步驟1:組件
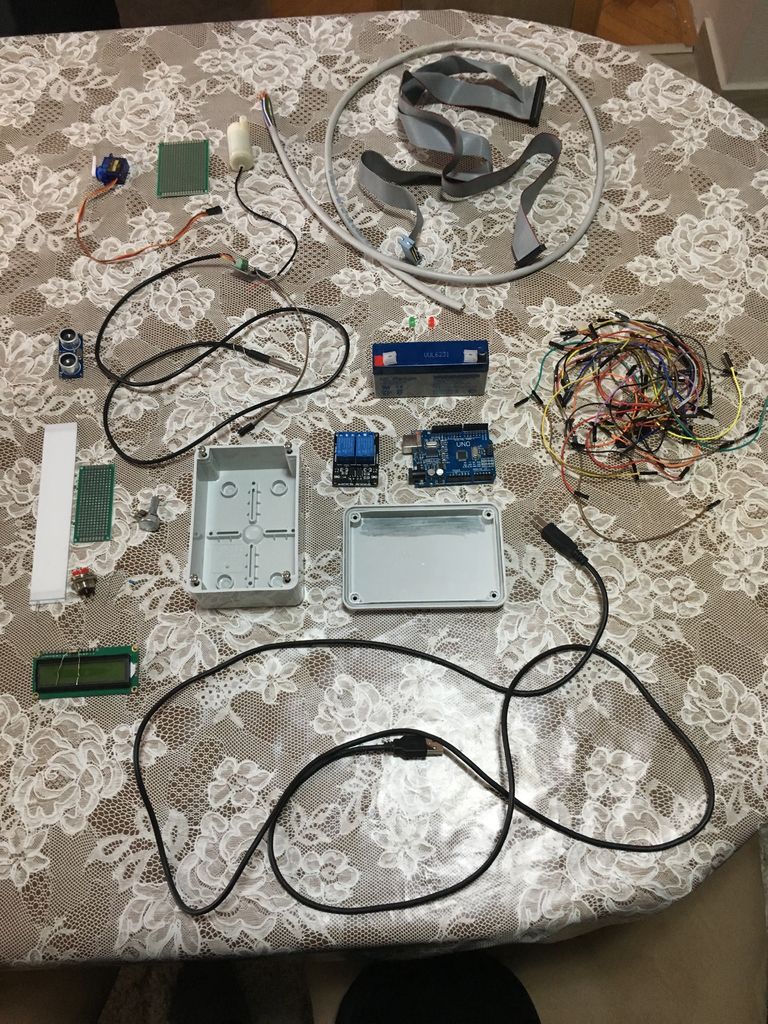
這里我們將列出該項目所需的所有組件。
Arduino Uno
超聲波傳感器
LCD(16x2)
電位計(10k)
5V 2通道繼電器
水溫傳感器
跳線電纜
光敏電阻器
水泵水平型
1x 2.2k歐姆,1x220歐姆,1x1k歐姆,1x 4.7歐姆電阻器
6V可充電電池
2x Led二極管
Arduino Box
水泵軟管
CSA電纜組件LL83498 AWM色帶連接器
DS電纜LIYCY 8x0.5 mm2阻燃劑
RVVB 2x1.5 mm2
KCD11-101開/關開關
鎂片盒
晶體管7805
水族箱
Bi g 10 Litters Water Bottle
金屬盒(用于超聲波,伺服)
步驟2:使用光敏電阻和開關進行盒切割和LCD安裝
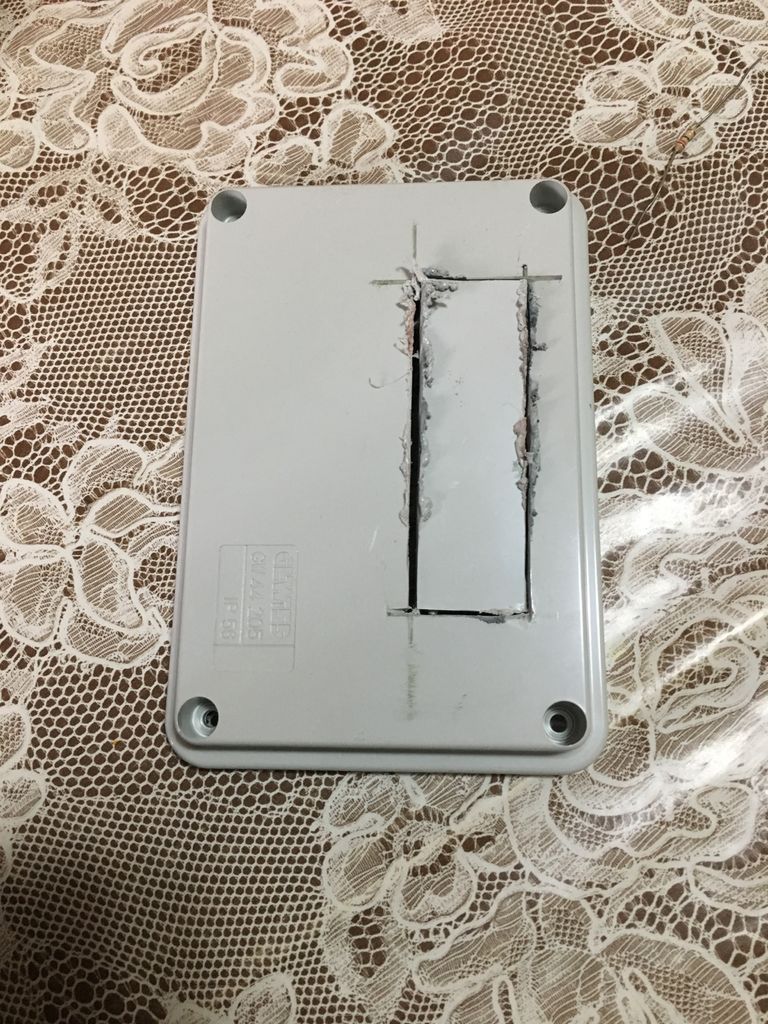
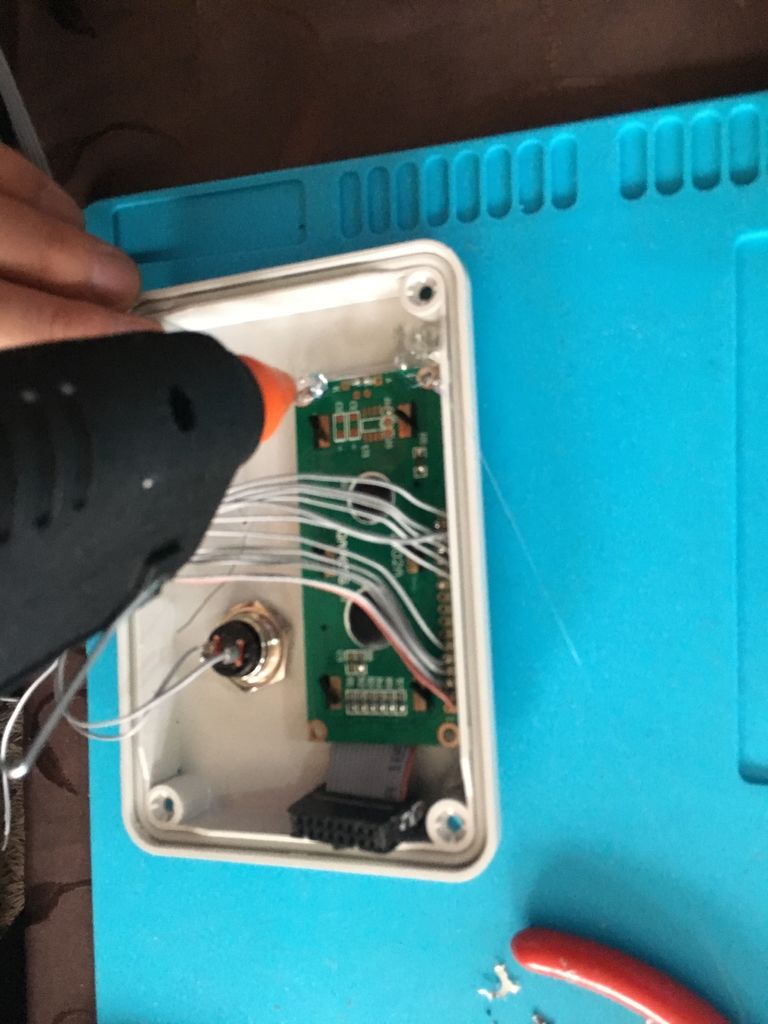
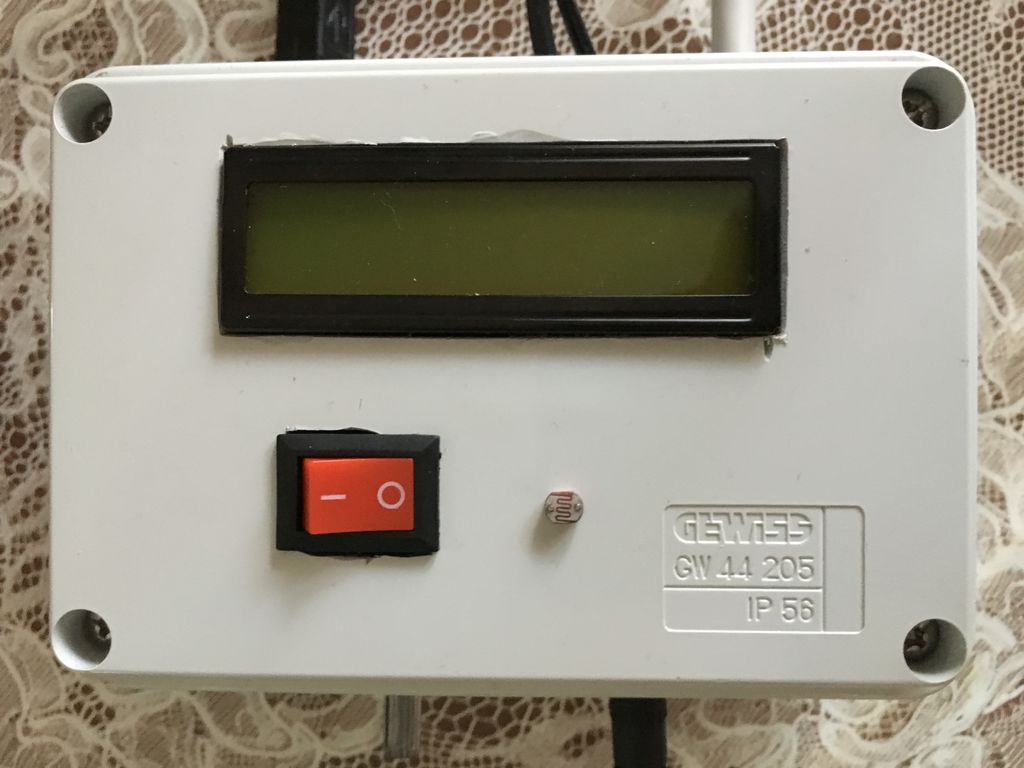
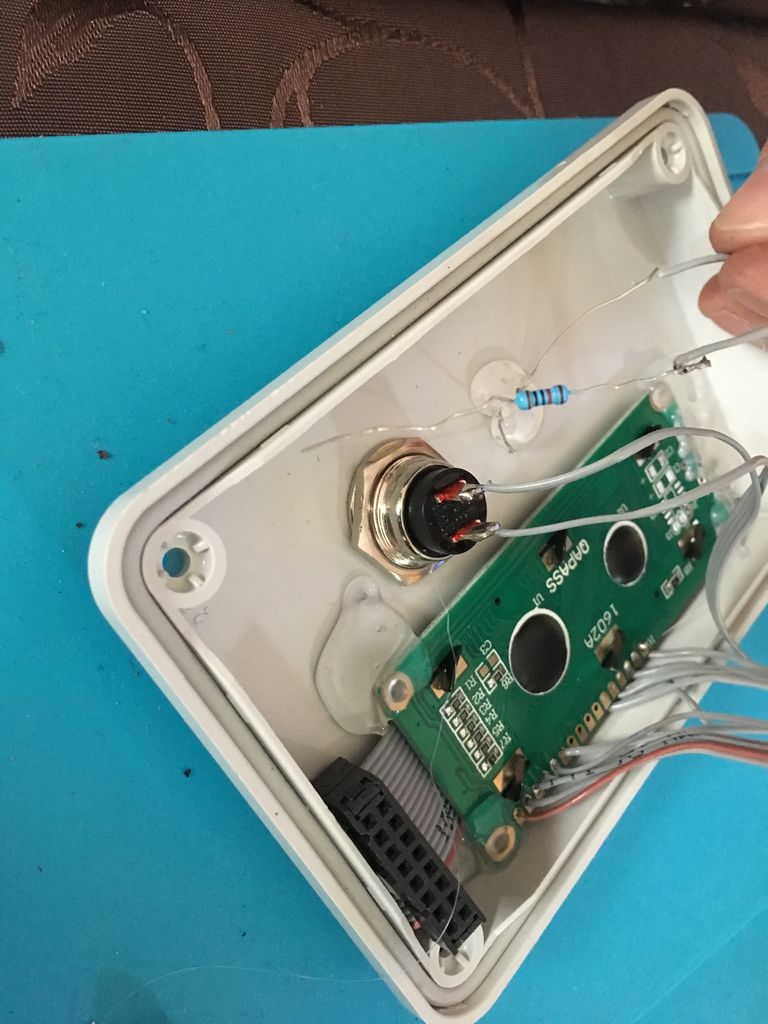
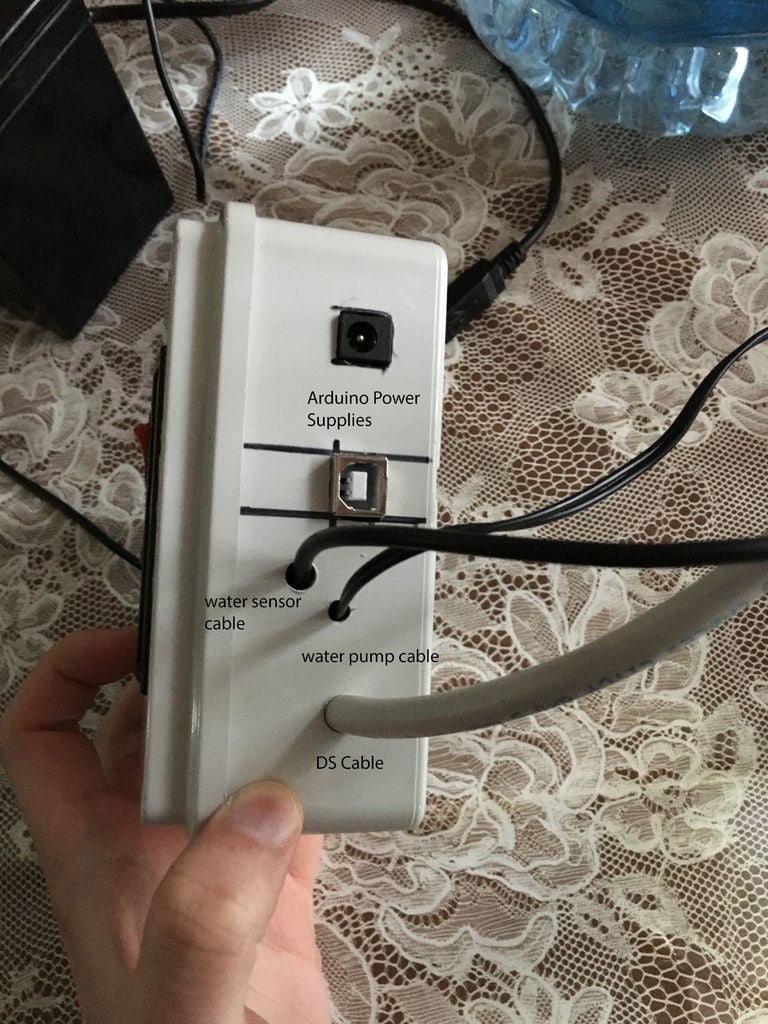
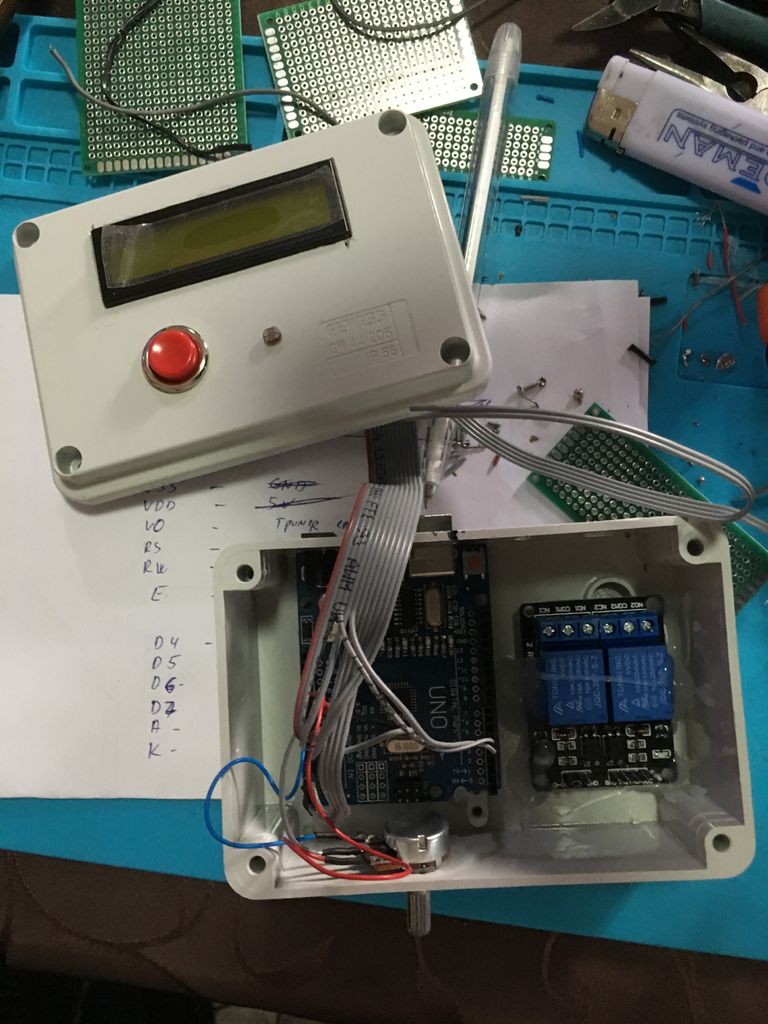
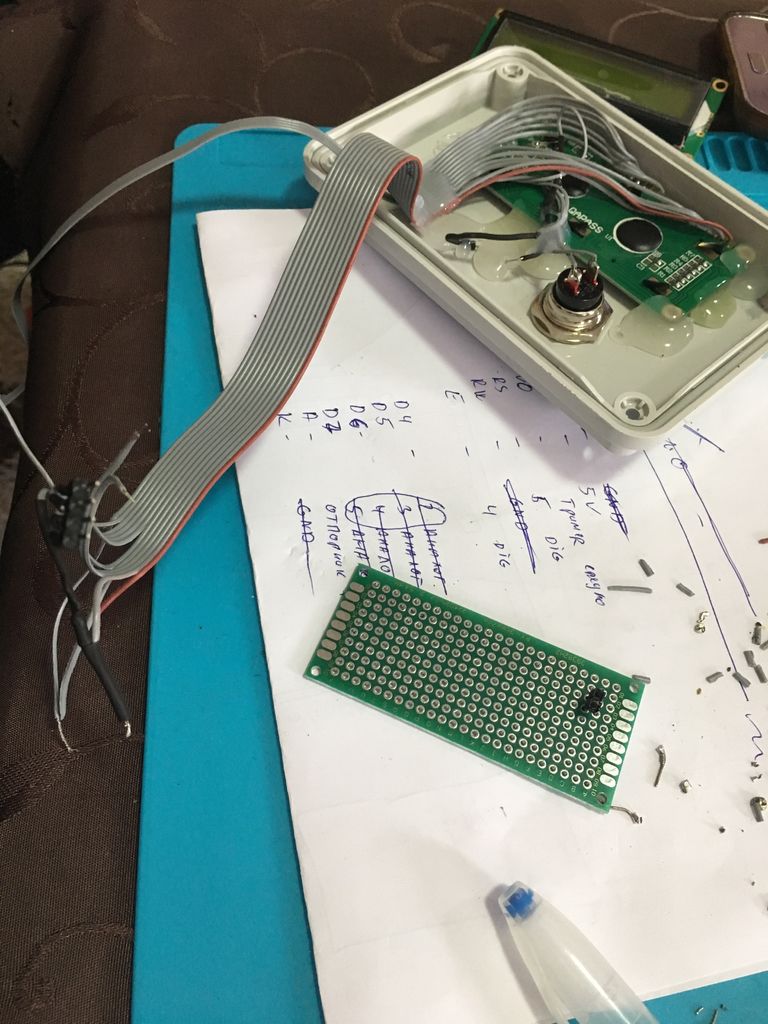
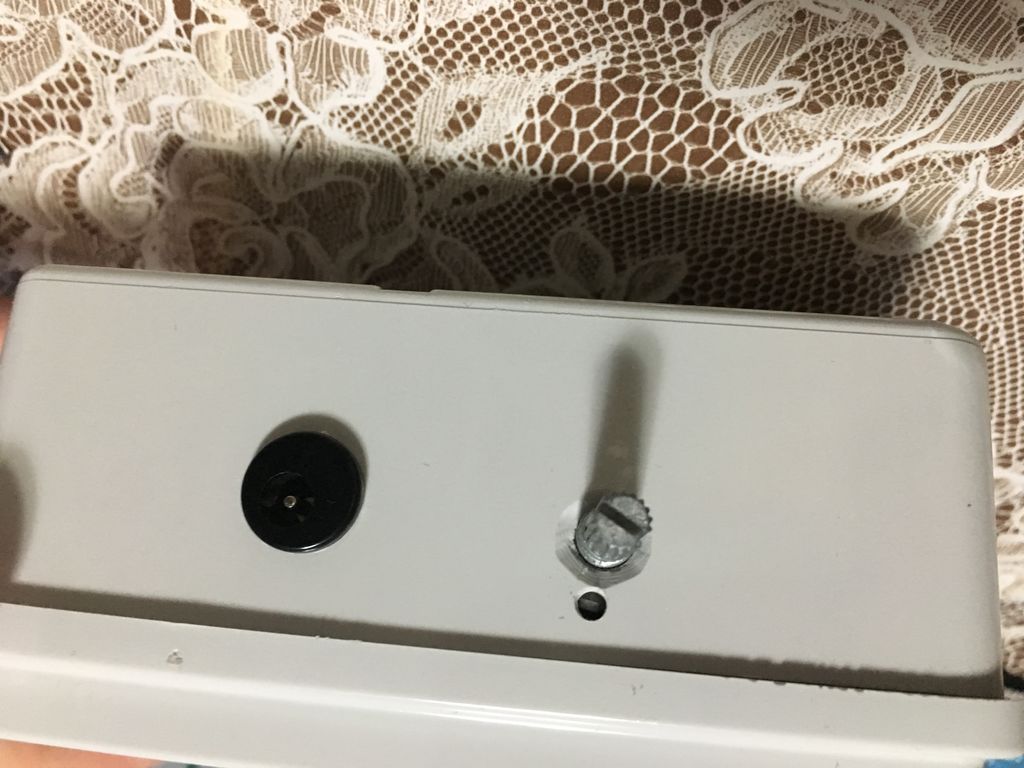
首先,我們測量LCD的長度,在我們的情況下為7x2.5厘米,因此它可以放在盒子的正面。稍后我們測量開關按鈕(2x1.3 cm)和光敏電阻,我們將它們添加到盒子的正面。
然后,在盒子的一側,我們鉆了幾個孔,2個用于Arduino,1個用于水溫傳感器,1個用于水泵,1個用于DS電纜。這些電纜后來連接在水族箱上方的金屬盒中。另一方面,我們鉆了2個孔,一個用于電位器,一個用于電源。
接下來,我們從兩側切割帶狀連接器,如普通電線,以便將它們與Arduino連接另一邊和LCD,光敏電阻和電位計在另一邊。從功能區到Arduino的接線如下:
帶有VSS的1-s導線,帶有VSS的LCD和帶Arduino的GND
帶狀的2-wire導線在LCD上使用VDD,在Arduino上使用VCC(5v)
帶有R0的3線電纜和LCD電位器(中間引腳)
帶有RS的帶狀線的第4根電線在Arduino上的LCD和數字引腳5上
帶有LED的第5條線,LCD上的RW和Arduino上的GND
帶有數字引腳4的LCD上帶有E的帶的第6條線在Arduino上
帶有D4的7號線在LCD上帶有模擬引腳2在Arduino
第8條線從帶有D5的LCD上帶有模擬引腳3在Arduino上
第9條導線,帶有D6的LCD,帶有模擬引腳4,位于Arduino
第10根導線,帶有D7的LCD,帶有模擬引腳5,位于Arduino上
帶有A的第11條導線,帶有A的LCD + 2.2k電阻,帶有VCC(5v)的Arduino
第12根導線來自帶狀,帶有K的LCD,帶有GND的Arduino
帶有VCC光纖的帶狀第13條線在Arduino上使用VCC進行電壓調整
帶光纖電阻器上帶有GND的第14根導線,帶有1.1k電阻+ GND和Arduino上的模擬引腳1(來自Arduino的GND線和引腳線與電阻器焊接在一起)與帶狀導線連接)
盒子前面的所有元件都用膠槍粘合。
注意:全部所有模塊的VCC線焊接在Arduino上VCC引腳的一根導線上。所有模塊的GND線也一樣。
步驟3:將Arduino與繼電器屏蔽,泵和LED連接
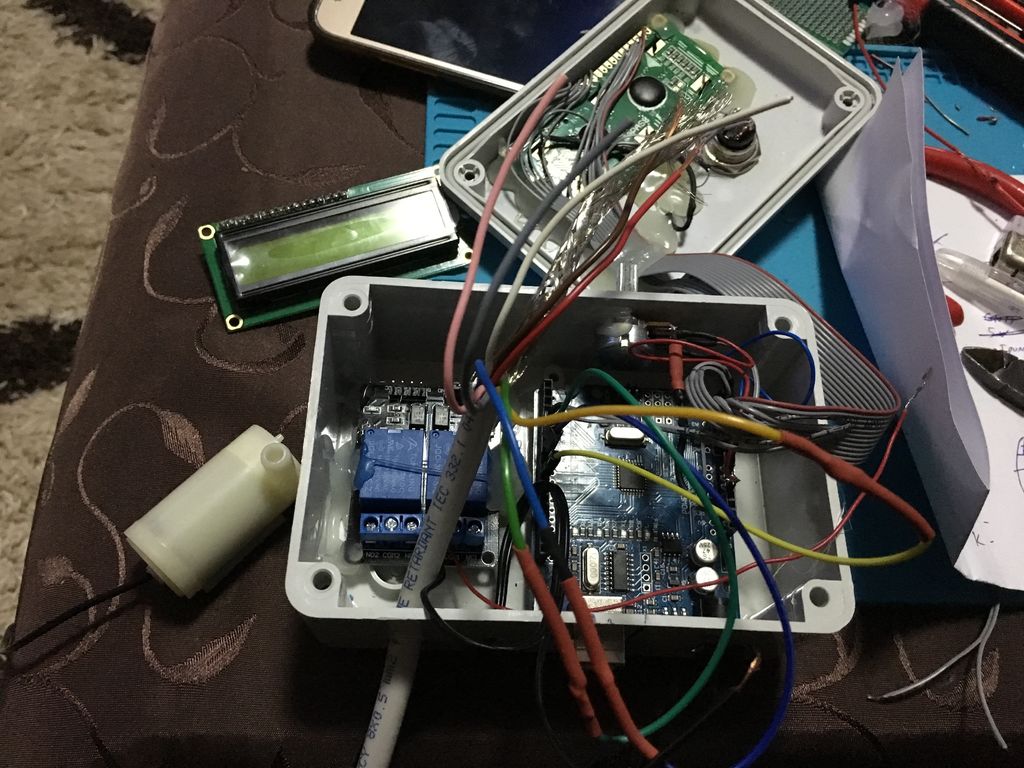
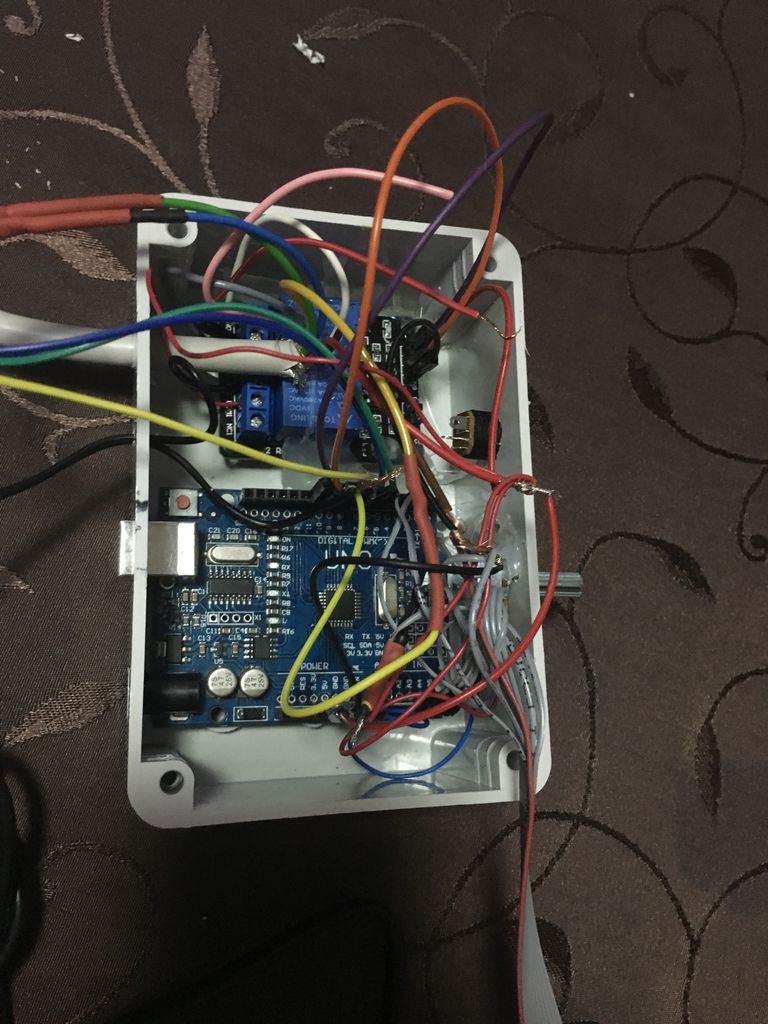
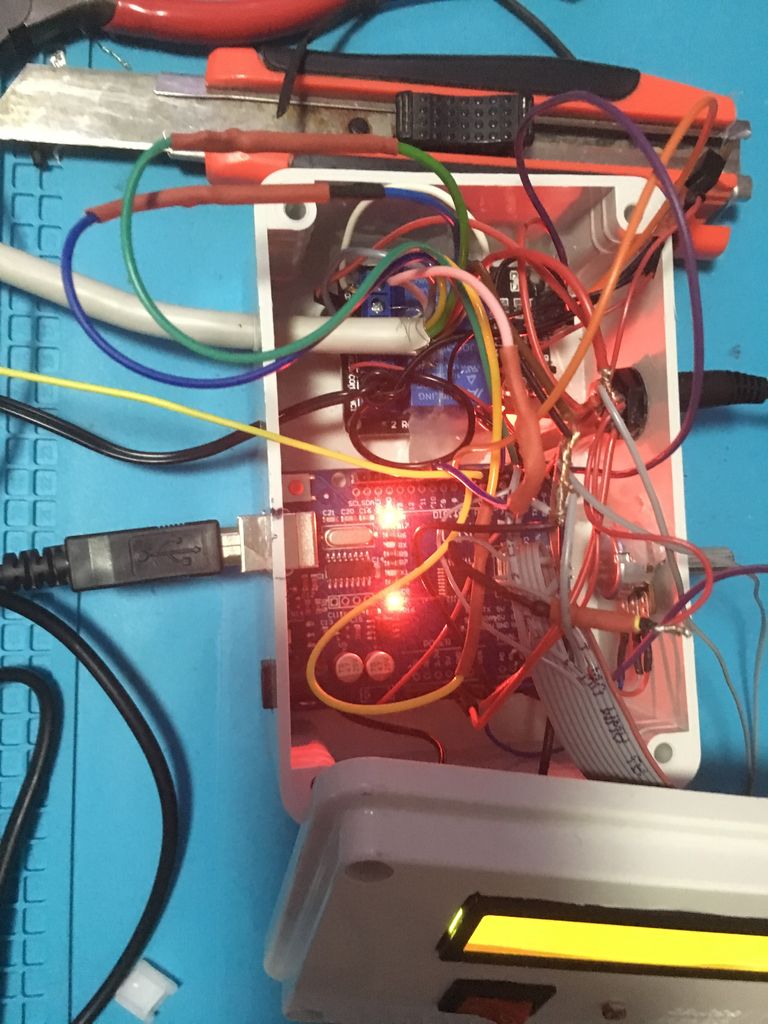
首先,我們需要將繼電器與Arduino連接起來。繼電器的VCC到Arduino的VCC,繼電器的GND到Arduino的GND,繼電器的IN1引腳,Arduino的數字引腳10和Arduino的數字2的IN2。
接下來我們要連接水泵通過開關連接到第一個繼電器,并將溫度信號指示燈發送到第二個繼電器。
開關的第一個引腳連接到電源插孔上的VCC引腳,而另一個引腳則連接到電源插孔上。引腳連接到晶體管的輸入引腳。電源插孔的GND引腳,晶體管的GND引腳和泵的GND引線焊接在一起。泵的VCC線與第一個繼電器的NO引腳連接,而晶體管的輸出引腳連接到繼電器的COM引腳。
由于LED位于水族箱內部,而Arduino位于水族箱內,因此我們需要使用長線連接它們。這就是DS Cable LIYCY 8x0.5 mm2阻燃劑的用武之地。該電纜中有8根電線,因此我們將其中的2根分別與LED的陽極連接。這些導線必須連接到第二繼電器,因此與綠色LED連接的導線連接在第二繼電器的NC引腳上,而來自紅色LED的導線與來自第二繼電器的NO引腳連接。 LED陰極與220歐姆電阻和1線(GND)焊接在一起,并與Arduino的GND連接在一起。在第二個繼電器上的COM引腳來自Arduino的VCC。
步驟4:連接其他傳感器
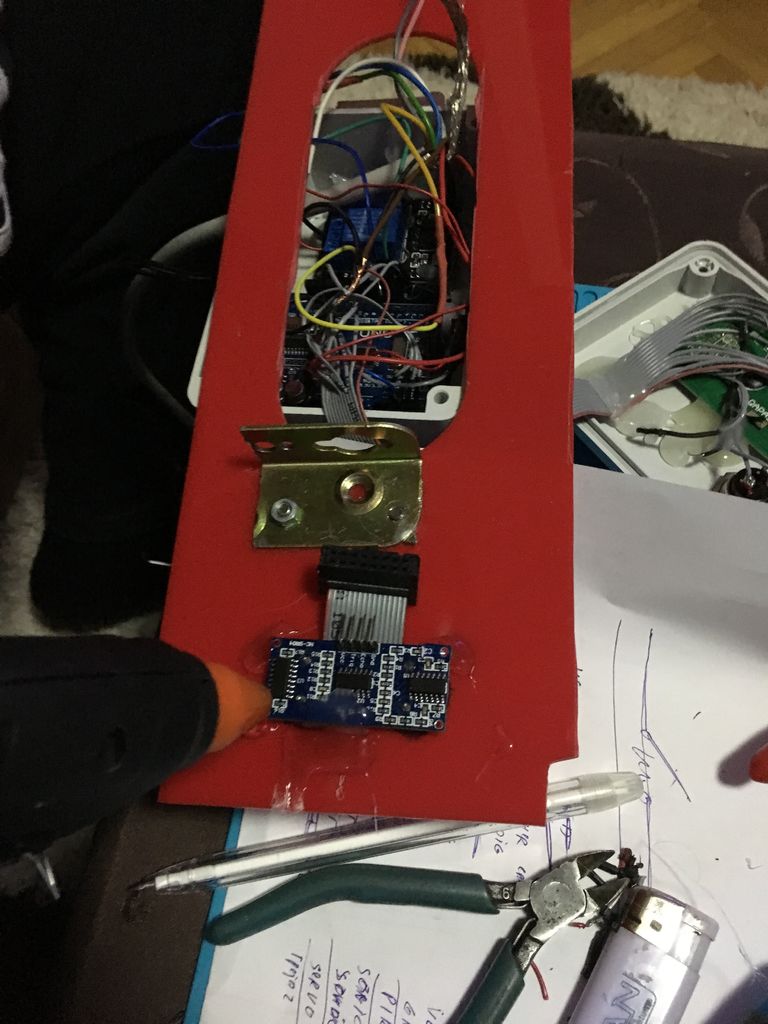
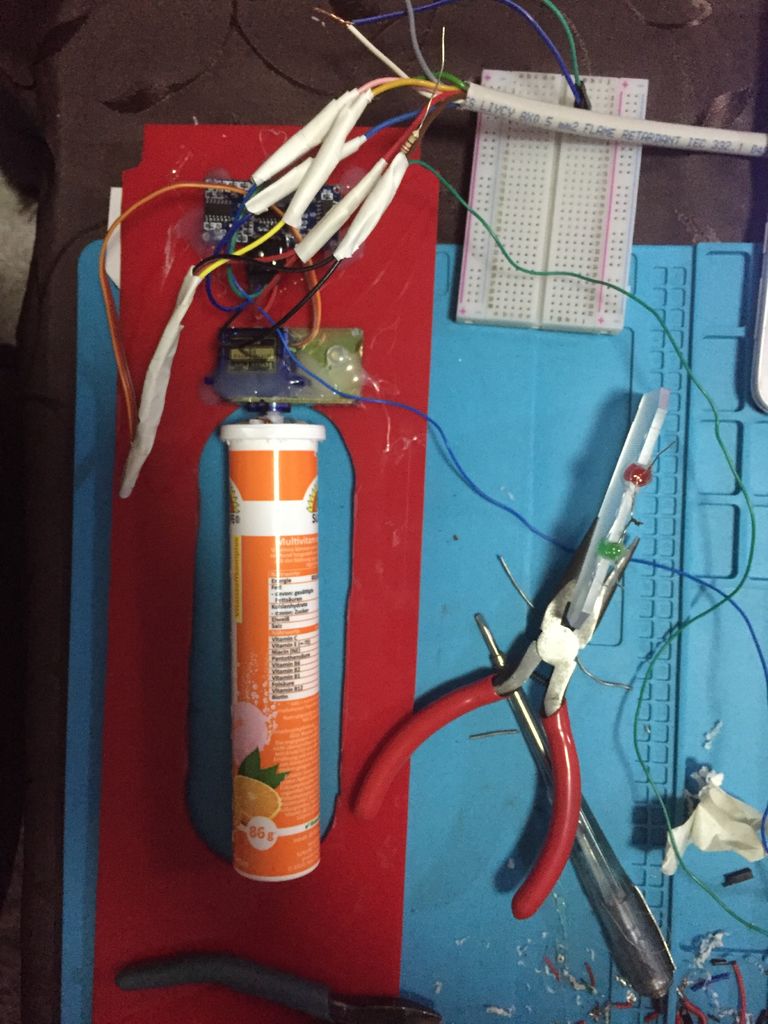
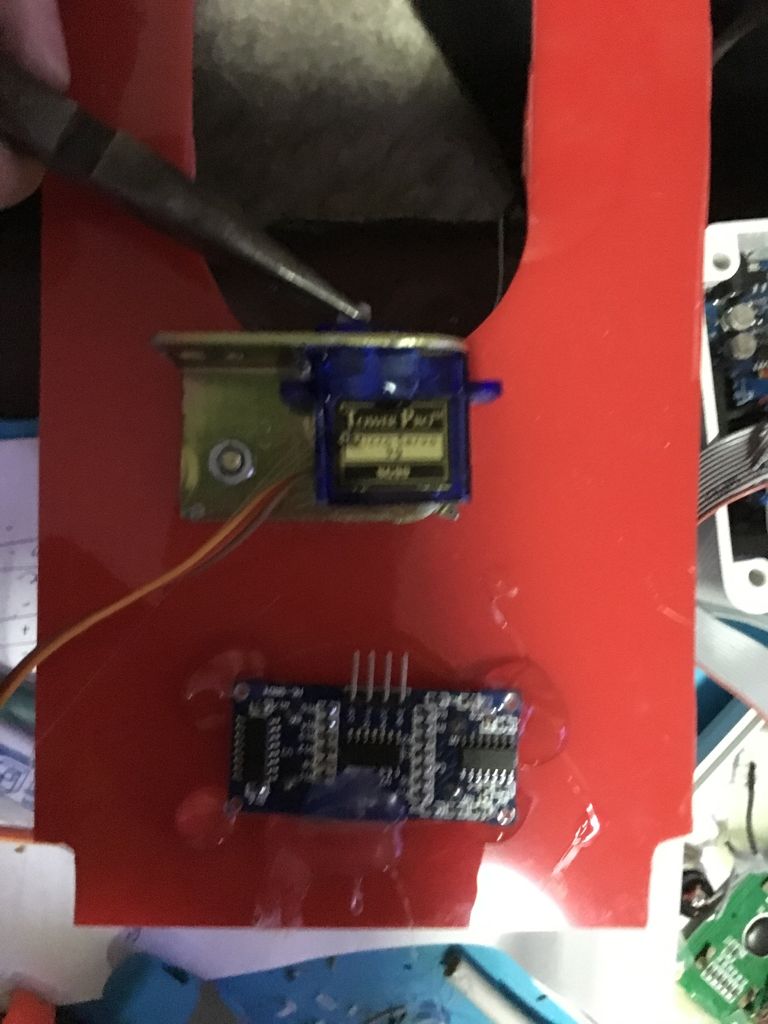
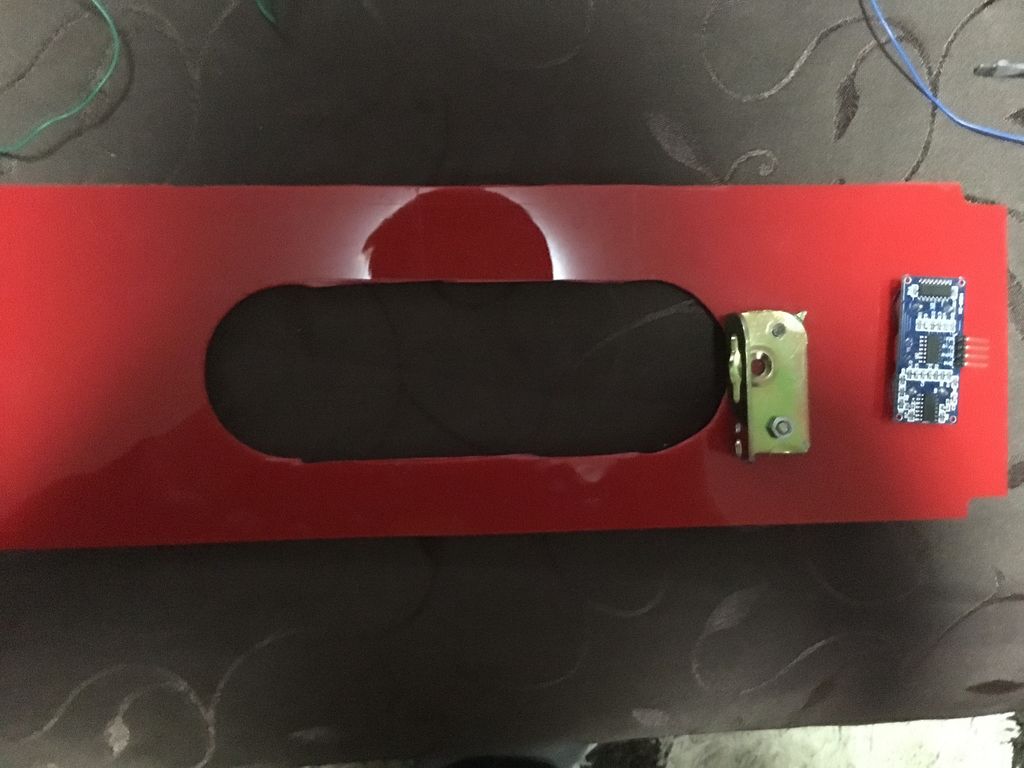
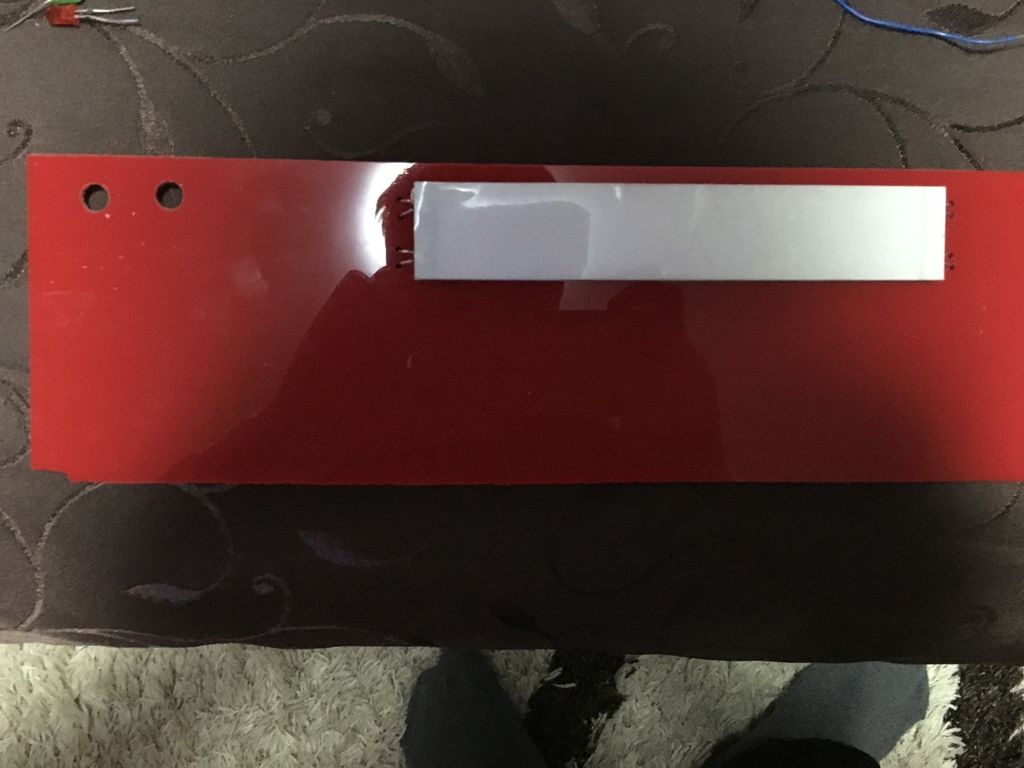
從圖片中我們可以看到,我們有一個帶孔的紅色塑料板,它是金屬盒的一部分在水族館上方。在那個洞里,帶有伺服系統的Magnesium Tablet Box會不時地旋轉以喂魚。有機玻璃中的LED二極管粘在電路板上,所以當它變暗時,它會通過光敏電阻激活。電路板上的另一個傳感器是超聲波傳感器,通過電路板的孔,水溫傳感器將進入水中。
首先,我們將開始將水溫傳感器與Arduino連接。由于我們在Arduino的盒子上鉆了一個洞(查看以前部件的圖片),我們不需要額外的電線來連接。來自傳感器的GND線連接到Arduino上的GND引腳,來自傳感器的VCC線連接到VCC引腳,來自傳感器的數據線連接到Arduino上的數字引腳8。然而,數據線也與來自傳感器的VCC線連接,與4.7k歐姆電阻焊接在一起。
接下來是超聲波傳感器。該傳感器通過DS電纜的4根線連接(請參閱前一部分)。 VCC線與Arduino的VCC和傳感器的VCC引腳相連。 GND線連接Arduino的GND和傳感器的GND。其余2根線用于傳感器的Echo和Trigger引腳。 Echo引腳連接在Arduino上的數字引腳7上,觸發引腳分別通過導線連接到Arduino上的數字引腳6上。但是,我們需要鉆兩個孔,這樣超聲波的“眼睛”就會指向水面。
之后是伺服電機。我們將取出伺服的旋轉蓋,我們將用鎂盒蓋替換它。伺服的連接很簡單。 DS電纜的VCC線與伺服的VCC線連接,電纜的GND線與伺服的GND線連接,伺服的數據線通過Arduino上的數字引腳9連接。電線離開了。
最后它出現了有機玻璃中的LED二極管。從技術上講,有機玻璃中有4個LED。但在這里我們不需要電阻器。在這里,來自LED的陽極與DS電纜的剩余電線之一焊接在一起,其末端連接到數字引腳12.Kathodes與GND電線焊接在一起,并與GND連接Arduino上的pin。
第5步:結論
代碼:
#include
#include
#include
#include
//digital pin 8 for data for DS18B20 water temperature sensor
#define ONE_WIRE_BUS 8
//digital pin 10 for relay1
#define RELAY1 10
//digital pin 2 for relay2
#define RELAY2 2
OneWire oneWire(ONE_WIRE_BUS);
// initialize the library by associating any needed LCD interface pin
// with the arduino pin number it is connected to
const byte rs = 5, en = 4, d4 = 16, d5 = 17, d6 = 18, d7 = 19;
byte trigPin = 6; // Trigger
byte echoPin = 7; // Echo
byte servoPin = 9; // Servo
byte light = 12; // Light
byte photocellPin = 1; //Photoresistor (analog pin 1)
Servo servo;
LiquidCrystal lcd(rs, en, d4, d5, d6, d7);
DallasTemperature sensors(&oneWire);
int i=0;
int val = 0; //analog value from photoresistor
int cm; //water level distance in cm
float Celsius = 0; // Water temperature
int servoAngle = 0; // Servo angle
unsigned long lastOccur = 0; // last time the servo was called (in milliseconds)
unsigned long current; // keep track of current time (in milliseconds)
void setup(){
Serial.begin(9600);
// set up the LCD‘s number of columns and rows:
lcd.begin(16,2);
pinMode(trigPin, OUTPUT);
pinMode(echoPin, INPUT);
servo.attach(servoPin);
pinMode(RELAY1, OUTPUT);
digitalWrite(RELAY1, HIGH);
pinMode(RELAY2, OUTPUT);
digitalWrite(RELAY2, HIGH);
pinMode(light, OUTPUT);
}
void loop(){
//Check time (used as timer for the servo)
current = millis();
//Read the value from the analog pin from the photoresistor
val = analogRead(photocellPin);
//Calculate the temperature in celsius
Celsius = calcTemp();
// Convert the time into a distance
cm = ultrasonic_distance();
// Print the temperature and water level
printLCD(cm,Celsius);
//Activate pump if water level is less than 18 cm
if(cm 》 18){
pump();
}
// Activate heater if temperature is below 22 degrees celsius
if(Celsius 《 22){
heat();
}
// Activate light
if(val 《= 412){
digitalWrite(light, HIGH);
}
else{
digitalWrite(light, LOW);
}
//timer 30s
if(current - lastOccur 》= 30000){
callServo();
lastOccur=millis();
}
}
float calcTemp() {
sensors.requestTemperatures();
// returns the temperature in celsius
return sensors.getTempCByIndex(0);
}
int ultrasonic_distance(){
// Clears the trigPin
digitalWrite(trigPin, LOW);
delay(0.002);
//Sets the trigPin on HIGH state for 10 micro seconds
digitalWrite(trigPin, HIGH);
delay(0.01);
digitalWrite(trigPin,LOW);
return calcDistanceInCm(pulseIn(echoPin, HIGH));
}
int calcDistanceInCm(long dur){
//divide by 29.1 or multiply by 0.0343
return (dur/2)*0.0343;
}
void heat(){
delay(1000); // wait 1 second
digitalWrite(RELAY2, LOW); // turn on relay2
delay(5000); //wait for 5 seconds
digitalWrite(RELAY2, HIGH); // turn off relay2
delay(1000); // wait 1 second
}
void pump(){
delay(1000); //wait 1 second
digitalWrite(RELAY1, LOW); // turn on relay1
delay(20000); // wait 20 seconds
digitalWrite(RELAY1, HIGH); // turn off relay1
delay(1000); // wait 1 second
}
void printLCD(int cm, float temp){
lcd.clear();
// set the cursor to column 0, line 0
// (note: line 0 is the first row, since counting begins with 0):
lcd.setCursor(0, 0);
lcd.print(“Distance: ”);
//print the water level in cm
lcd.print(cm);
lcd.print(“cm”);
lcd.setCursor(0, 1);
lcd.print(“Temperature:”);
//print the temperature in celsius
lcd.print((int)temp);
lcd.print((char)223);
lcd.print(“C”);
delay(1000)
}
void callServo(){
for(i=0;i《2;i++){
for(servoAngle = 0; servoAngle 《 180; servoAngle++){ // move the micro servo from 0 degrees to 180 degrees
servo.write(servoAngle);
delay(7); // servo start speed (faster)
}
delay(2000);
for(servoAngle = 180; servoAngle 》 0; servoAngle--){ // now move back the servo to 0 degrees
servo.write(servoAngle);
delay(10); //servo back speed (slower)
}
}
}
-
繼電器
+關注
關注
132文章
5333瀏覽量
148850 -
超聲波傳感器
+關注
關注
18文章
583瀏覽量
35931
發布評論請先 登錄
相關推薦
博物館溫濕度監控系統
智慧體育館:實時監控與智能管理的完美結合
探索智能水族世界:5010藍牙水族燈芯片


松下攜手盛世飛揚揭牌“數字媒體先鋒館暨Panasonic影像館”
博物館溫濕度監測系統方案
安科瑞黃巖博物館防火門監控系統 Acrelsale1
博物館與美術館藏品管理系統
針對大型博物館的智慧文博解決方案


 如何制作水族館管理系統


評論