
 HarmonyOS原子化服務開發快速入門教程(中)

三、修改代碼
-
查看js下剛剛創建的卡片,如圖7。
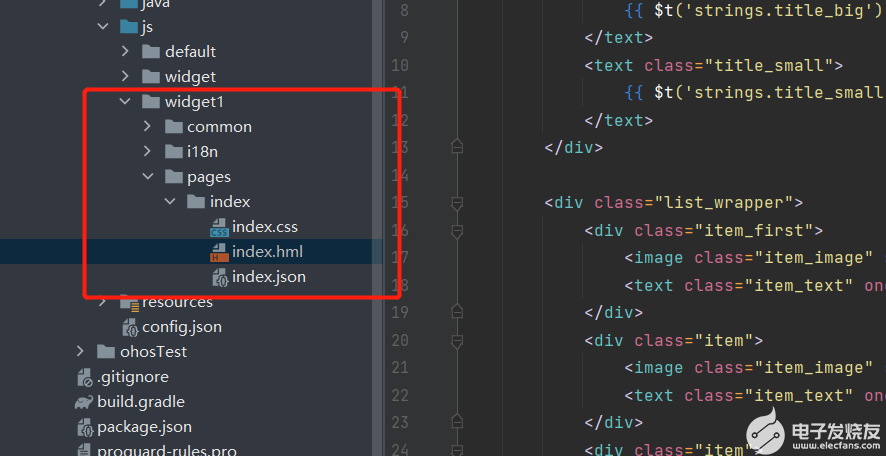
如圖7
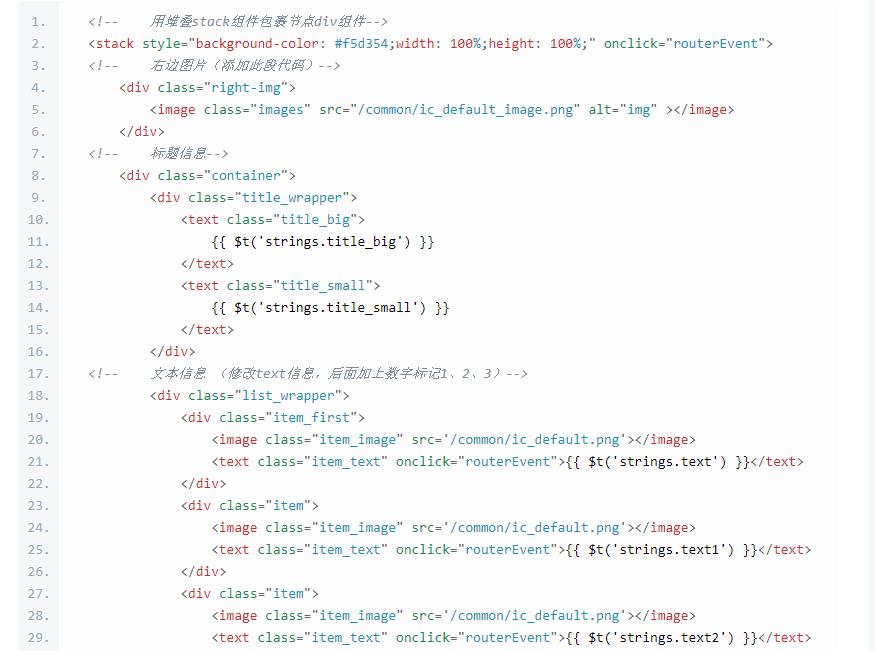
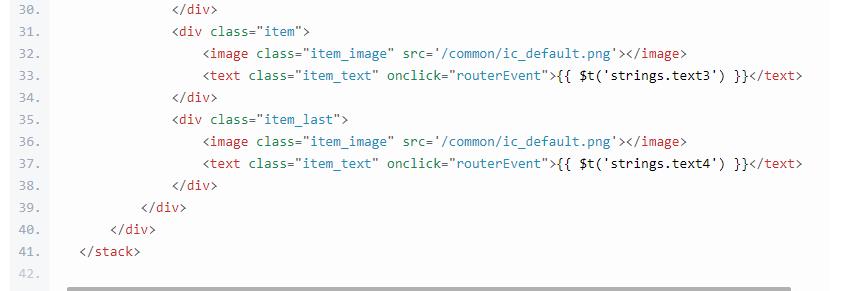
打開該文件下的index.hml文件,修改代碼。
打開該文件下的index.css文件,修改代碼(找到對應修改部分)。
.container {
flex-direction: column;
justify-content: space-between;
align-items: flex-start;
/*注釋代碼*/
/* background-color: dodgerblue;*/
/* background-image: url('/common/ic_default_image@3x.png');*/
/* background-repeat: no-repeat;*/
/* background-size: cover;*/
}
/*添加.right-img樣式*/
.right-img{
width: 40px;
height: 40px;
position: absolute;
right: 10px;
top: 10px;
border-radius: 12px;
}
/*將.title_big中的font-size: 19px;改為16px*/
.title_big {
font-size: 16px;
font-weight: bold;
color: white;
}
/*適配wearable*/
@media (device-type: wearable) {
.right-img{
display: none;
}
}
打開該文件下的i18n文件,打開.json文件,修改代碼。
zh_CN.json:
{
"strings": {
"title_big": "標題",
"title_small": "這里是副標題",
"text": "文本",
"text1": "文本1",
"text2": "文本2",
"text3": "文本3",
"text4": "文本4"
}
}en_US.json:
{
"strings": {
"title_big": "Title",
"title_small": "Text",
"text": "Text",
"text1": "Text1",
"text2": "Text2",
"text3": "Text3",
"text4": "Text4"
}
}1. 打開js下的default文件,打開pages文件,點擊index.hml.如圖8所示。
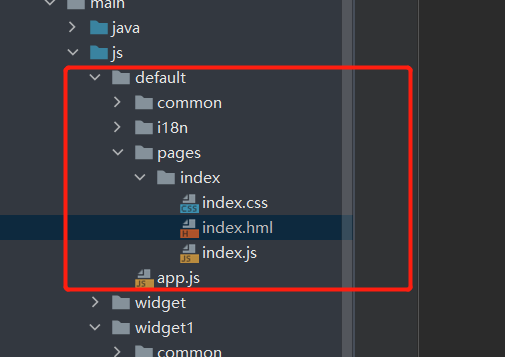
圖8
修改代碼:
index.hml
你好,歡迎來到{{title1}}{{title2}}index.css
.container {
flex-direction: column;
justify-content: center;
align-items: center;
width: 100%;
height: 100%;
}
.title {
font-size: 30px;
color: #000000;
opacity: 0.9;
margin: 4px 0px;
}
@media screen and (device-type: tablet) and (orientation: landscape) {
.title {
font-size: 100px;
}
}
@media screen and (device-type: wearable) {
.title {
font-size: 28px;
color: #FFFFFF;
}
}
@media screen and (device-type: tv) {
.container {
background-image: url("/common/images/Wallpaper.png");
background-size: cover;
background-repeat: no-repeat;
background-position: center;
}
.title {
font-size: 100px;
color: #FFFFFF;
}
}
@media screen and (device-type: phone) and (orientation: landscape) {
.title {
font-size: 60px;
}
}index.js
export default {
data: {
title1: "原子化服務",
title2: "新應用時代和新世界!"
},
onInit() {}
}
四、運行效果
-
打開模擬器,如圖9所示
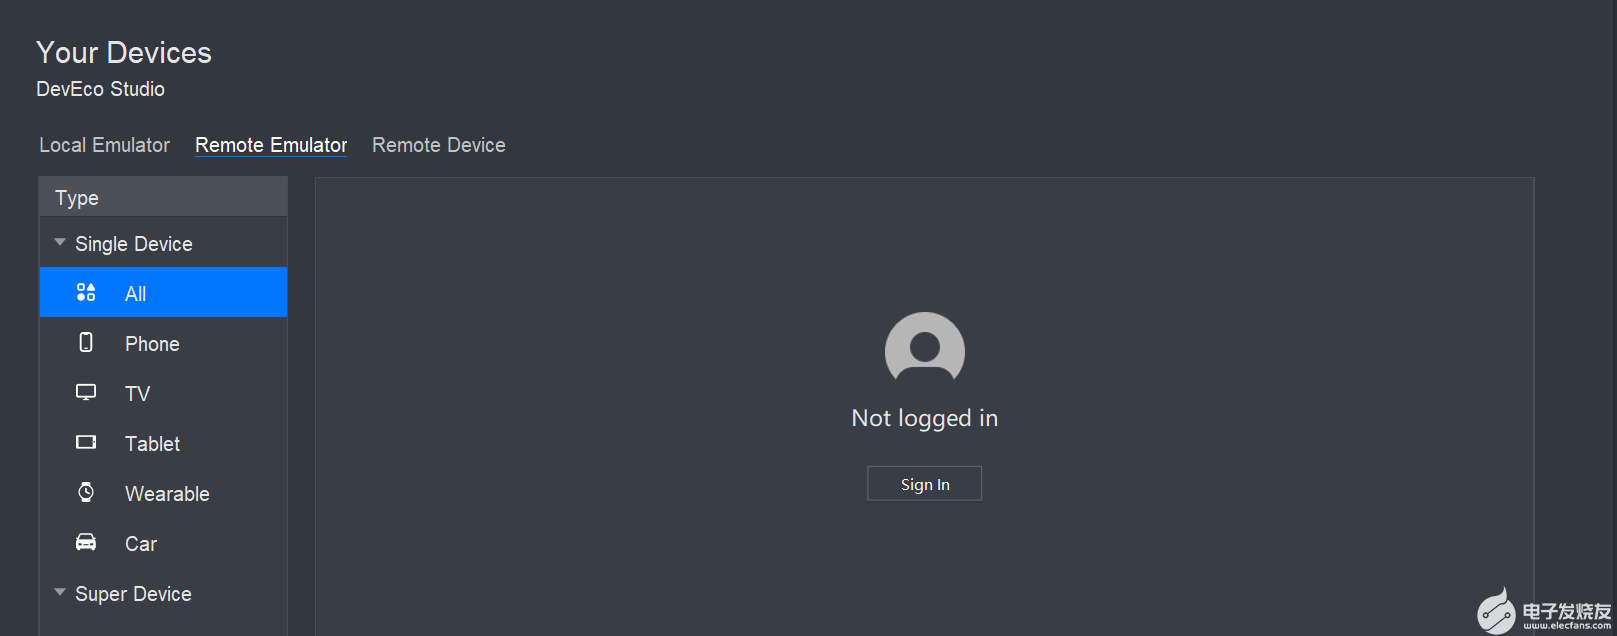
圖9
進行登錄,如圖10

圖10
輸入你的華為賬號進行登錄,如圖11
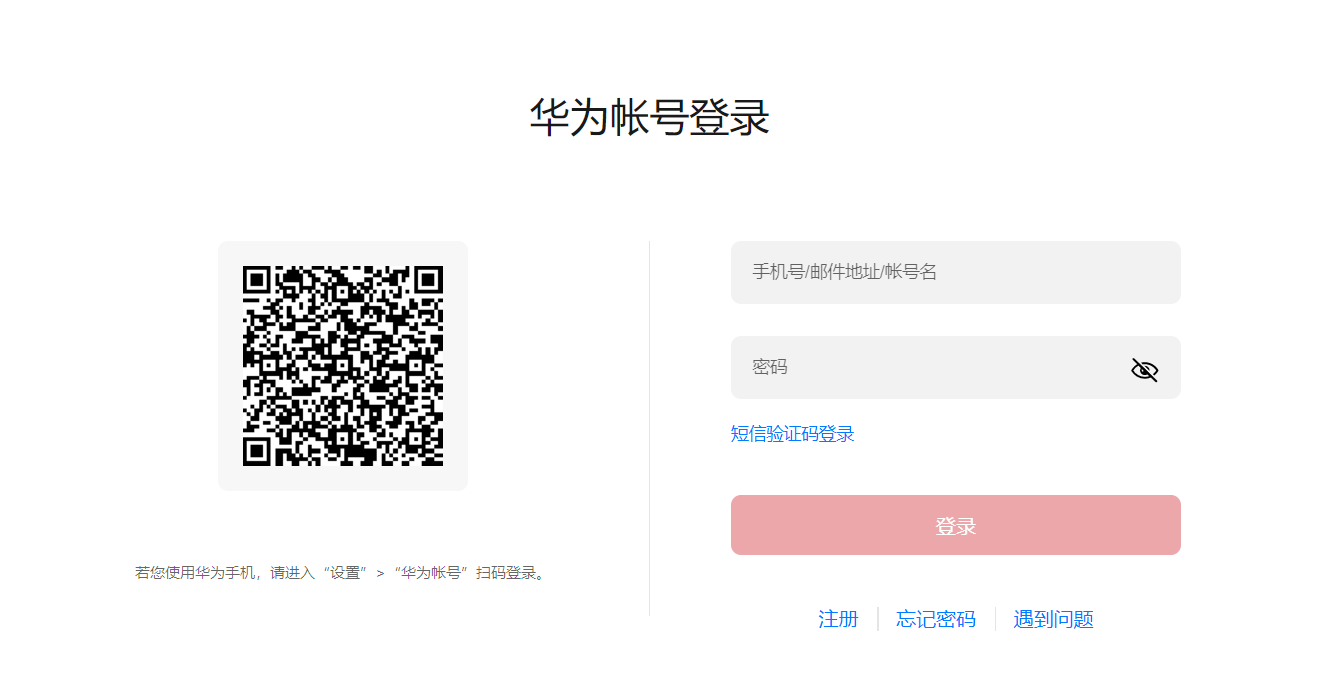
圖11
點擊允許,如圖12
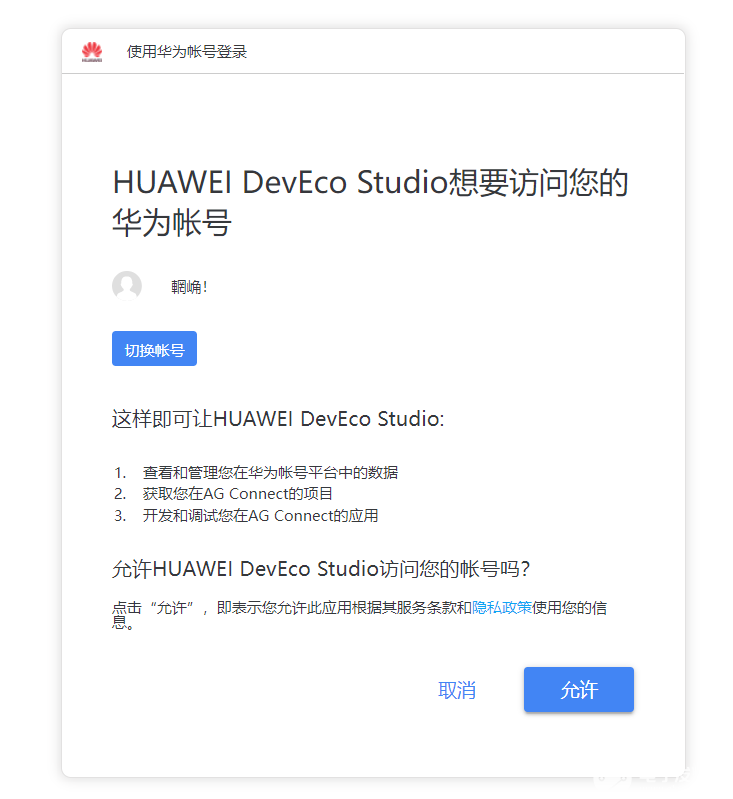
圖12
登陸成功,如圖13,然后返回DevEco Studio。
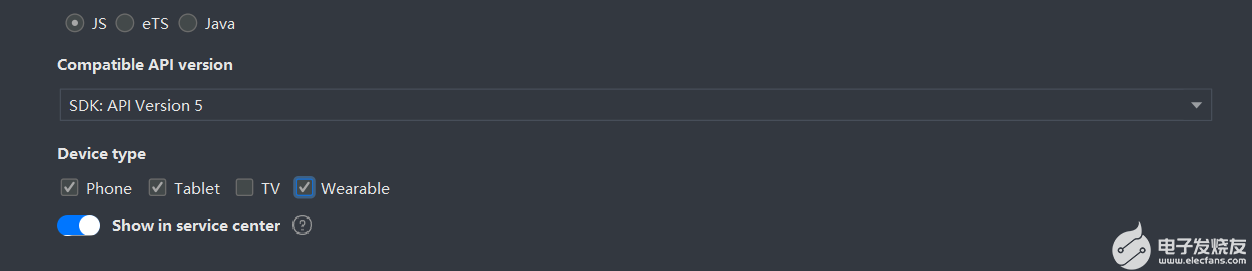
圖13
-
選擇模擬器,如圖14。
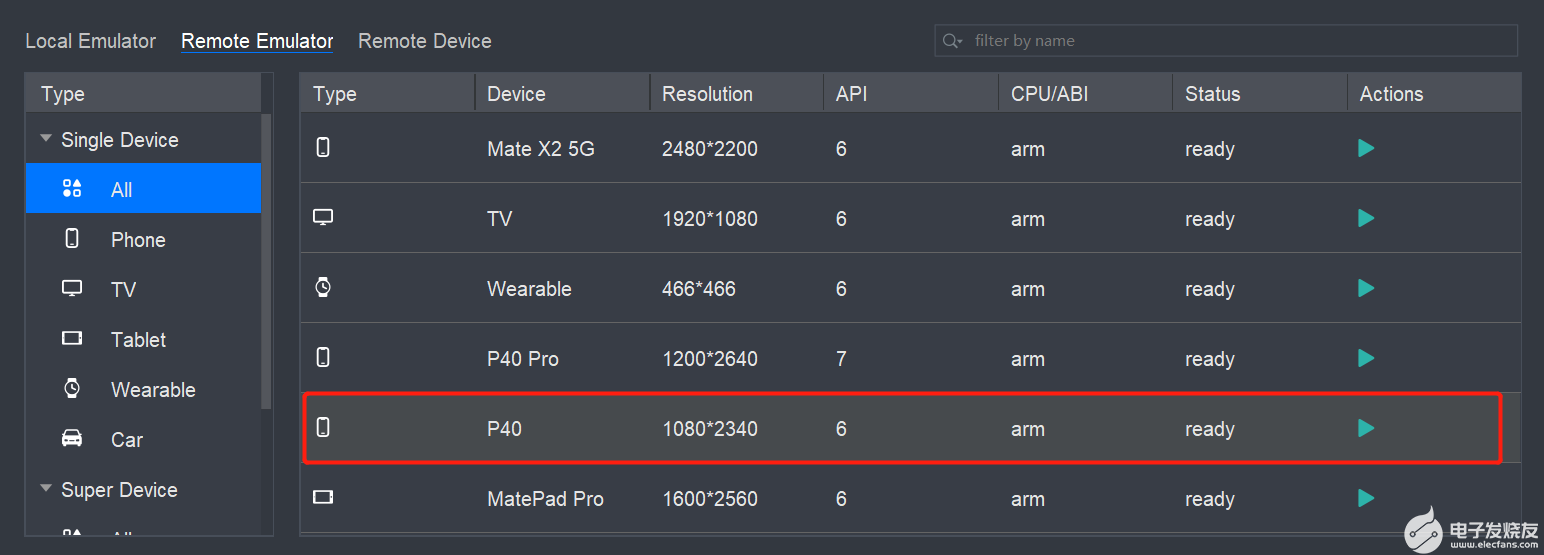
圖14
開啟成功,如圖15。

圖15
點擊小三角運行項目,如圖16
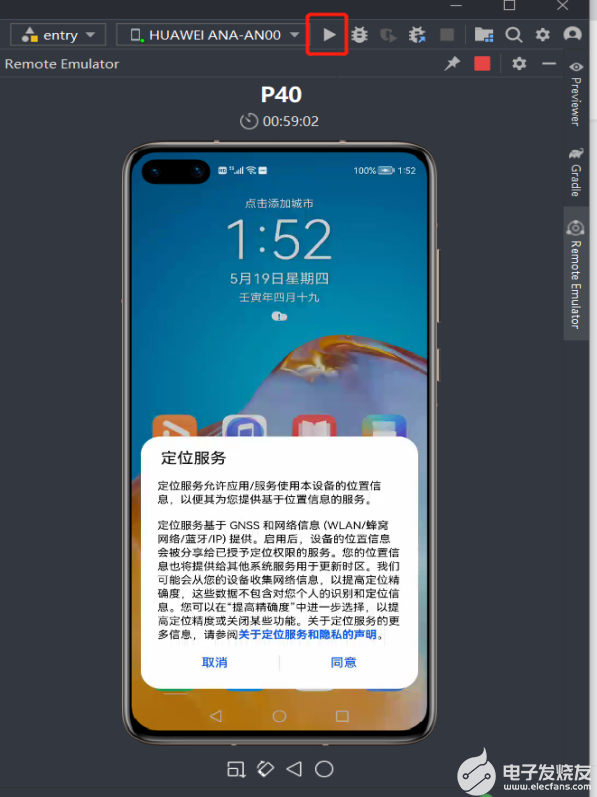
圖16
運行成功后會出現初始化頁面,如圖17
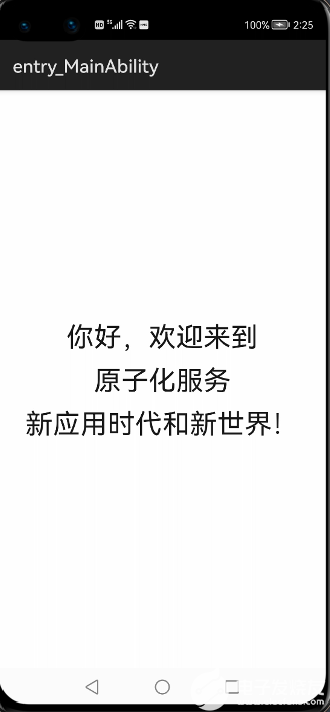
圖17
點擊模擬器中的
home鍵
,回到桌面,然后從左下角或者右下角斜向上滑動,進入服務中心,如圖18
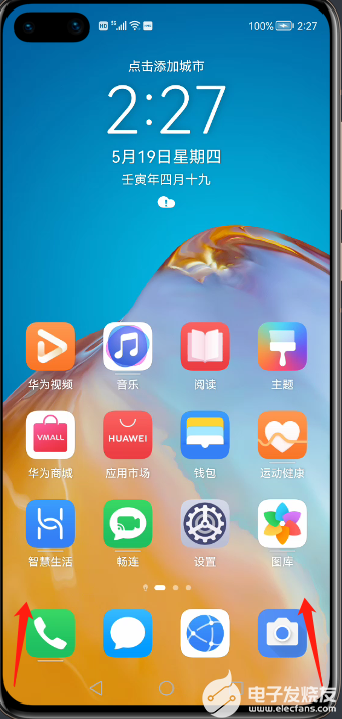
圖18
進入服務中心后可以看見創建的卡片(這是項目創建初始化自身就有的卡片widget),如圖19
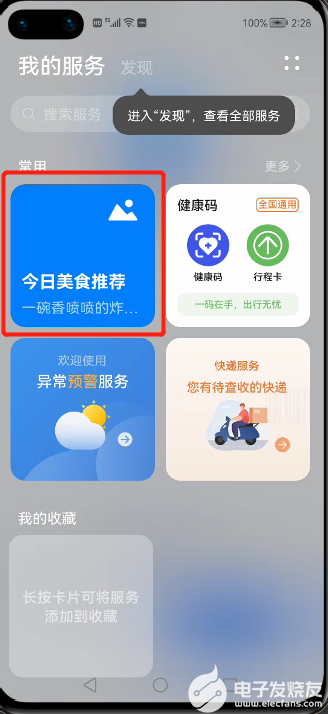
圖19
輕按卡片,添加至桌面,如圖20
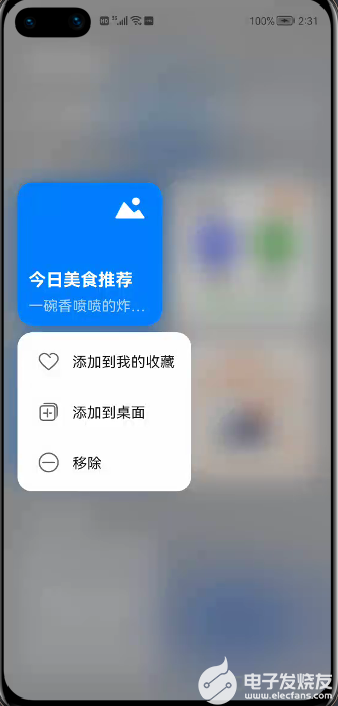
圖20
卡片成功添加至桌面,如圖21
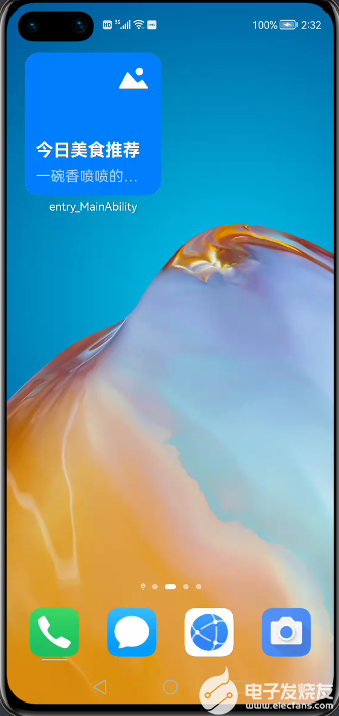
如圖21
長按桌面卡片,出現彈窗,單擊更多服務卡片,選擇我們之前新創建的卡片,并且添加至桌面,如圖22、圖23、圖24
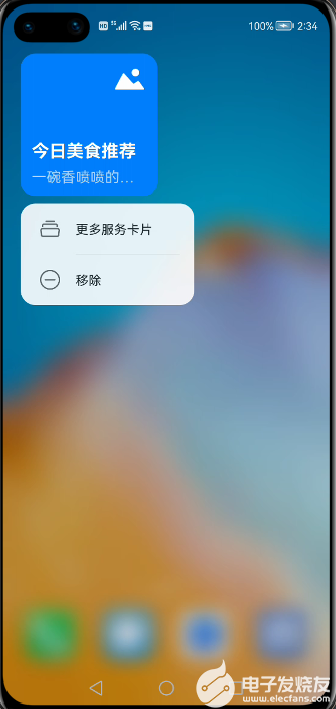
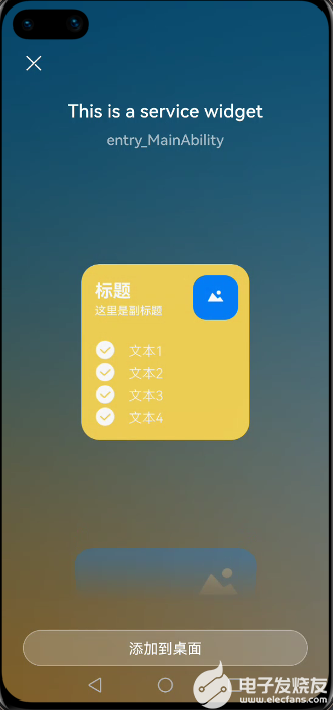
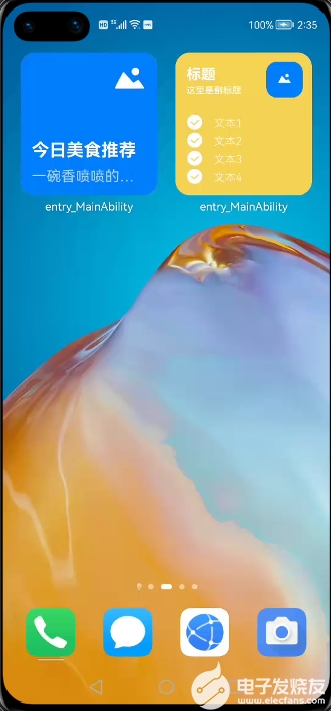
圖22圖23 圖24
點擊新添加至桌面的卡片,回到頁面,如圖25
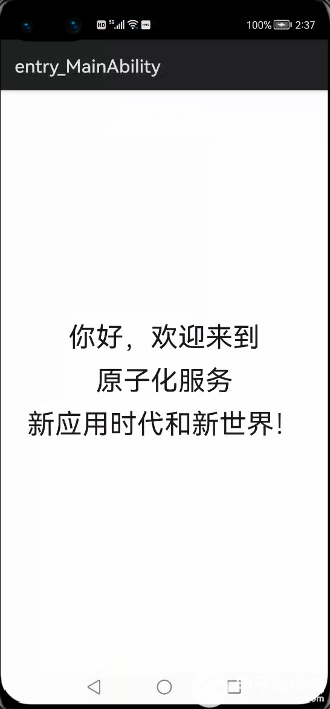
圖 25
-
這里想顯示其他模擬器效果,重復以上打開模擬器的步驟即可。
其他模擬器卡片效果可用previewr快速預覽,如圖26打開previewr。
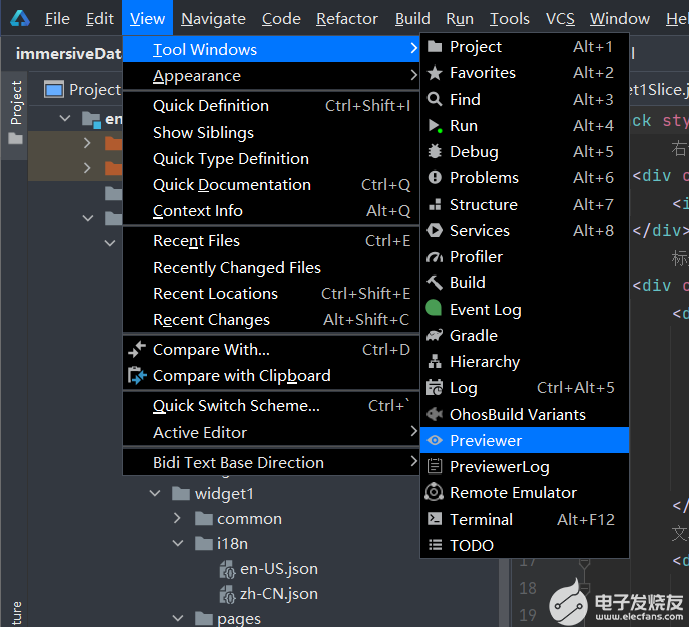
圖26
聲明:本文內容及配圖由入駐作者撰寫或者入駐合作網站授權轉載。文章觀點僅代表作者本人,不代表電子發燒友網立場。文章及其配圖僅供工程師學習之用,如有內容侵權或者其他違規問題,請聯系本站處理。
舉報投訴
-
HarmonyOS
+關注
關注
80文章
2127瀏覽量
33265 -
原子化服務
+關注
關注
0文章
31瀏覽量
997
發布評論請先 登錄
相關推薦
熱點推薦
HarmonyOS原子化服務開發快速入門教程 (下)
者快速上手,所有服務卡片都指向了一個單頁面。具體項目開發時,需要熟悉各項配置與功能,引用各項SDK和API等。 項目代碼地址: https://gitee.com/jltfcloudcn/jump_to/tree/feature

HarmonyOS原子化服務開發快速入門教程(上)
學習說明1.開發者具備JS與前端開發語言入門級及以上基礎。2.已經安裝好DevEco Studio。本案例用的DevEco Studio 3.0.0.800,API4-7都可以體驗。3.開發
發表于 06-16 16:19
HarmonyOS原子化服務開發快速入門教程(中)
; }}index.jsexport default { data: {title1: "原子化服務",title2: "新應用時代和新世界!"
發表于 06-17 09:57
每周精選 | RT-thread移植教程,RK3399與RK356x USB開發指南
PHY 的硬件設計和軟件驅動設計,以便開發者根據產品的 USB 應用需求進行靈活設計和快速開發。5、HarmonyOS原子
發表于 06-17 10:32
HarmonyOS原子化服務開發快速入門教程 (下)
五、多設備效果顯示 其他卡片效果顯示,如圖27、圖28、圖29所示Phone:圖 27Tablet:圖28Wearable:圖29學習說明本教程演示了主要開發流程,便于開發者快速上手,所有服務
發表于 06-18 11:22
OpenHarmony原子化服務開發快速入門體驗(下)
OpenHarmony程序的方法與運行HarmonyOS的方法一樣,點擊右上角的運行按鈕,等待片刻即可。由于各個OpenHarmony開發板系統的差異性,本原子化
發表于 06-22 09:56
HarmonyOS原子化服務開發中的API版本使用問題
項目與做各項開發工作,比較新鮮。但是,如果開發的這個原子化服務需要上架操作的話,API7和API8暫時是不支持的,因為它們還不屬于大規模推廣
發表于 08-15 09:55
《HarmonyOS原子化服務卡片原理與實戰》清華大學出版社李洋著
對原子化服務未來發展的展望;繼續努力體驗與成長,持續奮斗。本書主要闡述鴻蒙操作系統( HarmonyOS )應用開發
發表于 12-29 12:14
HarmonyOS鴻蒙原生應用開發設計- 元服務(原子化服務)圖標
HarmonyOS設計文檔中,為大家提供了獨特的元服務圖標,開發者可以根據需要直接引用。
開發者直接使用官方提供的元
發表于 11-01 16:55


 工商網監
工商網監

評論