引言
在PyQT5中引用OpenMV2023版本支持SDK,實現(xiàn)二次開發(fā)使用。OpenMV算法層已經(jīng)開放SDK調(diào)用支持,從圖像處理、分析、測量到深度學(xué)習(xí)推理全部支持SDK調(diào)用方式實現(xiàn)第三方應(yīng)用與程序集成。
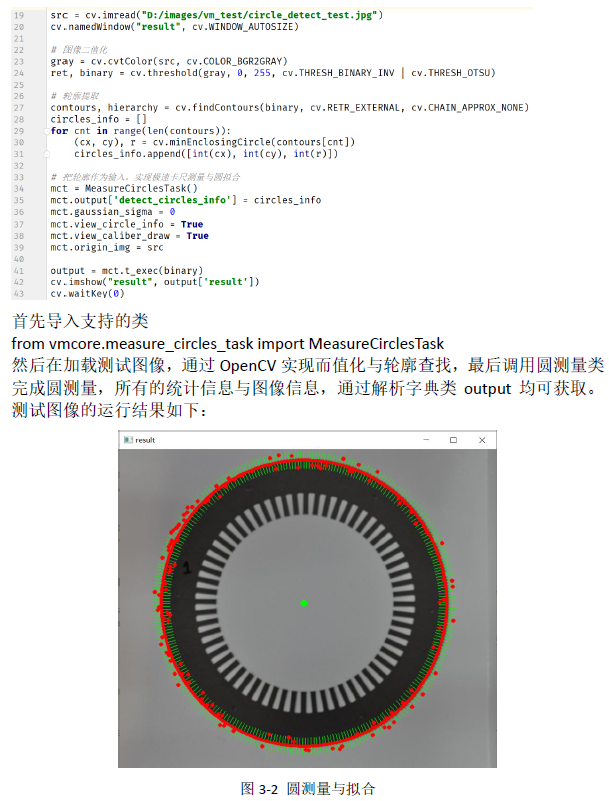
圖像分析SDK支持
YOLOv8推理SDK支持
OpenMV中YOLOv8推理支持包導(dǎo)入,從dlcore包中導(dǎo)入:
from dlcore.dl_infer_settings import DLInferSettings
from dlcore.yolov8_vino_ort_infer import YOLOv8Detector
OpenCV庫導(dǎo)入支持
import cv2 as cv然后完成下面的代碼
settings = DLInferSettings()
settings.weight_file_path = self.weight_file_path.text()
settings.label_map_file_path = "D:/projects/classes.txt"
settings.target_deploy = 1
detector = YOLOv8Detector(settings)
image = cv.imread(image_file)
detector.infer_image(image)
cv.waitKey("result", image)
即可實現(xiàn)YOLOv8圖像推理與結(jié)果顯示。 關(guān)于OpenMVSDK支持與上述更詳細(xì)的資料參考見《Open Machine Vision Toolkit Software2023.1開發(fā)者手冊》PDF文檔。
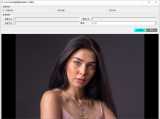
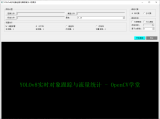
綜合代碼演示
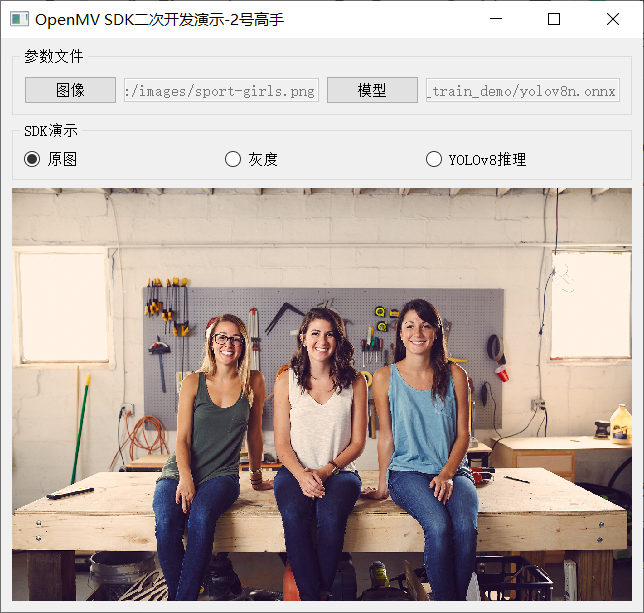
灰度
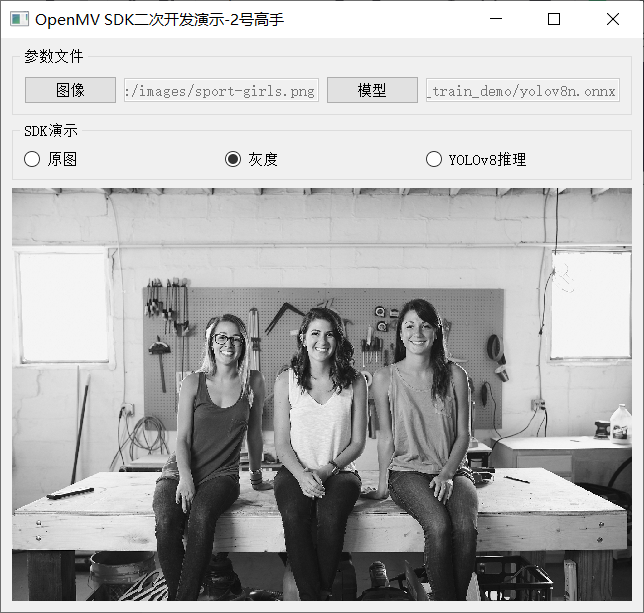
YOLOv8推理
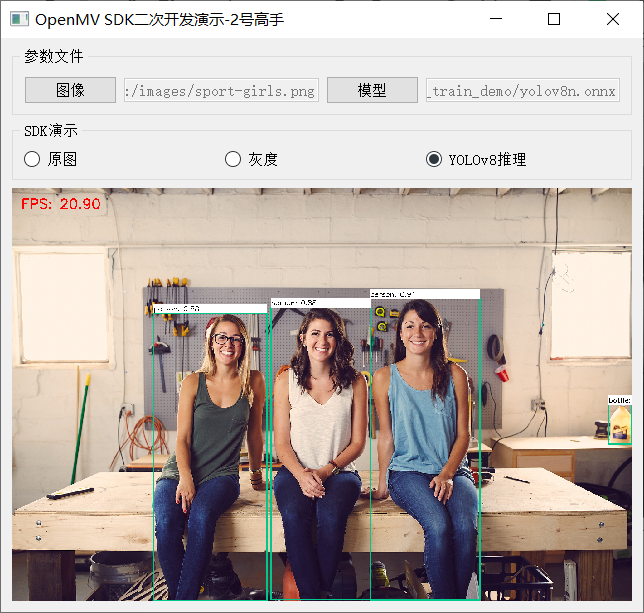
相關(guān)實現(xiàn)代碼如下:
  1fromdlcore.yolov8_vino_ort_inferimportYOLOv8Detector
  2fromdlcore.dl_infer_settingsimportDLInferSettings
  3importcv2ascv
  4fromPyQt5importQtWidgets,QtCore,QtGui
  5fromvmcore.color_space_taskimportColorSpaceTask
  6importsys
  7
  8
  9classRadioCheckBoxDemoPanel(QtWidgets.QWidget):
 10def__init__(self,parent=None):
 11super().__init__(parent)
 12#文本標(biāo)簽
 13self.rbtn0=QtWidgets.QRadioButton("原圖")
 14self.rbtn1=QtWidgets.QRadioButton("灰度")
 15self.rbtn3=QtWidgets.QRadioButton("YOLOv8推理")
 16self.rbtn0.setChecked(True)
 17
 18hbox_layout1=QtWidgets.QHBoxLayout()
 19hbox_layout1.addWidget(self.rbtn0)
 20hbox_layout1.addWidget(self.rbtn1)
 21hbox_layout1.addWidget(self.rbtn3)
 22
 23panel1=QtWidgets.QGroupBox("SDK演示")
 24panel1.setLayout(hbox_layout1)
 25
 26#輸入文本框
 27self.image_file_edit=QtWidgets.QLineEdit()
 28self.image_file_edit.setMinimumWidth(100)
 29self.image_file_edit.setEnabled(False)
 30fileBtn=QtWidgets.QPushButton("圖像")
 31self.weight_file_path=QtWidgets.QLineEdit()
 32self.weight_file_path.setMinimumWidth(100)
 33self.weight_file_path.setEnabled(False)
 34modelBtn=QtWidgets.QPushButton("模型")
 35
 36hbox_layout2=QtWidgets.QHBoxLayout()
 37hbox_layout2.addWidget(fileBtn)
 38hbox_layout2.addWidget(self.image_file_edit)
 39hbox_layout2.addWidget(modelBtn)
 40hbox_layout2.addWidget(self.weight_file_path)
 41
 42panel2=QtWidgets.QGroupBox("參數(shù)文件")
 43panel2.setLayout(hbox_layout2)
 44
 45#輸入文本框
 46self.label=QtWidgets.QLabel()
 47pixmap=QtGui.QPixmap("images/wp.jpg")
 48pix=pixmap.scaled(QtCore.QSize(620,500),QtCore.Qt.KeepAspectRatio)
 49self.label.setPixmap(pix)
 50self.label.setAlignment(QtCore.Qt.AlignCenter)
 51self.label.setStyleSheet("background-color:black;color:green")
 52
 53#添加到布局管理器中
 54vbox_layout=QtWidgets.QVBoxLayout()
 55vbox_layout.addWidget(panel2)
 56vbox_layout.addWidget(panel1)
 57vbox_layout.addWidget(self.label)
 58vbox_layout.addStretch(1)
 59
 60#面板容器
 61self.setLayout(vbox_layout)
 62
 63#setuplistener
 64self.rbtn0.toggled.connect(self.on_update_original)
 65self.rbtn1.toggled.connect(self.on_update_gray)
 66self.rbtn3.toggled.connect(self.on_yolov8_infer)
 67modelBtn.clicked.connect(self.on_weight_select)
 68fileBtn.clicked.connect(self.on_update_image)
 69
 70defon_update_original(self):
 71image_file=self.image_file_edit.text()
 72iflen(image_file)==0orimage_fileisNone:
 73QtWidgets.QMessageBox.warning(self,"警告","圖像文件未選擇...")
 74return
 75pixmap=QtGui.QPixmap(image_file)
 76pix=pixmap.scaled(QtCore.QSize(620,500),QtCore.Qt.KeepAspectRatio)
 77self.label.setPixmap(pix)
 78
 79defon_update_gray(self):
 80image_file=self.image_file_edit.text()
 81iflen(image_file)==0orimage_fileisNone:
 82QtWidgets.QMessageBox.warning(self,"警告","圖像文件未選擇...")
 83return
 84image=cv.imread(image_file)
 85cst=ColorSpaceTask()
 86cst.low_scalar=(0,0,0)
 87cst.high_scalar=(0,0,0)
 88#0-BGR,1-HSV,2-gray
 89cst.color_type=2
 90output=cst.t_exec(image)
 91gray=output['result']
 92dst=cv.cvtColor(gray,cv.COLOR_GRAY2RGB)
 93
 94height,width,channel=dst.shape
 95bytesPerLine=3*width
 96img=QtGui.QImage(dst.data,width,height,bytesPerLine,QtGui.QImage.Format_RGB888)
 97pixmap=QtGui.QPixmap(img)
 98pix=pixmap.scaled(QtCore.QSize(620,500),QtCore.Qt.KeepAspectRatio)
 99self.label.setPixmap(pix)
100
101defon_yolov8_infer(self):
102image_file=self.image_file_edit.text()
103iflen(image_file)==0orimage_fileisNone:
104QtWidgets.QMessageBox.warning(self,"警告","圖像文件未選擇...")
105return
106
107settings=DLInferSettings()
108settings.weight_file_path=self.weight_file_path.text()
109settings.label_map_file_path="D:/projects/classes.txt"
110settings.target_deploy=1
111detector=YOLOv8Detector(settings)
112image=cv.imread(image_file)
113detector.infer_image(image)
114
115dst=cv.cvtColor(image,cv.COLOR_BGR2RGB)
116height,width,channel=dst.shape
117bytesPerLine=3*width
118img=QtGui.QImage(dst.data,width,height,bytesPerLine,QtGui.QImage.Format_RGB888)
119pixmap=QtGui.QPixmap(img)
120pix=pixmap.scaled(QtCore.QSize(620,500),QtCore.Qt.KeepAspectRatio)
121self.label.setPixmap(pix)
審核編輯:劉清
-
GUI
+關(guān)注
關(guān)注
3文章
659瀏覽量
39658 -
SDK
+關(guān)注
關(guān)注
3文章
1035瀏覽量
45907 -
pyqt5
+關(guān)注
關(guān)注
0文章
25瀏覽量
3398 -
openMV
+關(guān)注
關(guān)注
3文章
39瀏覽量
9811
原文標(biāo)題:PyQT5構(gòu)建YOLOv8界面應(yīng)用程序
文章出處:【微信號:CVSCHOOL,微信公眾號:OpenCV學(xué)堂】歡迎添加關(guān)注!文章轉(zhuǎn)載請注明出處。
發(fā)布評論請先 登錄
相關(guān)推薦
利用PyQt5編輯軟件界面的簡單步驟
如何使用Python配合PyQT5模塊來開發(fā)圖形化應(yīng)用程序
PyQt5的中文教程電子書免費下載

使用YOLOv8做目標(biāo)檢測和實例分割的演示
使用pycharm開發(fā)上位機配置pyqt5的環(huán)境

如何實現(xiàn)YOLOv8 + ONNRUNTIME推理界面化與多線程支持
目標(biāo)檢測算法再升級!YOLOv8保姆級教程一鍵體驗
三種主流模型部署框架YOLOv8推理演示
解鎖YOLOv8修改+注意力模塊訓(xùn)練與部署流程
如何修改YOLOv8的源碼
基于PyQT5與ONNXRUNTIME實現(xiàn)風(fēng)格遷移應(yīng)用

如何快速開發(fā)出功能強大、界面美觀的GUI 應(yīng)用程序
基于YOLOv8的自定義醫(yī)學(xué)圖像分割
YOLOv8+PyQT5打造細(xì)胞計數(shù)與識別應(yīng)用說明


 請問PyQT5是如何構(gòu)建YOLOv8界面應(yīng)用程序的


評論