本文涉及到的產品
1 mechArm 270
2 mycobot 280
3 mypalletizer 260
4 AI kit
主題內容
今天的文章的主題主要介紹一下跟aikit 套件搭配的三款機械臂,它們之間分別有什么不一樣的地方。
前言
假如說你有一臺機械臂的話,你會用它來干什么呢?簡單的控制機械臂動一動;讓它重復執行某個軌跡;還是讓它能夠在工業上代替人類去工作。在隨著時代的進步,機器人頻繁的出現在我們的周圍,它們代替我們從事危險的工作,服務人類等。今天我們一起來看一下,機械臂是如何在一個放工業場景中進行工作的。
介紹
what is AI kit?
人工智能套裝是集視覺、定位抓取、自動分揀模塊為一體的入門級人工智能套裝。
基于Linux系統,在ROS搭建1:1仿真模型,可通過開發軟件實現機械臂的控制,能夠快速入門學習人工智能基礎知識。
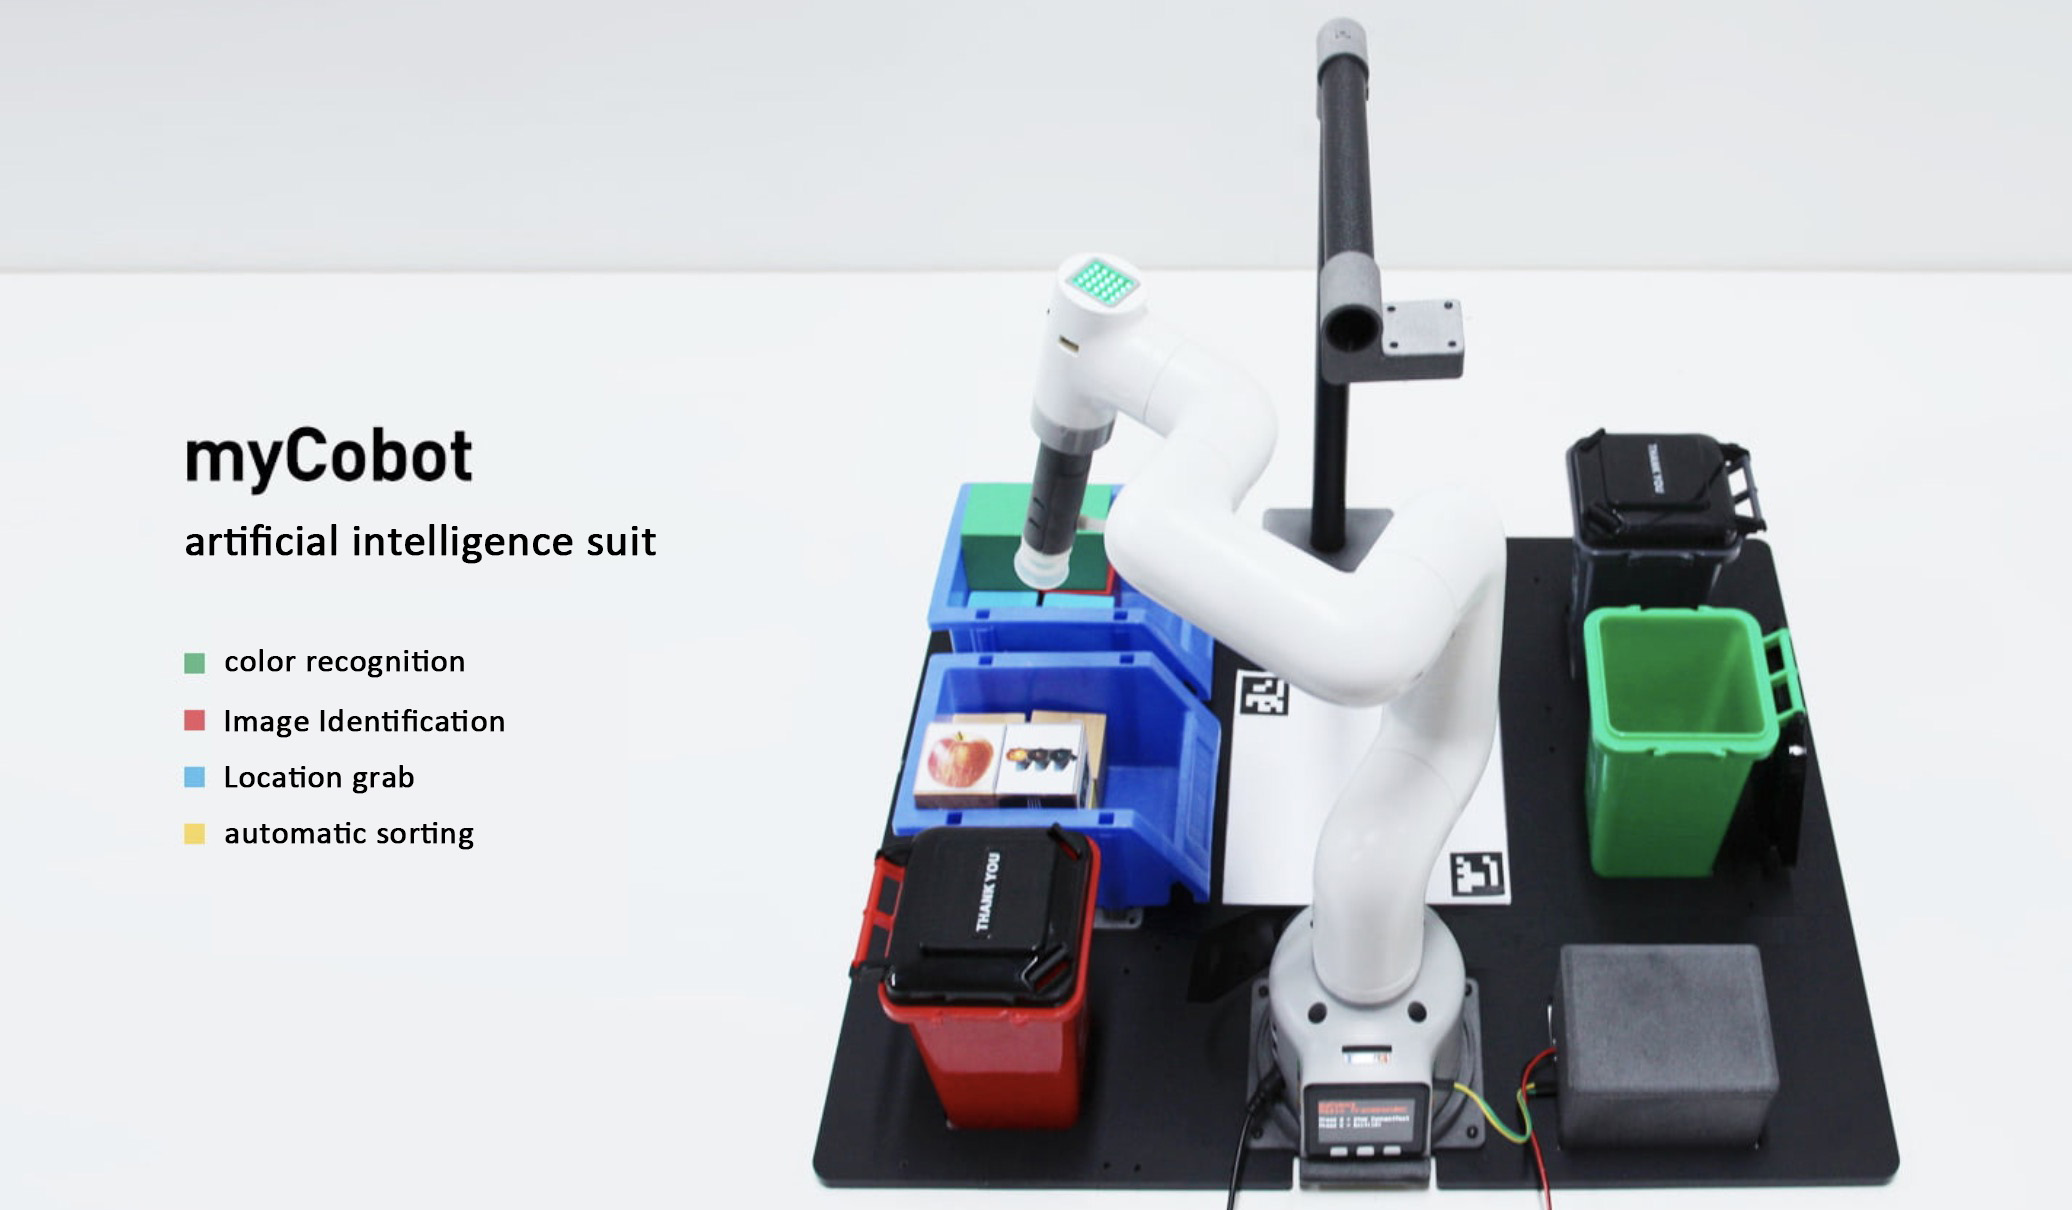
目前我們的人工智能套裝可以實現對顏色識別和抓取,對圖像識別和抓取。
該套件對于剛入門機械臂,機器視覺的用戶來說是非常有幫助的,能夠帶你快速的了解人工智能項目是如何搭建起來的,進一步的了解機器視覺是如何跟機械臂進行聯動的。
接下來我們簡單了解一下,能夠與aikit套裝適配的三款機械臂
機械臂
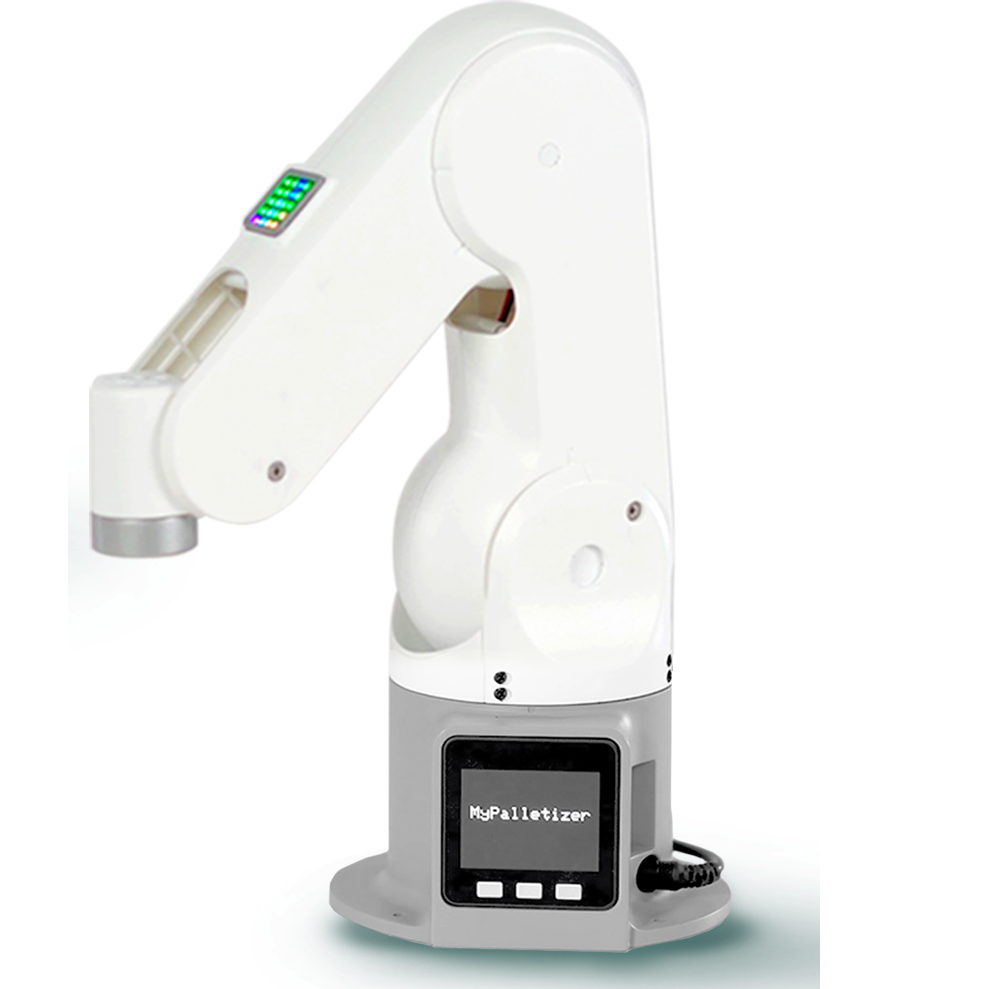
myPalletizer 260
myPalletizer260是一款四軸的碼垛機械臂,全包裹輕量級四軸碼垛機械臂,整體去鰭設計,小巧緊湊,便于攜帶。myPalletizer本體重量960g,負載250g,工作半徑260mm,專為創客,教育設計,有豐富的擴展接口,ai套件模擬工業場景,可以進行機器視覺的學習。t 套裝適配的三款機械臂
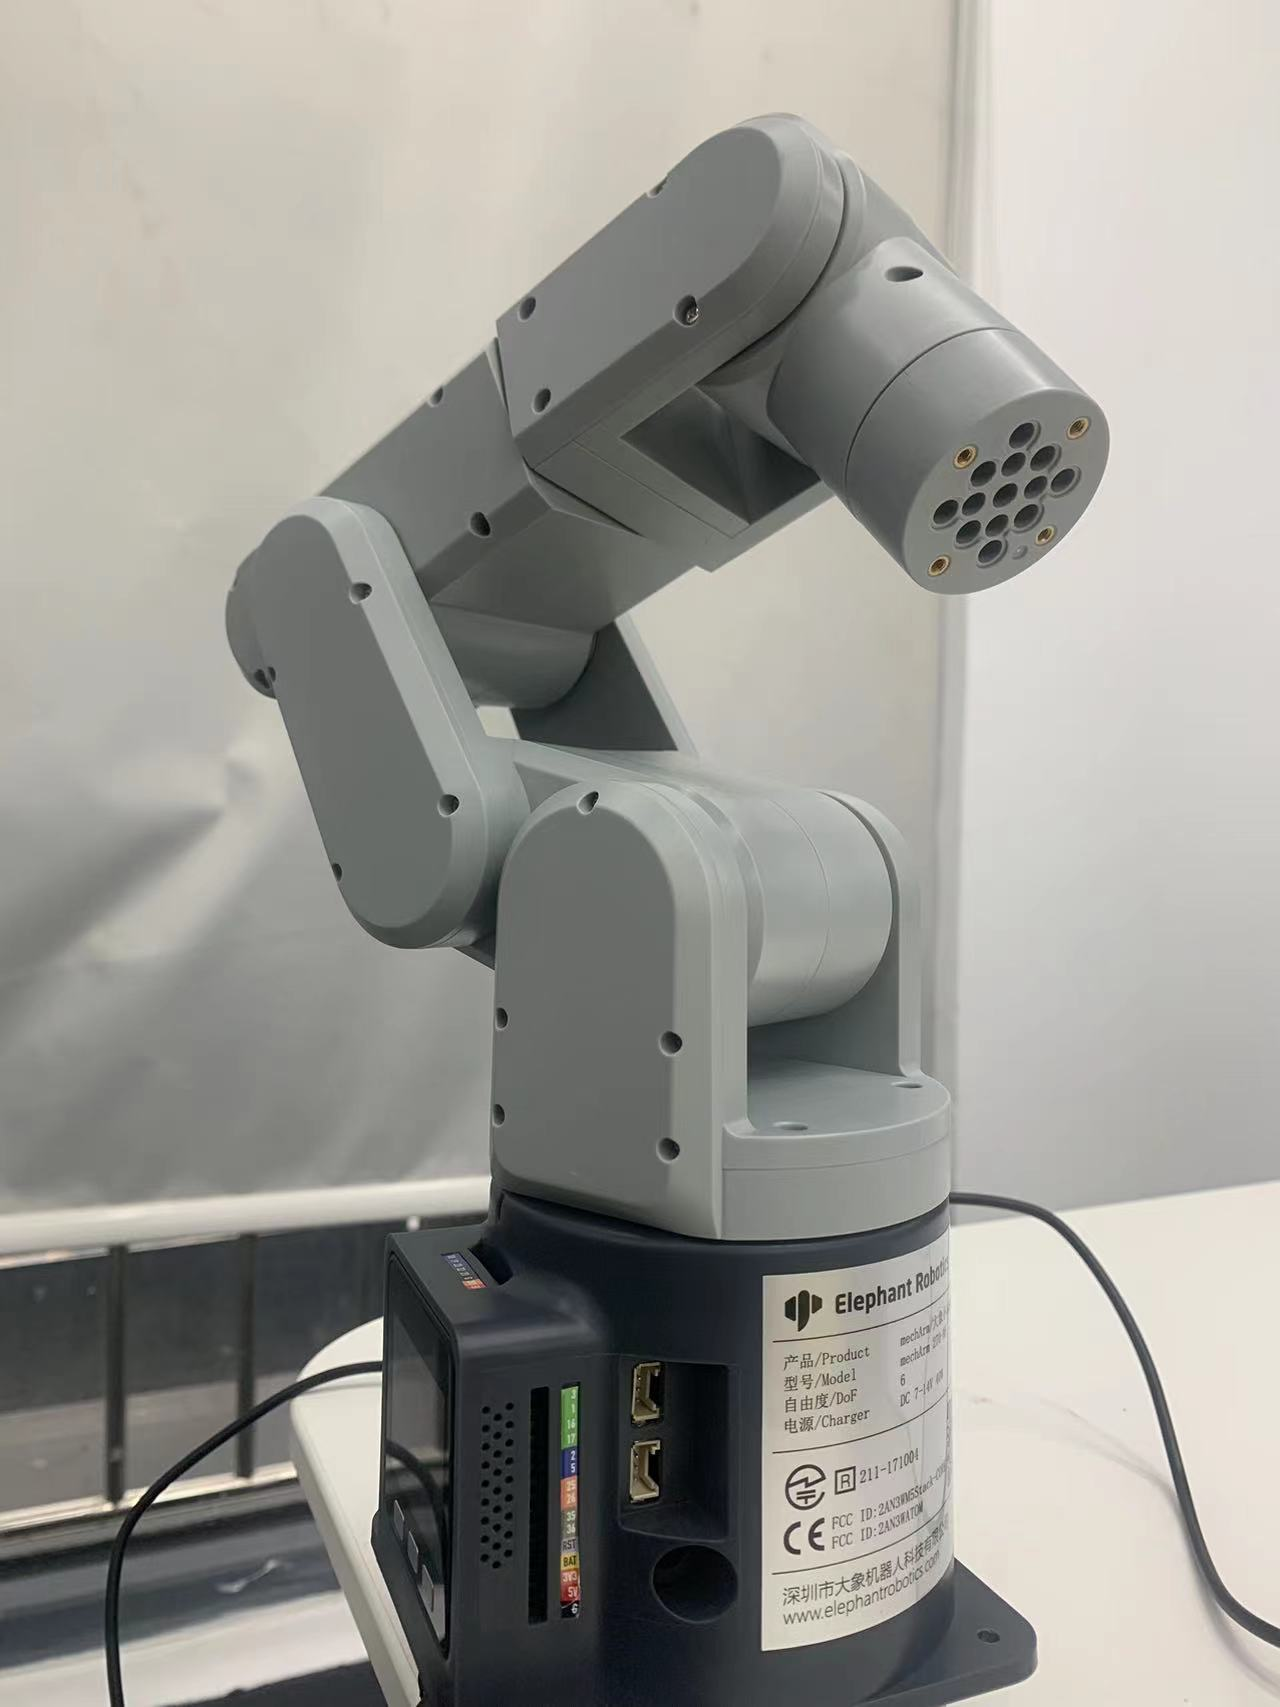
mechArm 270
mechArm 270 是一款小六軸機械臂,結構是中心對稱結構(仿工業結構)。mechArm 270本體重量1kg, 負載250g,工作半徑270mm,設計緊湊便攜,小巧但功能強大,操作簡單,能與人協同、安全工作。
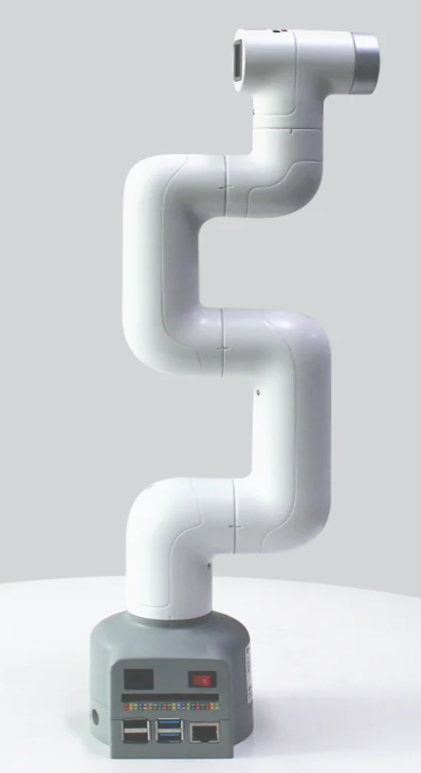
myCobot 280
myCobot 280 是世界上最小最輕的六軸協作機械臂(UR結構),可以根據用戶需求進行二次開發,實現用戶個性化定制。myCobot 本體自重850g,有效負載250g,有效工作半徑280mm,體積小巧但功能強大,既可搭配多種末端執行器適配多種應用場景,也可支持多平臺軟件的二次開發,滿足科研教育、智能家居,商業探索等各種場景需求。
我們先來看個視頻aikit 是如何跟這三款機械臂運行的。
內容
視頻地址:https://youtu.be/9J2reiPYNxg
視頻內容展現了,顏色識別和智能分揀功能,還有圖像識別和智能分揀功能。
我們簡單介紹一下 aikit 是如何實現的。(以顏色識別和智能分揀功能為例)
該人工智能項目主要運用到了兩個模塊
●視覺處理模塊
●計算模塊(處理eye to hand的之間的換算)
視覺處理模塊:
OpenCV (Open Source Computer Vision) 是一個開源的計算機視覺庫,用于開發計算機視覺應用程序。OpenCV 包含了大量用于圖像處理、視頻分析、基于深度學習的目標檢測和識別等功能的函數和算法。

我們使用了OpenCV來對圖像進行處理。從攝像頭得到的視頻進行處理,從而獲取視頻中的信息例如顏色,圖像,視頻中的平面坐標(x,y)等。將獲取到的信息傳遞給處理器進行下一步的處理。
下面是處理圖像的部分代碼(顏色識別)
# detect cube color
def color_detect(self, img):
	# set the arrangement of color'HSV
	x = y = 0
	gs_img = cv2.GaussianBlur(img, (3, 3), 0) # Gaussian blur
	# transfrom the img to model of gray
	hsv = cv2.cvtColor(gs_img, cv2.COLOR_BGR2HSV)

	for mycolor, item in self.HSV.items():
		redLower = np.array(item[0])
		redUpper = np.array(item[1])
		# wipe off all color expect color in range
		mask = cv2.inRange(hsv, item[0], item[1])
		# a etching operation on a picture to remove edge roughness
		erosion = cv2.erode(mask, np.ones((1, 1), np.uint8), iterations=2)
		# the image for expansion operation, its role is to deepen the color depth in the picture
		dilation = cv2.dilate(erosion, np.ones(
			(1, 1), np.uint8), iterations=2)


		# adds pixels to the image
		target = cv2.bitwise_and(img, img, mask=dilation)
		# the filtered image is transformed into a binary image and placed in binary
		ret, binary = cv2.threshold(dilation, 127, 255, cv2.THRESH_BINARY)
		# get the contour coordinates of the image, where contours is the coordinate value, here only the contour is detected
		contours, hierarchy = cv2.findContours(
			dilation, cv2.RETR_EXTERNAL, cv2.CHAIN_APPROX_SIMPLE)

		if len(contours) > 0:
			# do something about misidentification
			boxes = [
				box
			for box in [cv2.boundingRect(c) for c in contours]
			if min(img.shape[0], img.shape[1]) / 10
			< min(box[2], box[3])
			< min(img.shape[0], img.shape[1]) / 1
			]
			if boxes:
				for box in boxes:
					x, y, w, h = box
				# find the largest object that fits the requirements
				c = max(contours, key=cv2.contourArea)
				# get the lower left and upper right points of the positioning object
				x, y, w, h = cv2.boundingRect(c)
				# locate the target by drawing rectangle
				cv2.rectangle(img, (x, y), (x+w, y+h), (153, 153, 0), 2)
				# calculate the rectangle center
				x, y = (x*2+w)/2, (y*2+h)/2
				# calculate the real coordinates of mycobot relative to the target
				if mycolor == "red":
					self.color = 0

				elif mycolor == "green":
					self.color = 1

				elif mycolor == "cyan" or mycolor == "blue":
					self.color = 2

				else:
					self.color = 3


		if abs(x) + abs(y) > 0:
			return x, y
		else:
			return None
只是獲取我們的圖像信息還不夠,得處理得到的信息,傳遞給機械臂去執行命令。這里就運用到了計算模塊。
計算模塊
NumPy (Numerical Python) 是一個開源的 Python 庫,主要用于數學計算。NumPy 提供了大量用于科學計算的函數和算法,包括矩陣運算、線性代數、隨機數生成、傅里葉變換等。
我們要處理圖像上的坐標,換算成真實的坐標,這有一個專業名詞就是eye to hand。我們用python通過numpy計算庫來計算我們的坐標,最后發送給機械臂去執行分揀。
下面是計算的部分代碼
    while cv2.waitKey(1) < 0:
       # read camera
        _, frame = cap.read()
        # deal img
        frame = detect.transform_frame(frame)
        if _init_ > 0:
            _init_ -= 1
            continue
        # calculate the parameters of camera clipping
        if init_num < 20:
            if detect.get_calculate_params(frame) is None:
                cv2.imshow("figure", frame)
                continue
            else:
                x1, x2, y1, y2 = detect.get_calculate_params(frame)
                detect.draw_marker(frame, x1, y1)
                detect.draw_marker(frame, x2, y2)
                detect.sum_x1 += x1
                detect.sum_x2 += x2
                detect.sum_y1 += y1
                detect.sum_y2 += y2
                init_num += 1
                continue
        elif init_num == 20:
            detect.set_cut_params(
                (detect.sum_x1)/20.0,
                (detect.sum_y1)/20.0,
                (detect.sum_x2)/20.0,
                (detect.sum_y2)/20.0,
            )
            detect.sum_x1 = detect.sum_x2 = detect.sum_y1 = detect.sum_y2 = 0
            init_num += 1
            continue

        # calculate params of the coords between cube and mycobot
        if nparams < 10:
            if detect.get_calculate_params(frame) is None:
                cv2.imshow("figure", frame)
                continue
            else:
                x1, x2, y1, y2 = detect.get_calculate_params(frame)
                detect.draw_marker(frame, x1, y1)
                detect.draw_marker(frame, x2, y2)
                detect.sum_x1 += x1
                detect.sum_x2 += x2
                detect.sum_y1 += y1
                detect.sum_y2 += y2
                nparams += 1
                continue
        elif nparams == 10:
            nparams += 1
            # calculate and set params of calculating real coord between cube and mycobot
            detect.set_params(
                (detect.sum_x1+detect.sum_x2)/20.0,
                (detect.sum_y1+detect.sum_y2)/20.0,
                abs(detect.sum_x1-detect.sum_x2)/10.0 +
                abs(detect.sum_y1-detect.sum_y2)/10.0
            )
            print ("ok")
            continue

        # get detect result
        detect_result = detect.color_detect(frame)
        if detect_result is None:
            cv2.imshow("figure", frame)
            continue
        else:
            x, y = detect_result
            # calculate real coord between cube and mycobot
            real_x, real_y = detect.get_position(x, y)
            if num == 20:
                detect.pub_marker(real_sx/20.0/1000.0, real_sy/20.0/1000.0)
                detect.decide_move(real_sx/20.0, real_sy/20.0, detect.color)
                num = real_sx = real_sy = 0

            else:
                num += 1
                real_sy += real_y
                real_sx += real_x
我們的項目是開源的可以在GitHub上找到
https://github.com/elephantrobotics/mycobot_ros/blob/noetic/mycobot_ai/ai_mycobot_280/scripts/advance_detect_obj_color.py
區別
在比較了視頻和內容還有程序的代碼,這三款機械臂的框架是一樣的,只需要在數據上稍微作以修改就能夠運行成功。
比較這三款機械臂有什么不同,大致有兩點。
其一本質上就是來比較四軸和六軸的機械臂在實際的運用中有什么不同點。(myPalletizer 和mechArm/myCobot之間的對比)
我們來看一下四軸機械臂和六軸機械臂之間粗略的對比

從視頻中可以看出,不論是四軸機械臂還是六軸機械臂在AI Kit 所工作的范圍都是足夠的,它們兩者最大的區別就是在程序啟動的過程中,myPalletizer的動作簡單快捷,只有四個關節在運動,能夠高效且穩定的執行任務;myCobot需要調動六個關節,比myPalletizer多兩個關節,在程序中的計算量是比myPalletizer的計算量要大,所花費的時間要長一些(小型場景)。
我們簡單總結一下,在場景固定的情況下,我們在考慮如何選擇機械臂的時候可以優先考慮機械臂的工作范圍。在符合工作范圍的機械臂的情況下,高效和穩定將是必要的條件。假如說現在有一個工業場景類似于我們的AI kit的話,四軸機械臂將會是優先選擇。當然六軸機械臂可以在更大的空間范圍內操作,并且可以實現更復雜的運動。它們可以在空間內進行回轉運動,而四軸機械臂則無法做到這一點。因此,六軸機械臂通常更適合用于需要精確操作、復雜運動的工業應用。
其二兩款都是六軸機械臂,他們最主要的不同是結構的不同。mechArm是中心對稱結構的機械臂,myCobot是UR結構的協作型機械臂。我們可以比較這兩種結構在實際運用場景中有何不同。
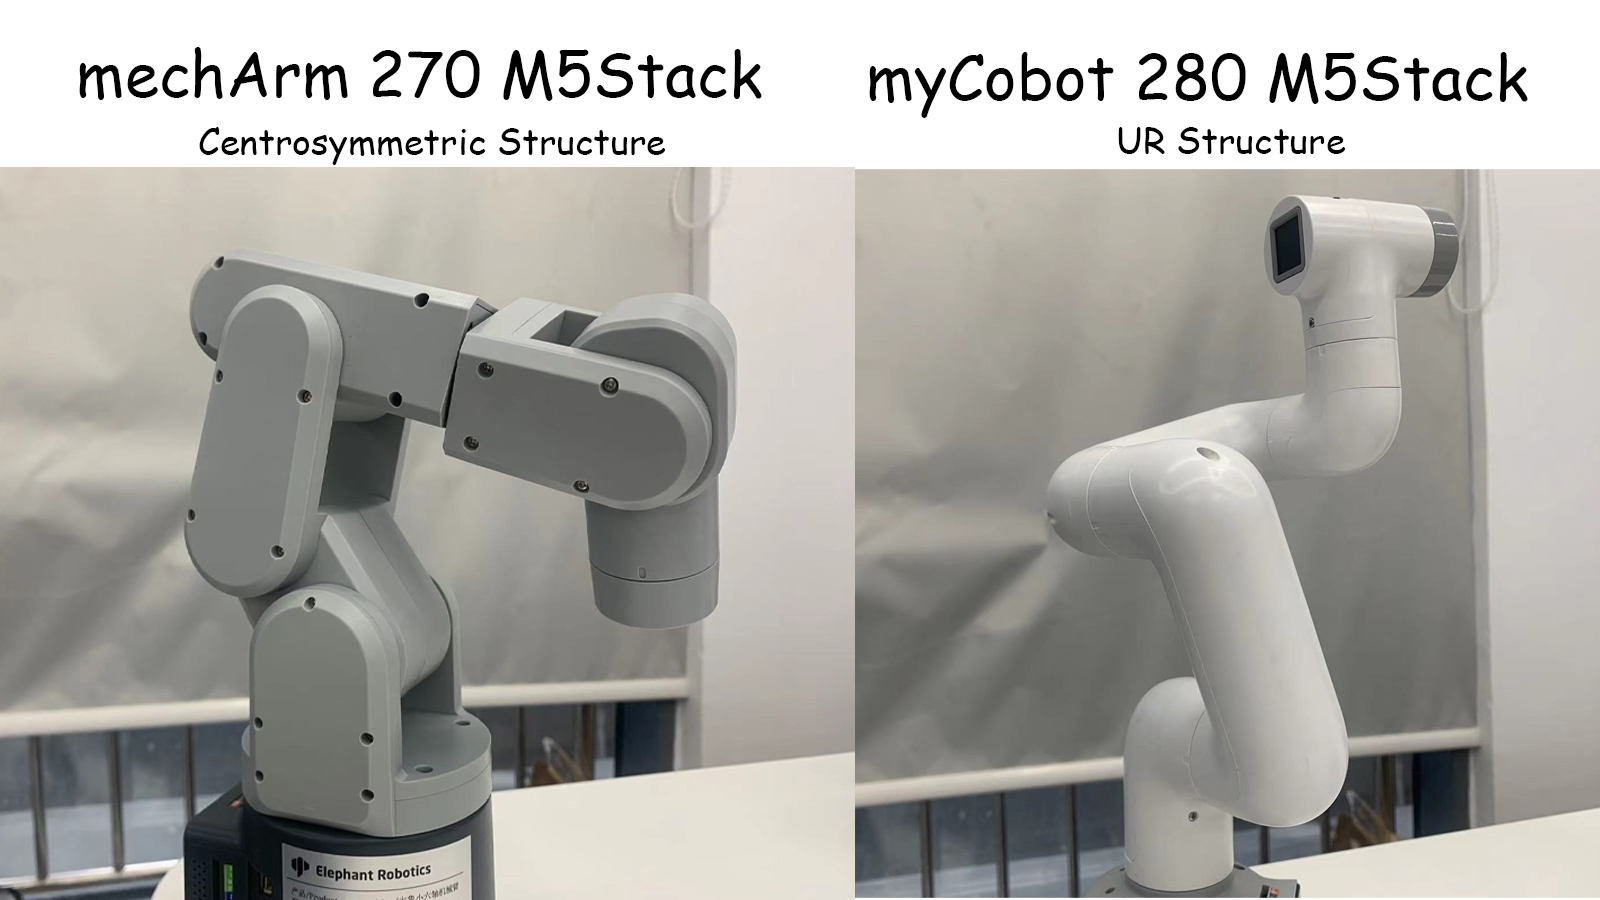
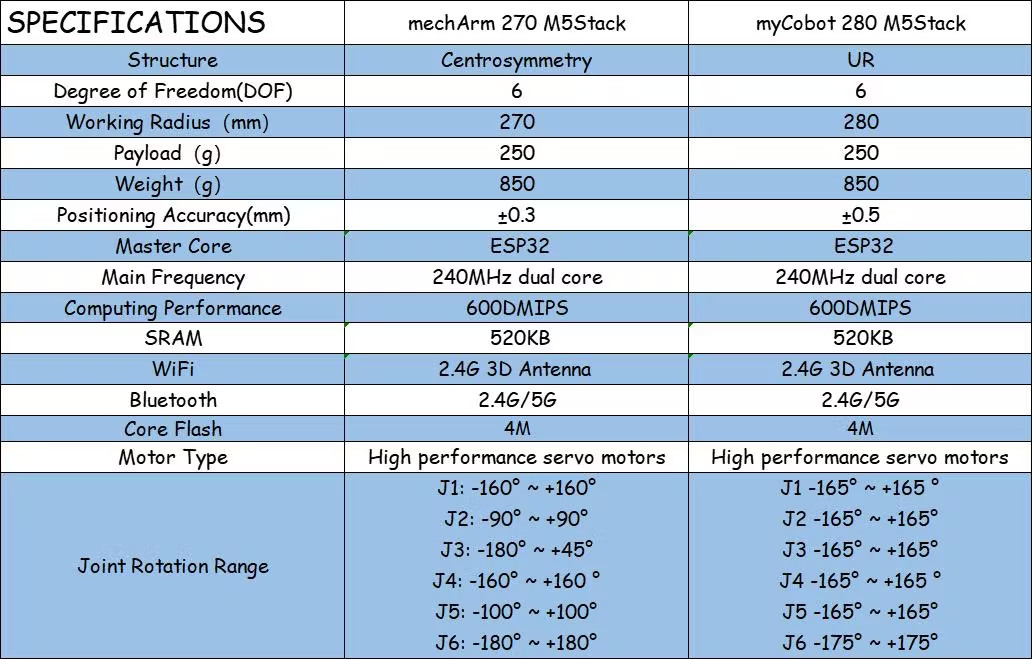
這兩者的結構不同導致了它們運動的范圍不一樣。以mechArm為例,中心對稱結構的機械臂是由三對相對的關節組成的,每對關節的運動方向相反。這種結構的機械臂具有較好的平衡性,能夠抵消關節間的力矩,使機械臂保持穩定。
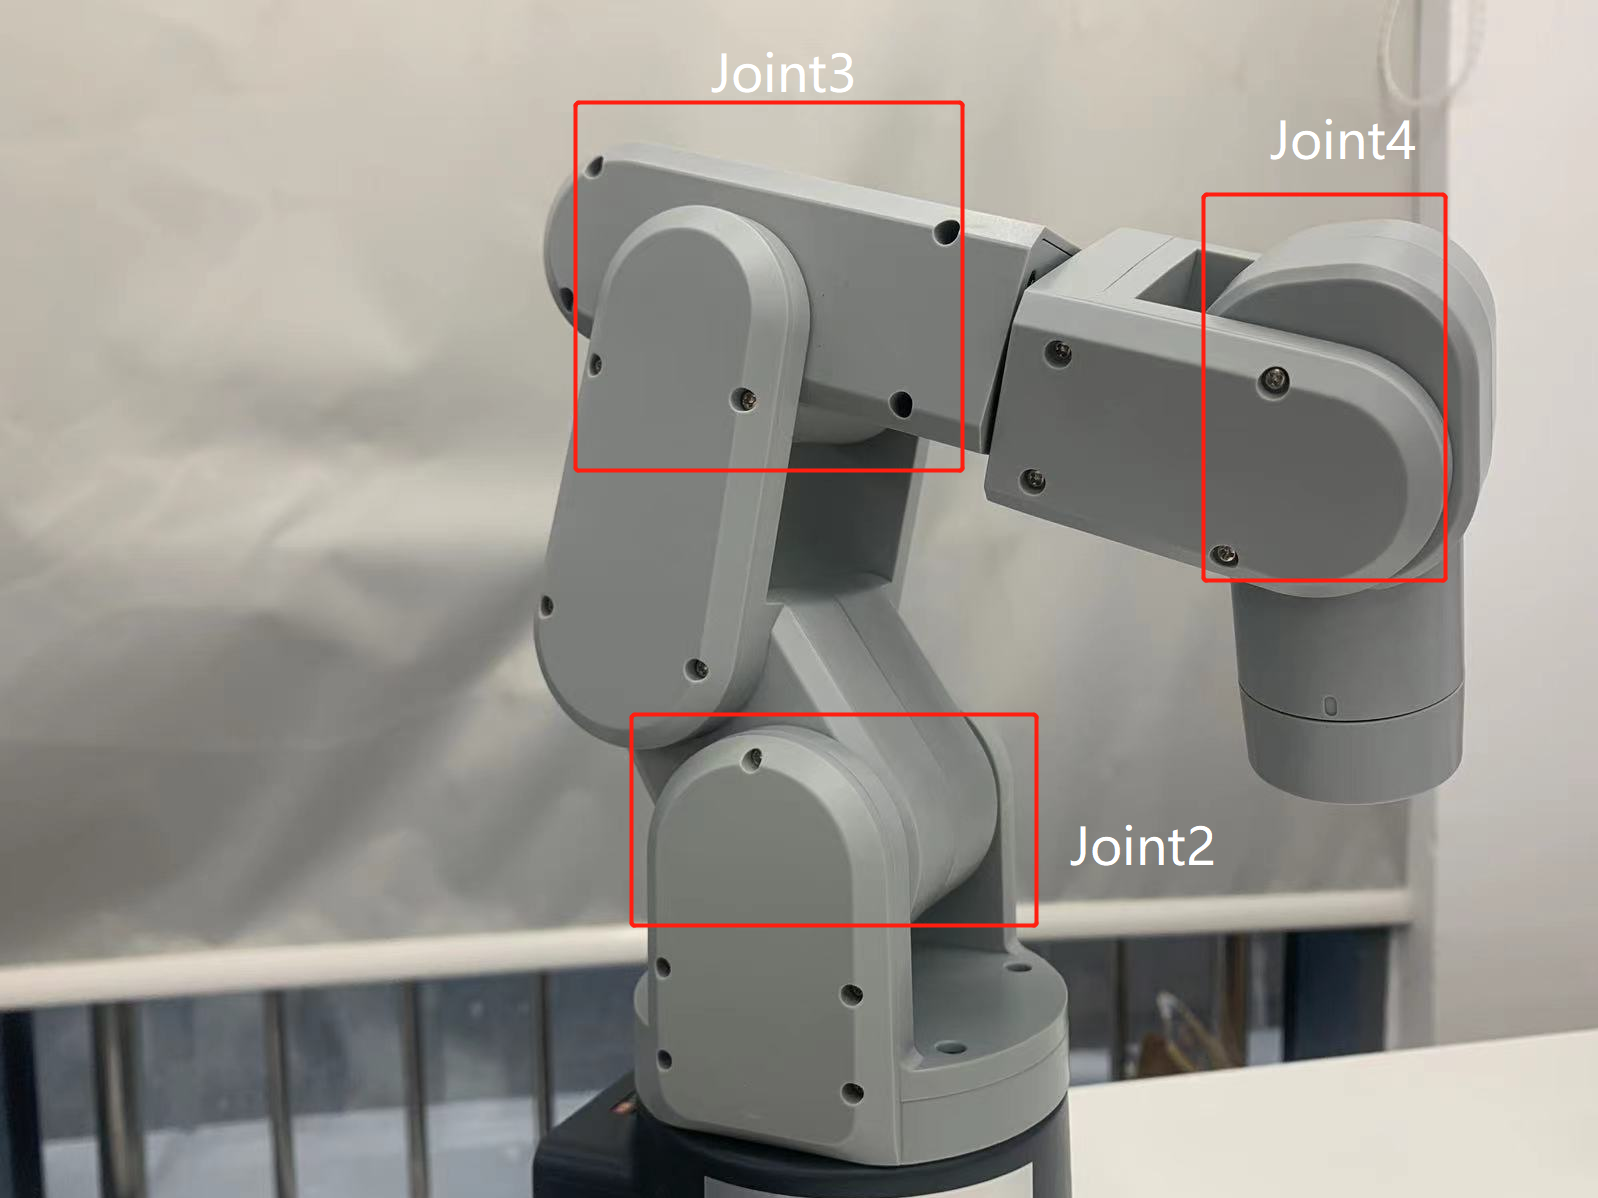
在視頻中展示,mechArm在運行中也是比較穩定的。
看到這你可能就會產生疑問,那myCobot不就一無是處了嘛?當然不是,UR結構的機械臂更加靈活,能夠實現更大范圍的運動,適用于較大的應用場合。myCobot更重要的一點它是協作型機械臂,它具有較好的人機交互能力,能夠與人類協作進行工作。六軸協作型機械臂通常用于生產線上的物流和裝配工作,以及醫療、研究和教育等領域。
總結
就如開頭所說,AI kit套裝搭載三款機械臂的不同本質上是如何選擇一款合適的機械臂來使用。如果你是出于某個特定的場景去選擇機械臂的話,就需要根據場景的需求,例如確定機械臂的工作半徑,使用的環境,機械臂的負載等方面。
如果你是想要學習機械臂相關知識的話,就可以選擇一款目前市面上主流的機械臂從而開展學習。myPalletizer是以碼垛機械臂為原型設計的,主要用于實現貨物的碼垛和托盤裝卸工作;mechArm 是以主流的工業型機械臂為原型設計的,因為它的結構特殊在運行的時候可以保持機械臂的穩定;myCobot是以協作型機械臂為原型設計的,該結構是近年來熱門的機械臂,能夠與人類協同工作,可以提供人類的力量和精度。
以上就是本篇文章的全部內容了,未來,機械臂技術將繼續發展,為人類生產、工作、生活帶來更多的便利。如果你喜歡這篇文章請給我們留言點贊!
審核編輯黃宇
-
機器人
+關注
關注
211文章
28512瀏覽量
207499 -
人工智能
+關注
關注
1792文章
47425瀏覽量
238955 -
機械臂
+關注
關注
12文章
515瀏覽量
24630
發布評論請先 登錄
相關推薦


 人工智能套裝 Ai Kit 橫向測評


評論