簡介
本文主要介紹Qt應(yīng)用程序開發(fā)工具 Qt Creator 的安裝及使用飛凌移植好的 Qt的SDK來搭建Qt應(yīng)用程序開發(fā)環(huán)境的方法。
Ubuntu環(huán)境:Ubuntu12.04 64bit
應(yīng)用程序開發(fā)工具:Qt Creator2.6.2 64bit
Qt sdk版本:Qt5.9 64bit
交叉編譯工具版本:arm-linux-gnueabihf-gcc 5.3.1
目標(biāo)平臺:OKA40i-C 開發(fā)板
一、Qt 應(yīng)用程序開發(fā)環(huán)境搭建
#01安裝Qt Creator 并執(zhí)行
將 qt-creator-linux-x86_64-opensource-2.6.2.bin 拷貝到虛擬機(jī) /root/workspace 路徑,執(zhí)行此文件:
cd /root/workspace/ chmod 777 qt-creator-linux-x86_64-opensource-2.6.2.bin ./qt-creator-linux-x86_64-opensource-2.6.2.bin
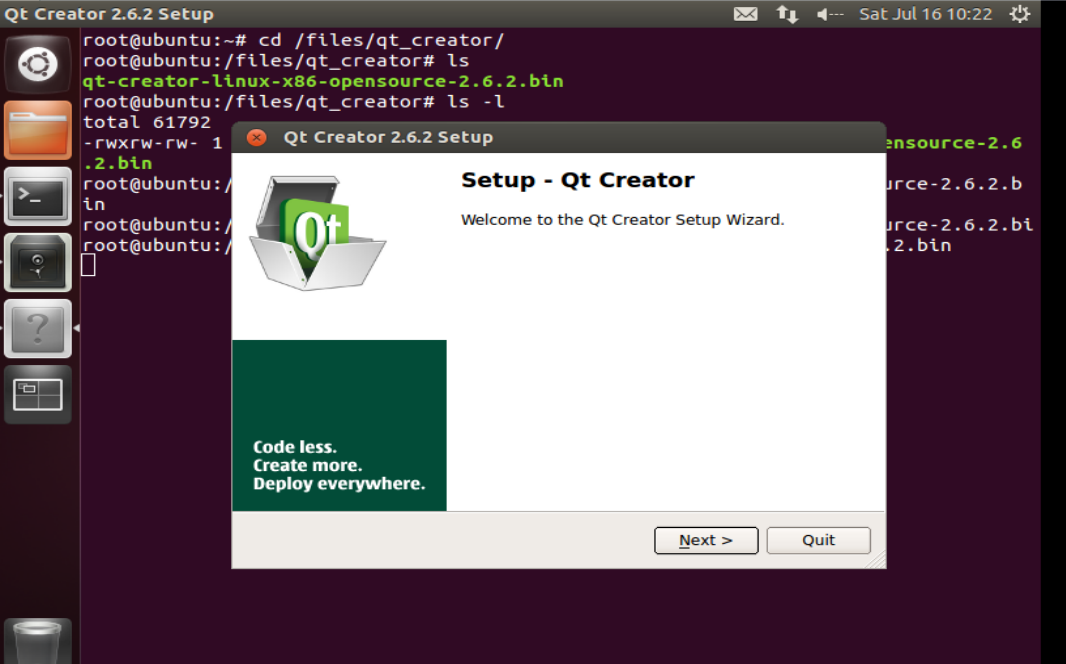
點(diǎn)擊“Next”。
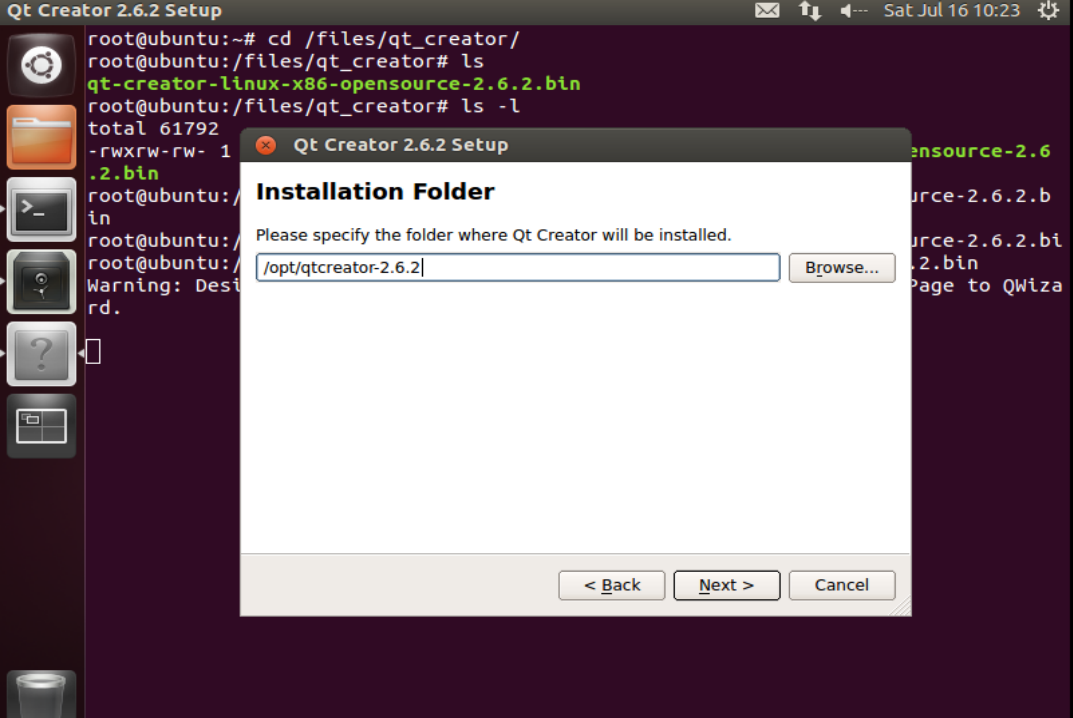
出現(xiàn)安裝路徑,不用修改使用默認(rèn)的即可,點(diǎn)擊“Next”。
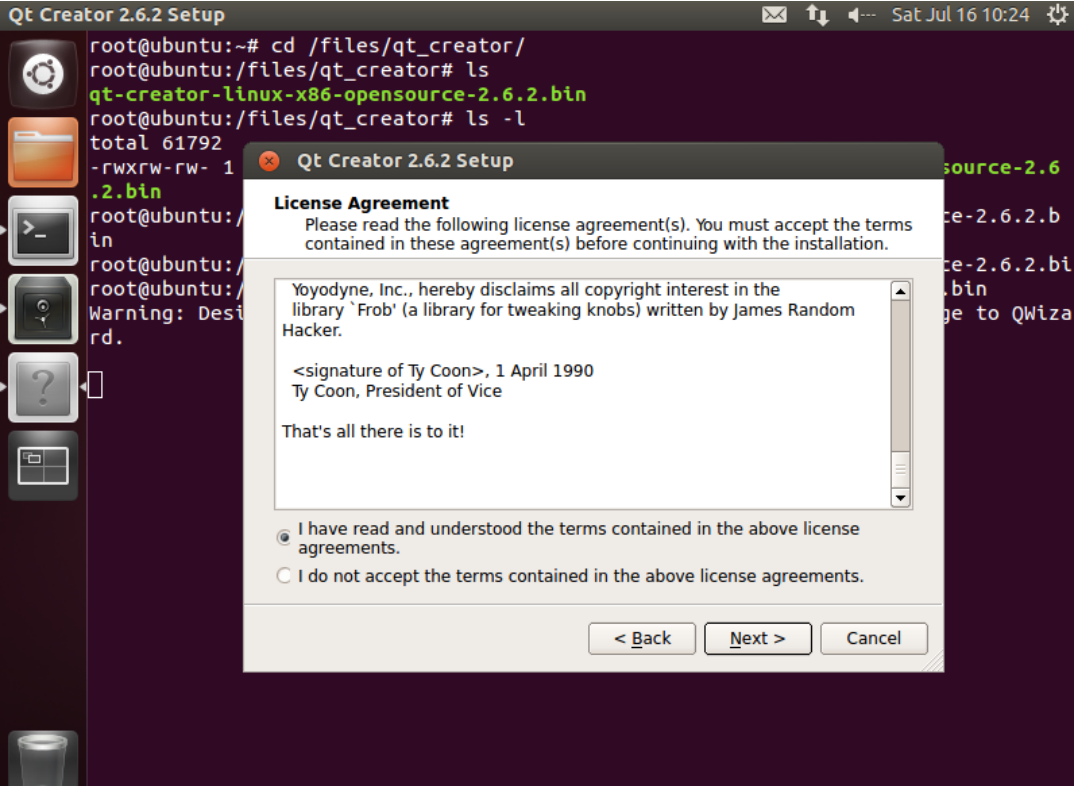
出現(xiàn)許可說明,閱讀幾秒后,點(diǎn)擊“I have read and ...”左側(cè)選項(xiàng),點(diǎn)擊“Next”。
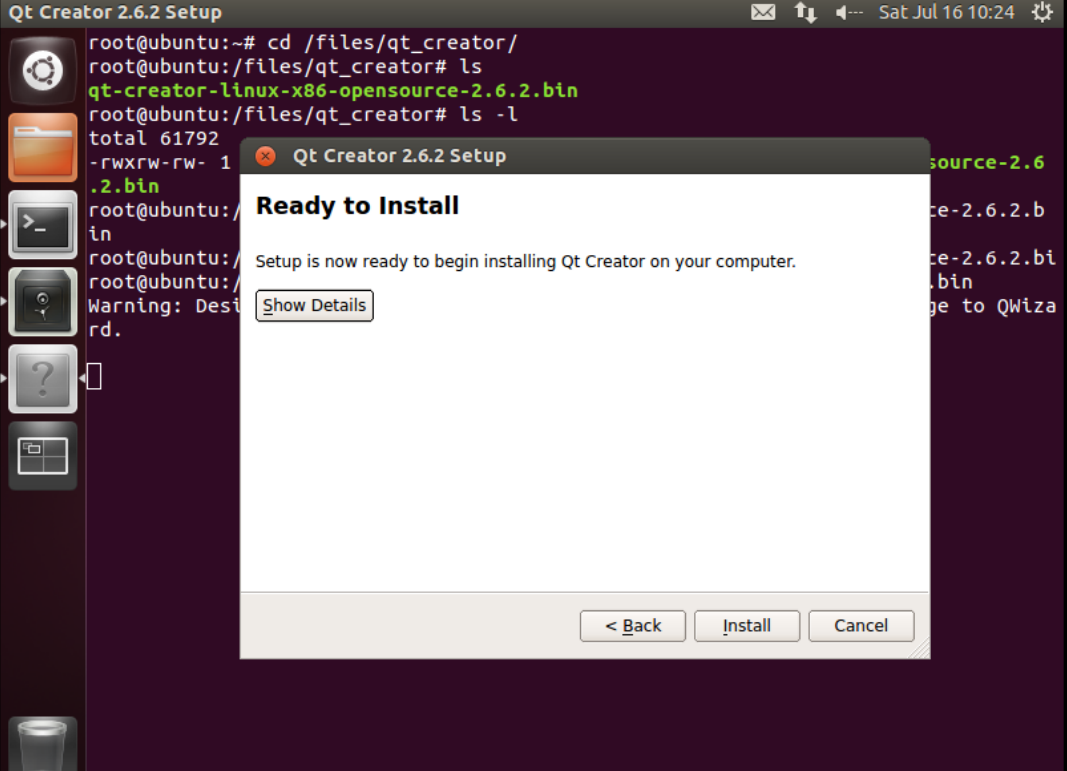
點(diǎn)擊“Install”。
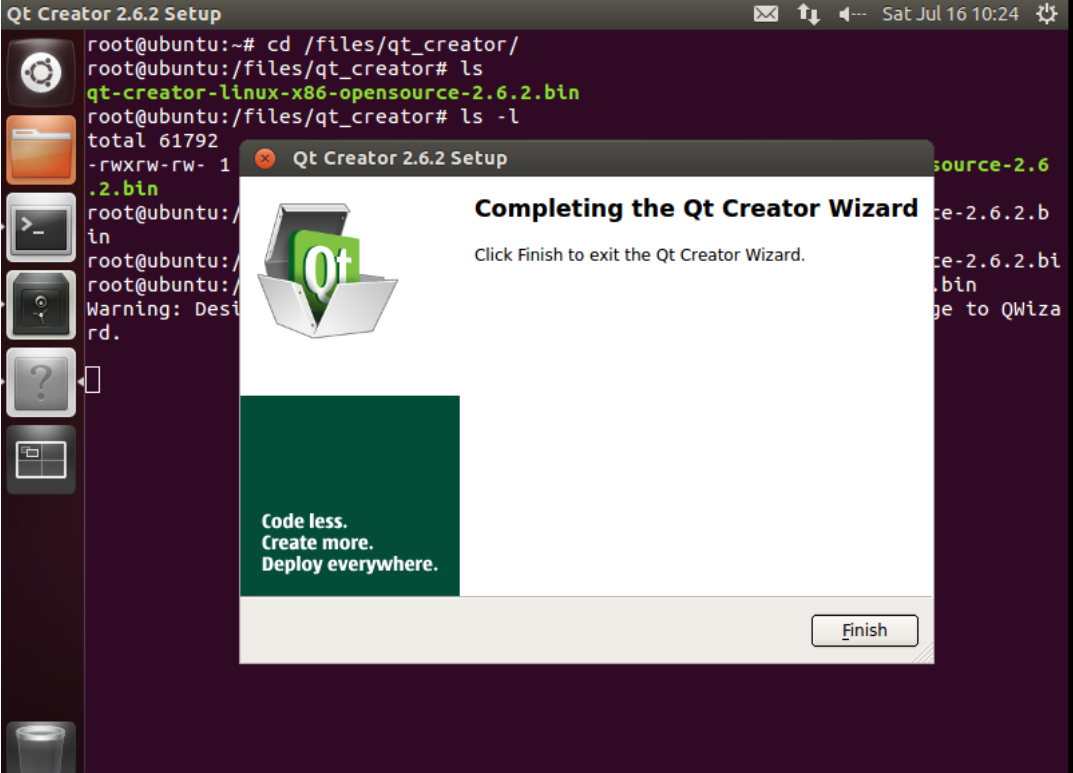
點(diǎn)擊“Finish”完成。
#02執(zhí)行Qt Creator
登陸后執(zhí)行 qtcreator /opt/qtcreator-2.6.2/bin/qtcreator &
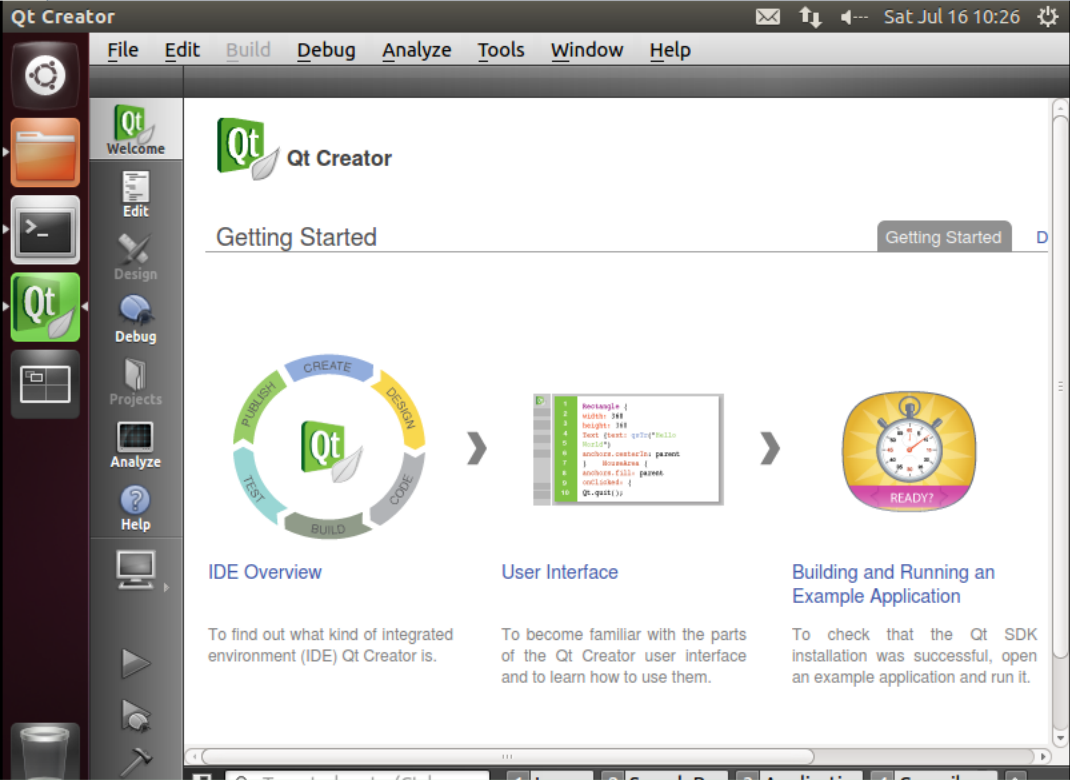
#03配置 Qt Creator
點(diǎn)擊 Qt Creator 的 Tools ->Options->Build & Run->Compilers, 然后點(diǎn)擊 Add - >GCC。
Name 輸入 GCC-A40i;
Compiler Path 點(diǎn)擊 Browse 選擇交叉編譯器的路徑為 /root/workspace/allwinner/A40i/bsp/lichee/out/sun8iw11p1/linux/common/buildroot/ho st/opt/ext-toolchain/bin//arm-linux-gnueabihf-g++
如下圖所示:
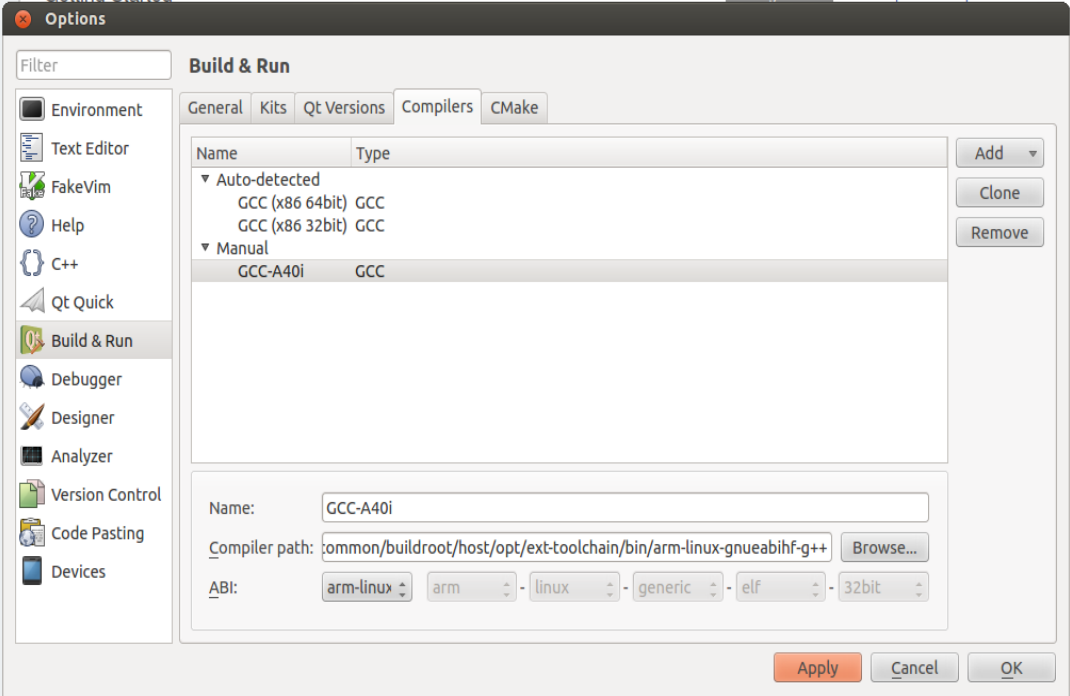
然后點(diǎn)擊 Apply。
點(diǎn)擊 Qt Creator 的 Qt Versions, 然后點(diǎn)擊 Add,彈出對話框選擇
/root/workspace/allwinner/A40i/bsp/lichee/buildroot-201611/dl/qt-everywhereopensource-src-5.9.0/Qt-5.9.0/bin/qmake 文件,
點(diǎn)擊 Open 添加。
然后會(huì)返回 Qt Version 配置框。
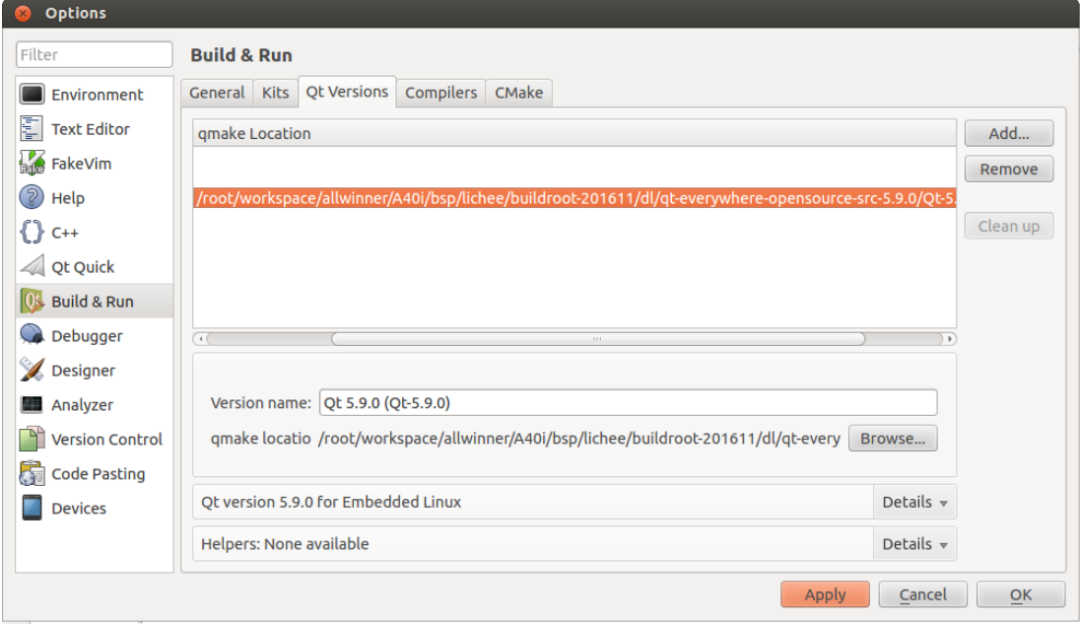
Version name 輸入 Qt 5.4.1-A40i。
然后點(diǎn)擊 Apply。
點(diǎn)擊 Qt Creator 的 Kits, 然后點(diǎn)擊 Add,出現(xiàn)配置部分。
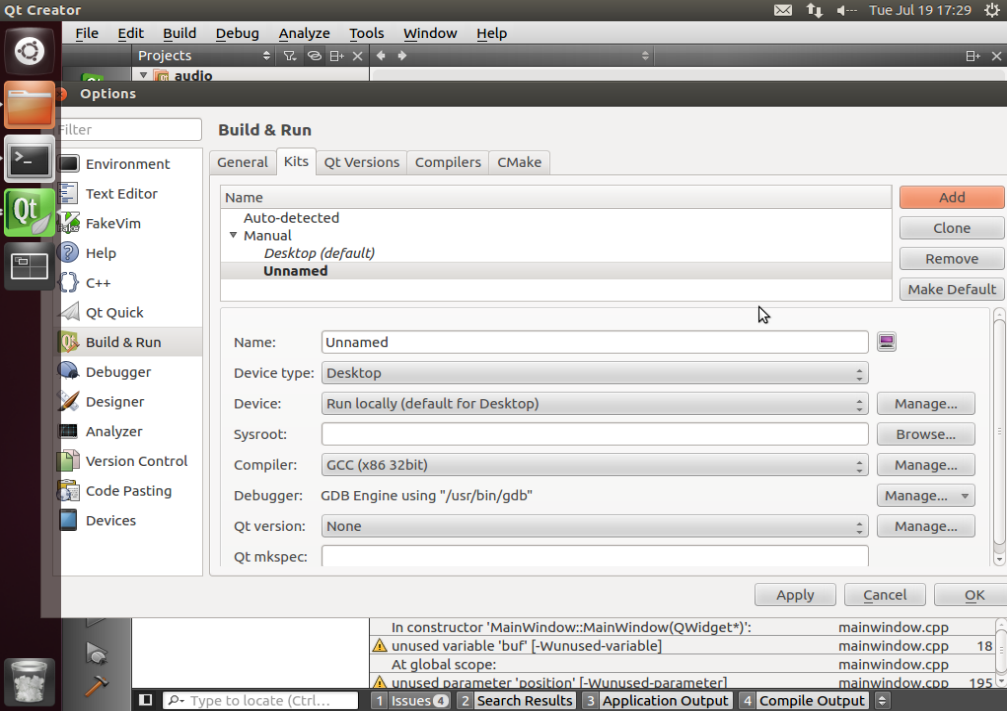
Name 輸入 Kits-A40i。
Compiler 選擇 GCC-A40i。
Qt version 選擇 Qt 5.4.1-A40i。
Sysroot:
/root/workspace/allwinner/A40i/bsp/lichee/out/sun8iw11p1/linux/common/buildroot/ho st/usr/arm-buildroot-linux-gnueabihf/sysroot
Compiler:GCC-A40i
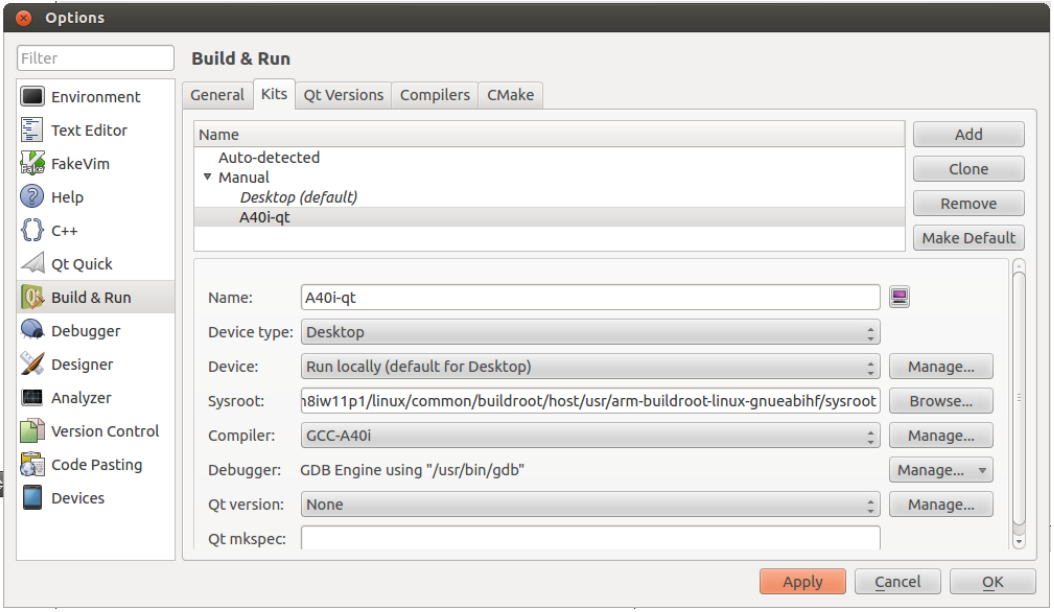
然后點(diǎn)擊 Apply 及 OK。
二、應(yīng)用程序編譯及運(yùn)行#01打開 backlight 測試程序
用戶資料\Linux\測試程序
\user_rootfs_apps.tar.gz\user_rootfs_apps\qt5\subs\backlight_gui
點(diǎn)擊 Qt Creator 的 File->Open File or Project,彈出窗口,
選擇 /root/backlight/backlight.pro
輸入項(xiàng)目名稱和項(xiàng)目路徑,如下圖:
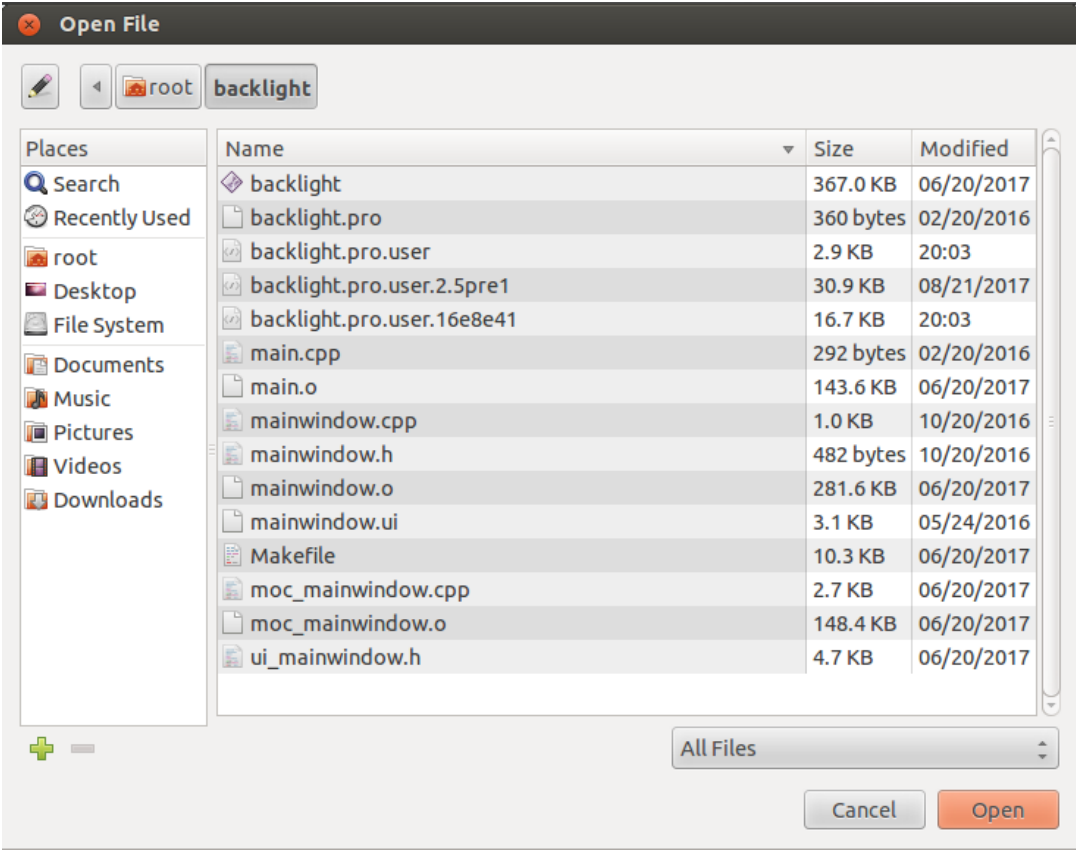
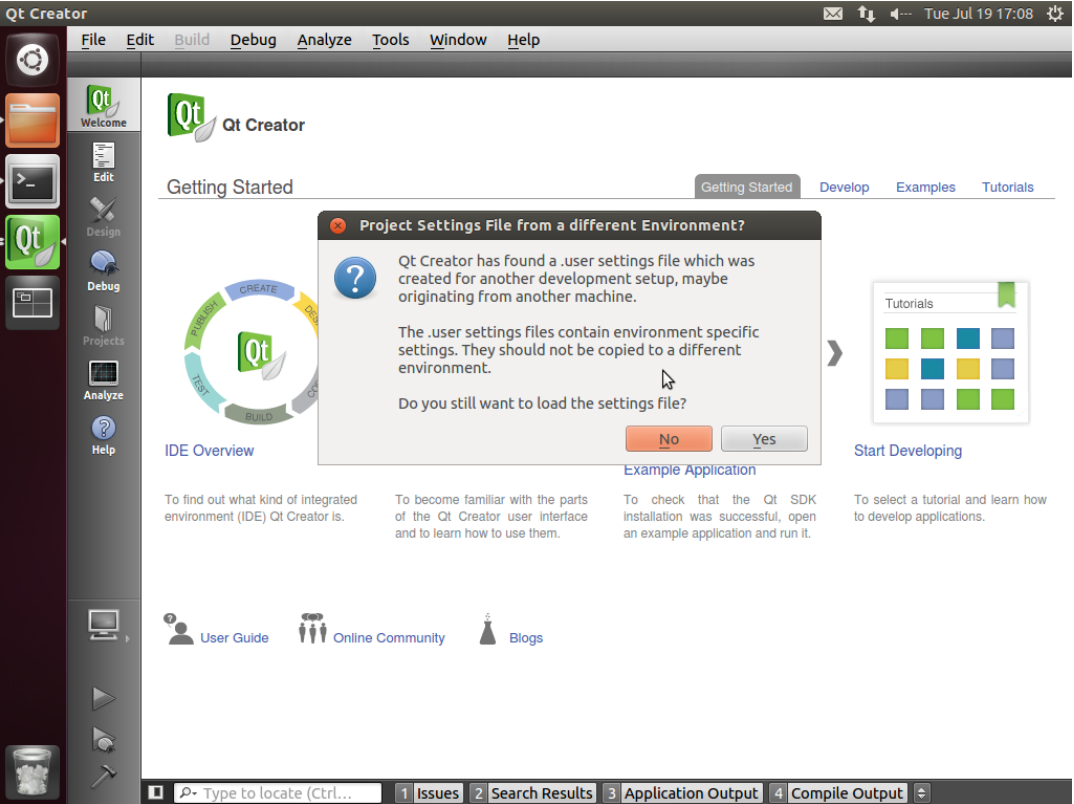
點(diǎn)擊 open。彈出是否保留原環(huán)境設(shè)置的窗口,選擇 no,如下:
彈出 Configure Project 窗口,如下:
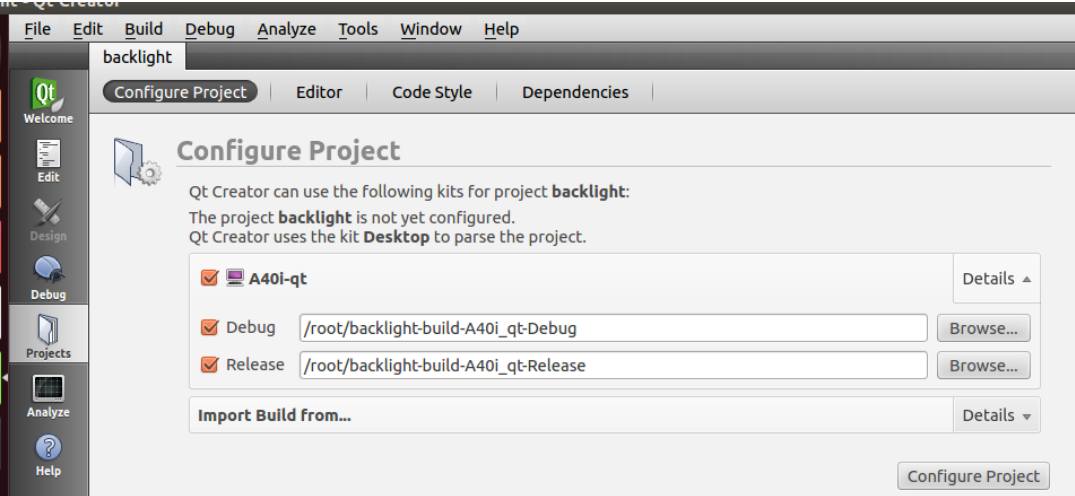
點(diǎn)擊 Configure Project。
打開項(xiàng)目后界面如下:
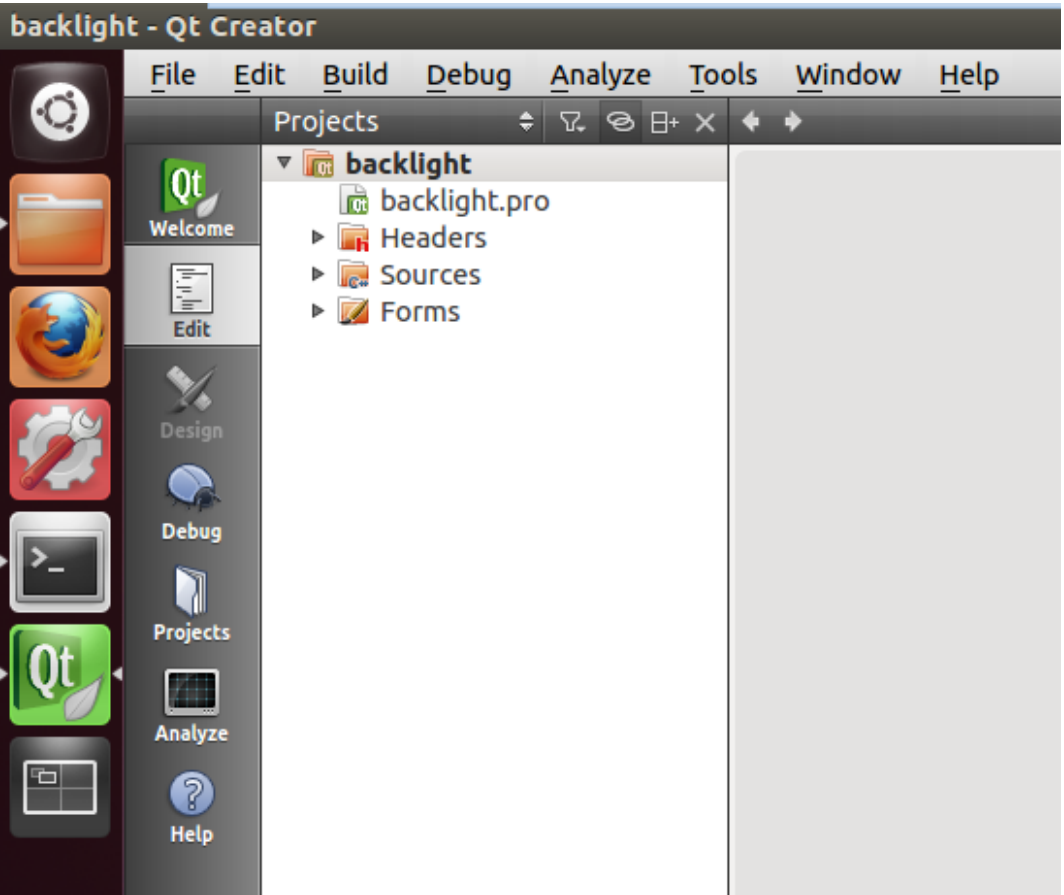
點(diǎn)擊 Build->Clean All 進(jìn)行清空。
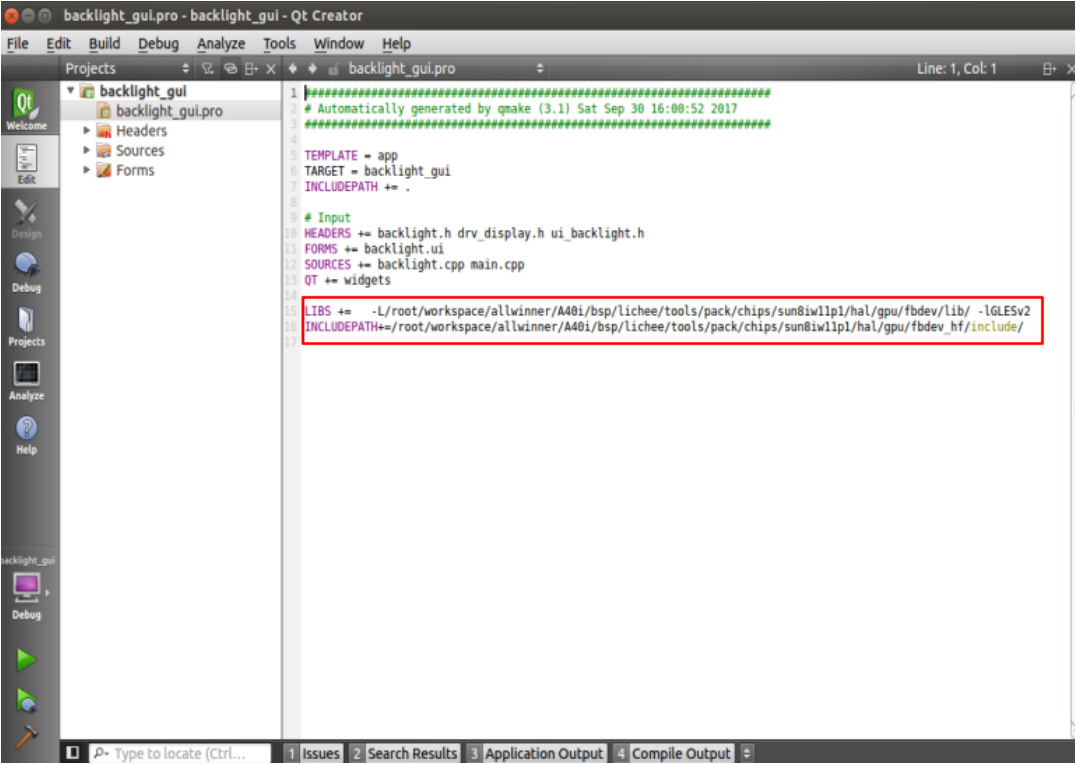
點(diǎn)擊左側(cè) projects backlight.pro 打開工程文件添加 GLESv2 動(dòng)態(tài)庫
#include
INCLUDEPATH+=/root/workspace/allwinner/A40i/bsp/lichee/tools/pack/chips/sun8iw 11p1/hal/gpu/fbdev_hf/include/
#libs
LIBS += -
L/root/workspace/allwinner/A40i/bsp/lichee/tools/pack/chips/sun8iw11p1/hal/gpu/fbde v_hf/lib/ -lGLESv2
如下圖:
點(diǎn)擊左側(cè) Projects,添加 Qt 所用版本,選擇編譯文件生成路徑。
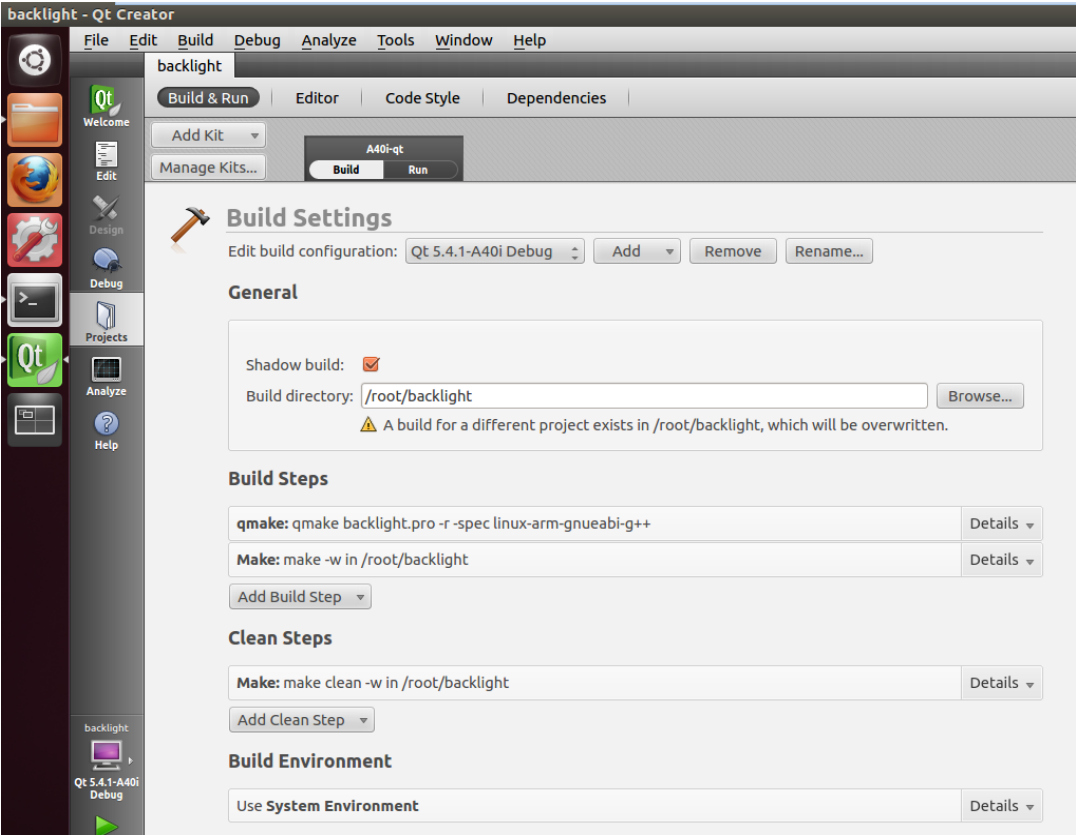
然后點(diǎn)擊 Build->Build All 進(jìn)行編譯。
左側(cè) Build 進(jìn)度條走完之后代表編譯完成,此時(shí)在路徑/root/backlight/目錄下會(huì)看到新生成的二進(jìn)制文件 backlight,如下:
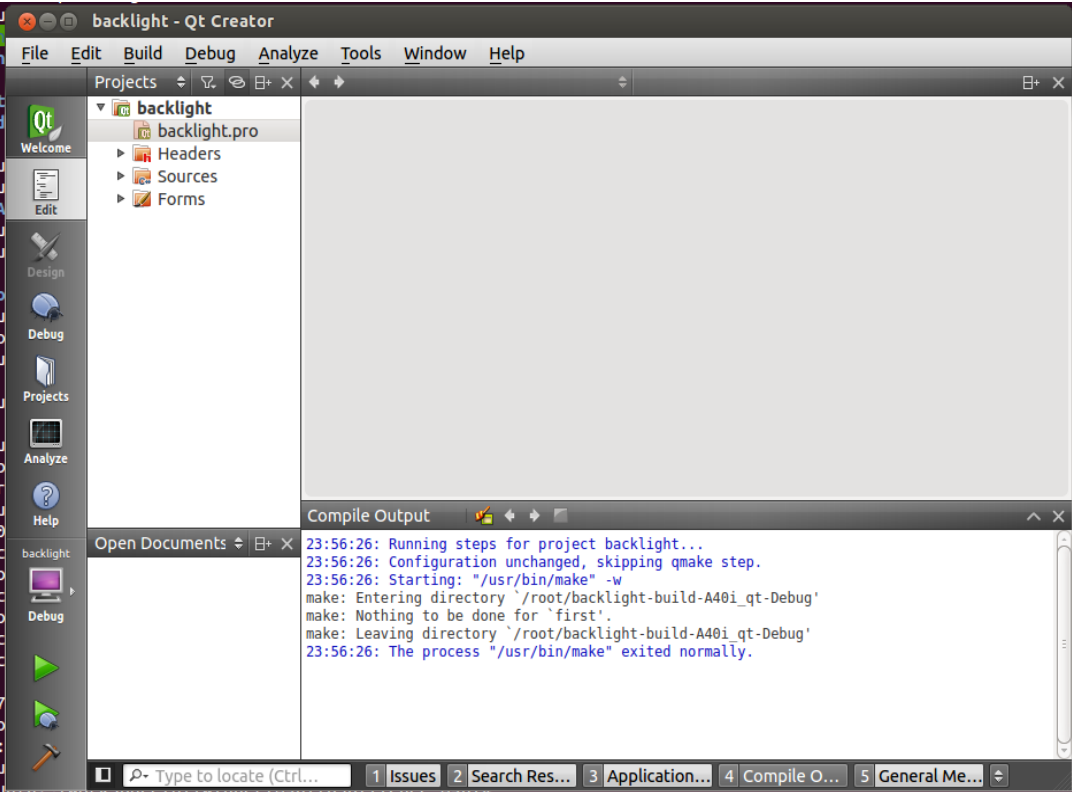

#02測試應(yīng)用
將測試程序拷貝到OKA40i-C開發(fā)板中,進(jìn)入對應(yīng)目錄,執(zhí)行測試程序。驗(yàn)證測試程序的正確與否。
#03GDB 使用 
使用 01 所示方法編譯 Qt 程序
/root/workspace/qt5/Qt-5.9.0/examples/touch/fingerpaint
/root/workspace/qt5/Qt-5.9.0/examples/touch/fingerpaint-build-Qt_5_9_0_Qt_5_9_0- Debug/ fingerpaint
復(fù)制到
/root/workspace/qt5/Qt-5.9.0/examples/touch/fingerpaint
把 fingerpaint 復(fù)制到開發(fā)板的/extp/fingerpaint 路徑(注:可以使用 ftp、ssh 或者 sd 卡)
cd /extp/fingerpaint/
#gdb fingerpaint
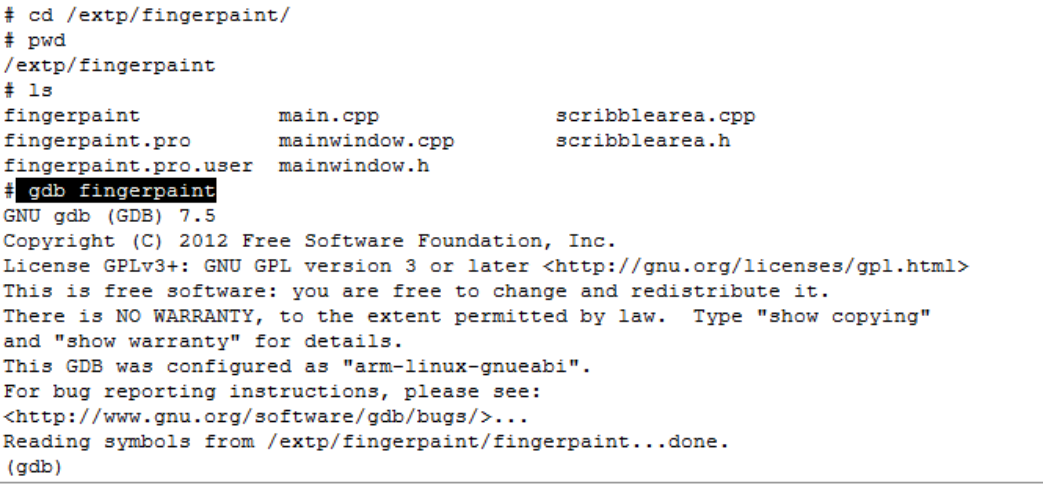
dir /extp/fingerpaint 設(shè)置源碼搜索路徑
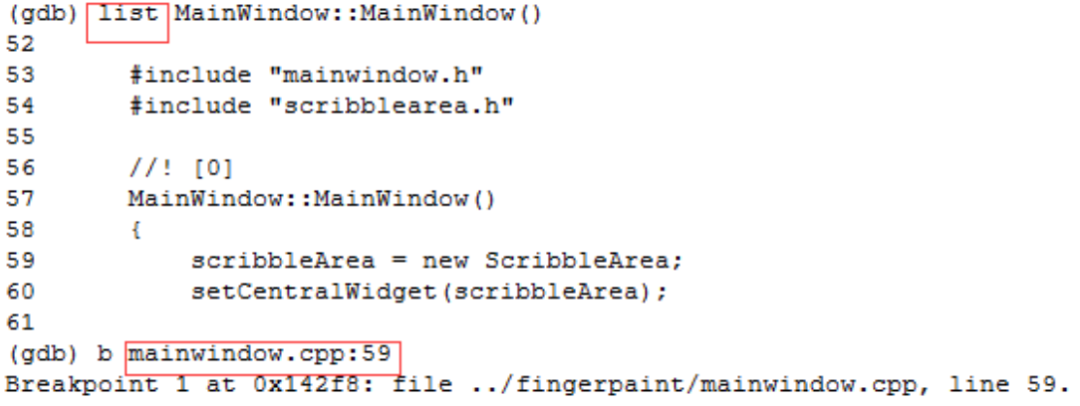
list 查看代碼
break 59 設(shè)置斷電到 59 行
run 執(zhí)行代碼,停到 59 行
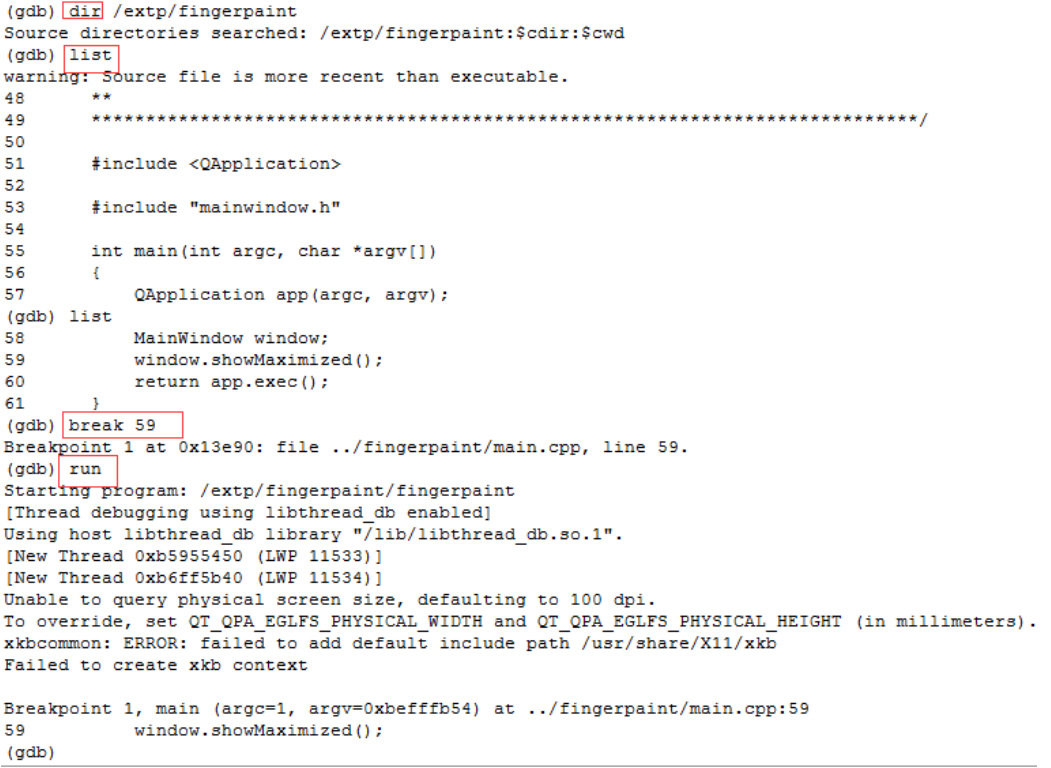
c 從斷點(diǎn)繼續(xù)執(zhí)行代碼

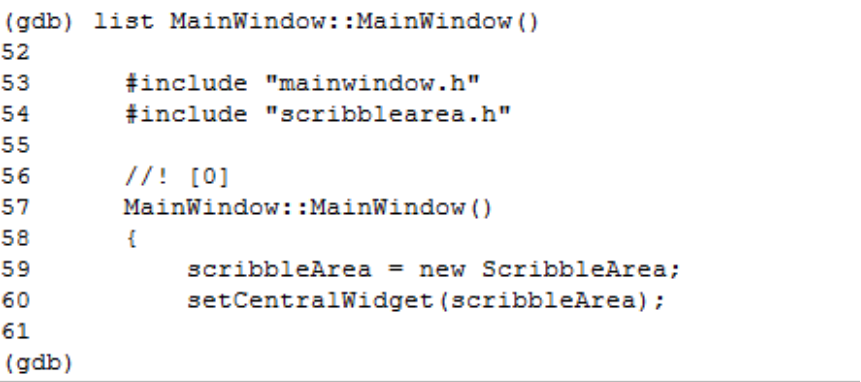
List MainWindow::MainWindow()
顯示
MainWindow::MainWindow 函數(shù)的內(nèi)容
(gdb) b mainwindow.cpp:59
Breakpoint 1 at 0x142f8: file ../fingerpaint/mainwindow.cpp, line 59.
(gdb)
設(shè)置 mainwindow.cpp 的 59 行斷點(diǎn)
Quit 退出 GDB。
小結(jié):
本文主要適用于飛凌 OKA40i-C開發(fā)板 Linux3.10 操作系統(tǒng),其它開發(fā)板也可以參考使用,但是不同開發(fā)板之間可能會(huì)存在差異,需用戶自行修改以適應(yīng)自己的使用。
-
嵌入式
+關(guān)注
關(guān)注
5082文章
19104瀏覽量
304816
發(fā)布評論請先 登錄
相關(guān)推薦
嵌入式QT常見開發(fā)方式有哪些?
QT5+OpenCV4搭建應(yīng)用開發(fā)環(huán)境
米爾NXP i.MX 93開發(fā)板的Qt開發(fā)指南
米爾NXP i.MX 93開發(fā)板的Qt開發(fā)指南

在嵌入式系統(tǒng)中集成Rust和Qt的實(shí)踐
嵌入式學(xué)習(xí)-飛凌嵌入式ElfBoard ELF 1板卡-在ELF 1開發(fā)環(huán)境中使用QT Creator進(jìn)行遠(yuǎn)程調(diào)試
飛凌嵌入式ElfBoard ELF 1板卡-在ELF 1開發(fā)環(huán)境中使用QT Creator進(jìn)行遠(yuǎn)程調(diào)試
在ELF 1開發(fā)環(huán)境中使用Qt Creator進(jìn)行遠(yuǎn)程調(diào)試

飛凌嵌入式ElfBoard ELF 1板卡-卸載ubuntu上安裝的QT Creator的方法
FPGA板子可以跑Qt應(yīng)用程序嗎
Qt For OpenHarmony圖形化的進(jìn)展突破

QT串口通信的簡單使用


 A40i應(yīng)用筆記 | Qt應(yīng)用程序開發(fā)工具 Qt Creator的安裝及使用


評論