 HarmonyOS開發實例:【分布式郵件】
概述
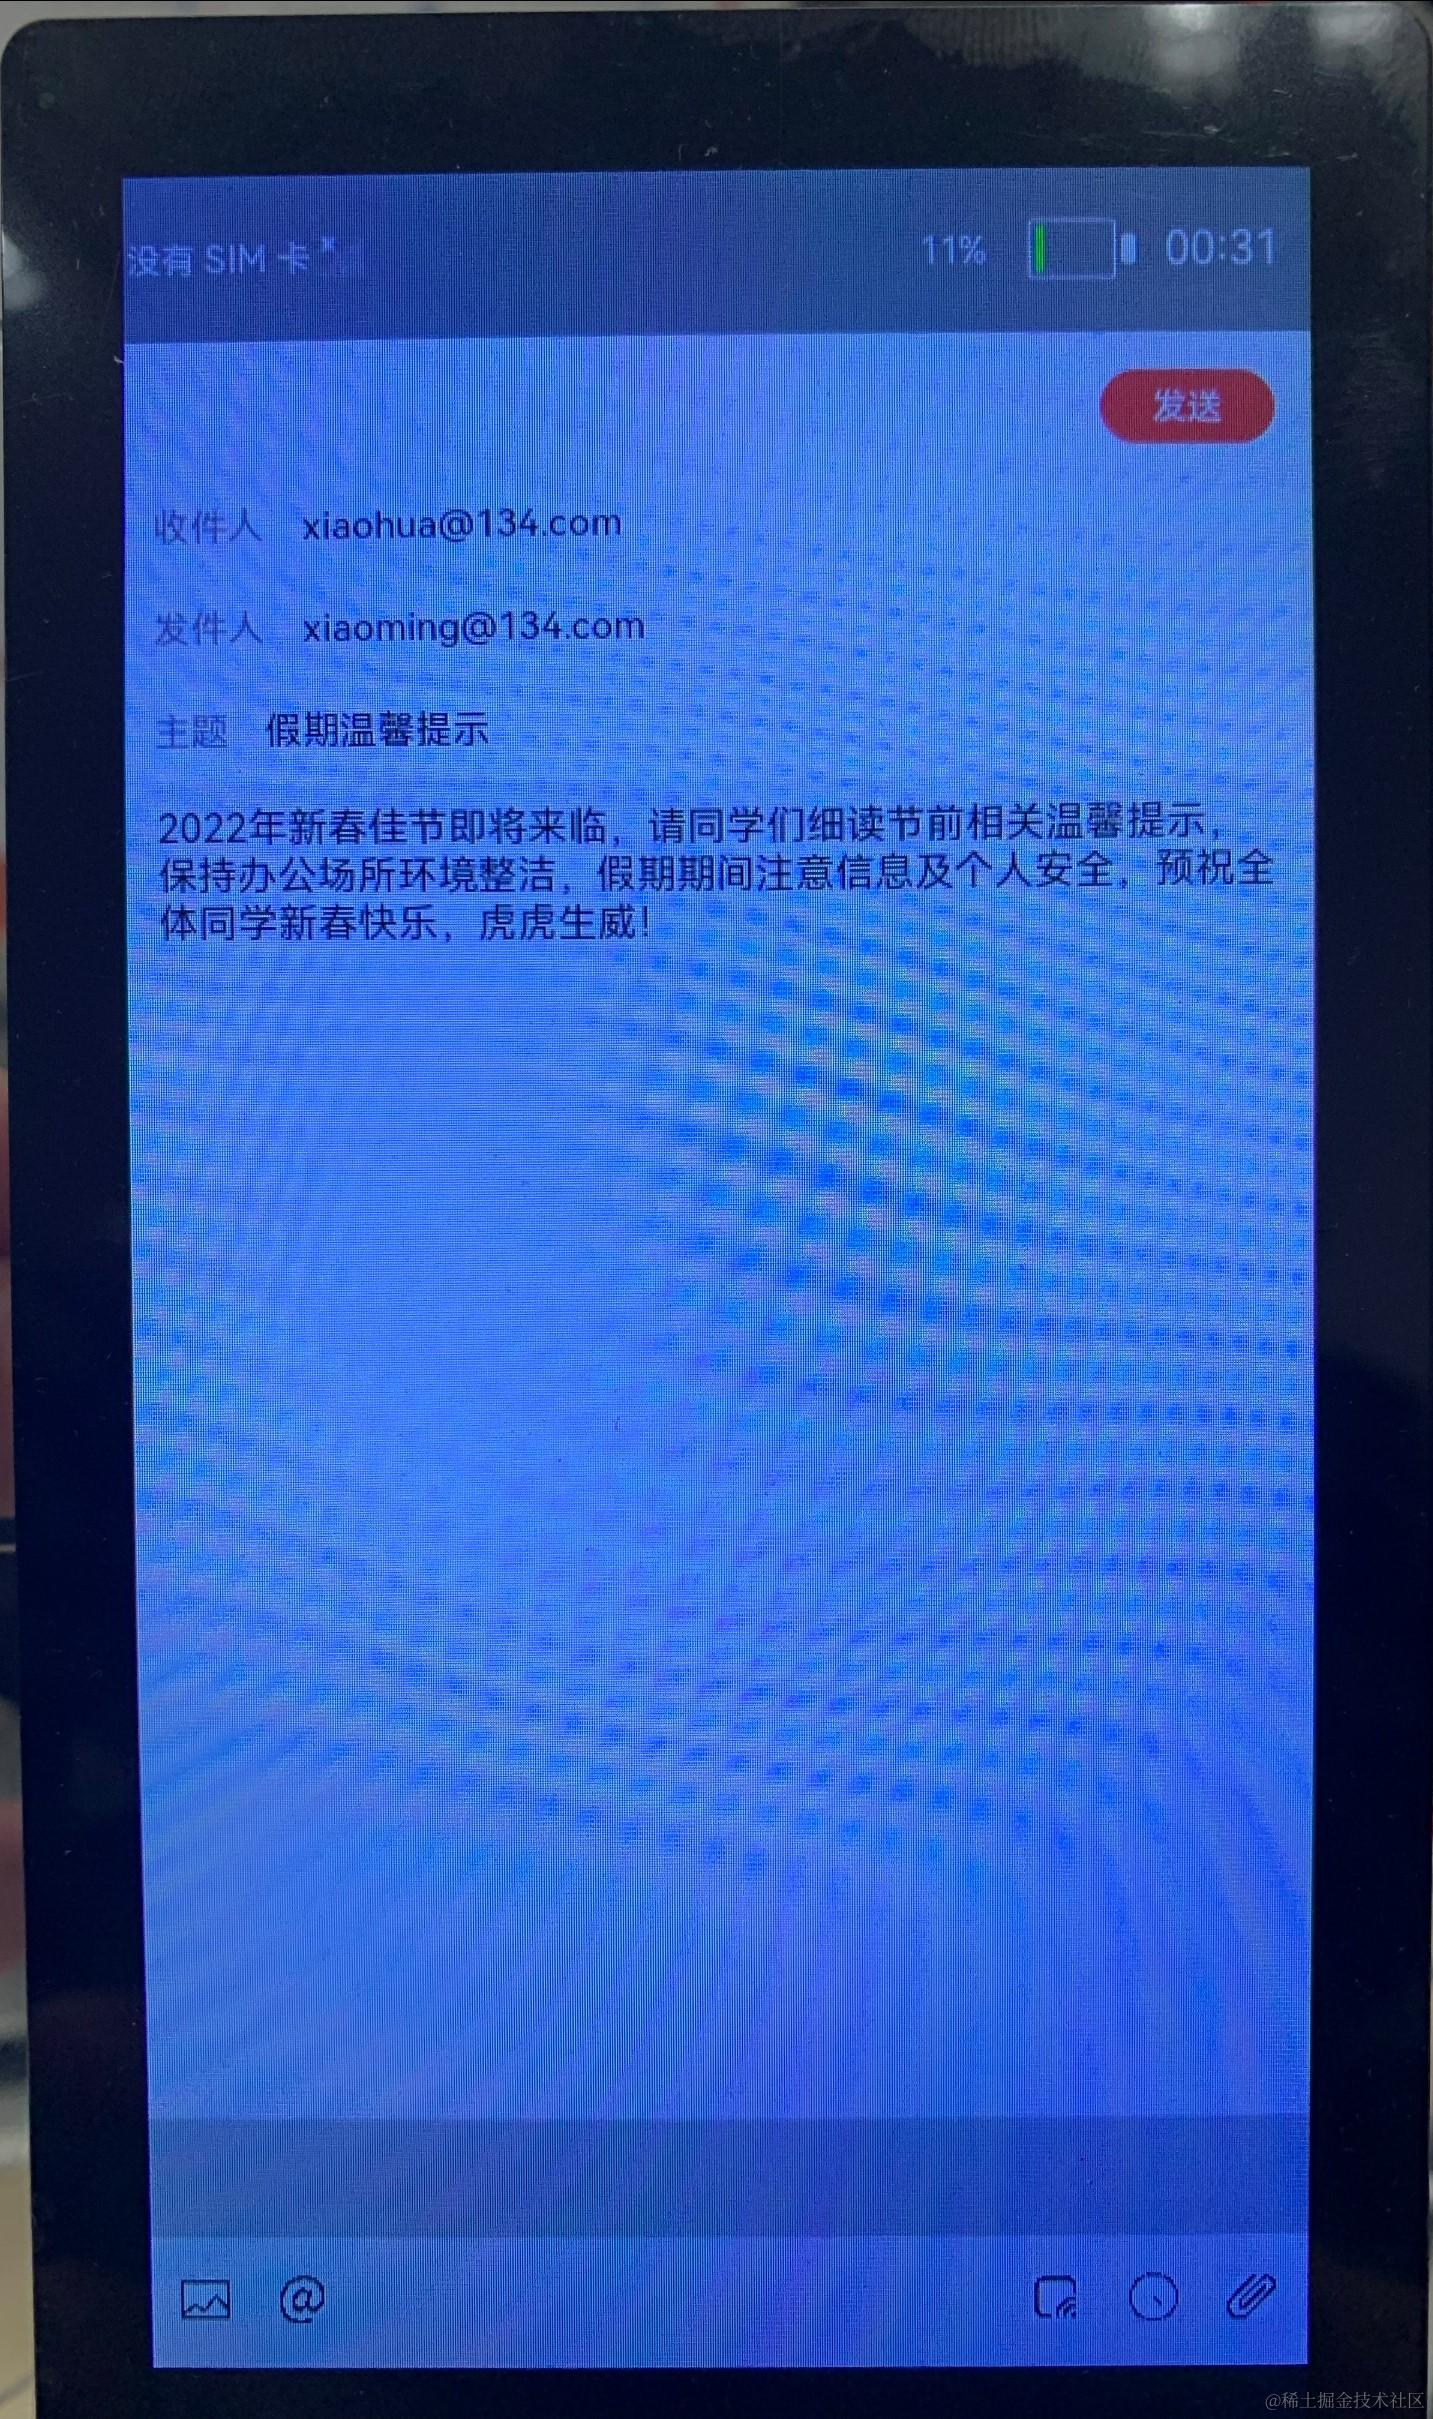
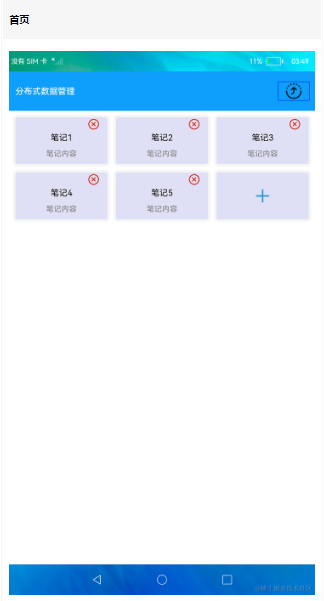
基于TS擴展的聲明式開發范式編程語言編寫的一個分布式郵件系統,可以由一臺設備拉起另一臺設備,每次改動郵件內容,都會同步更新兩臺設備的信息。效果圖如下:

搭建OpenHarmony開發環境
完成本篇Codelab我們首先要完成開發環境的搭建,本示例以Hi3516DV300開發板為例,參照以下步驟進行:
- [獲取OpenHarmony系統版本]:標準系統解決方案(二進制)。
以3.0版本為例: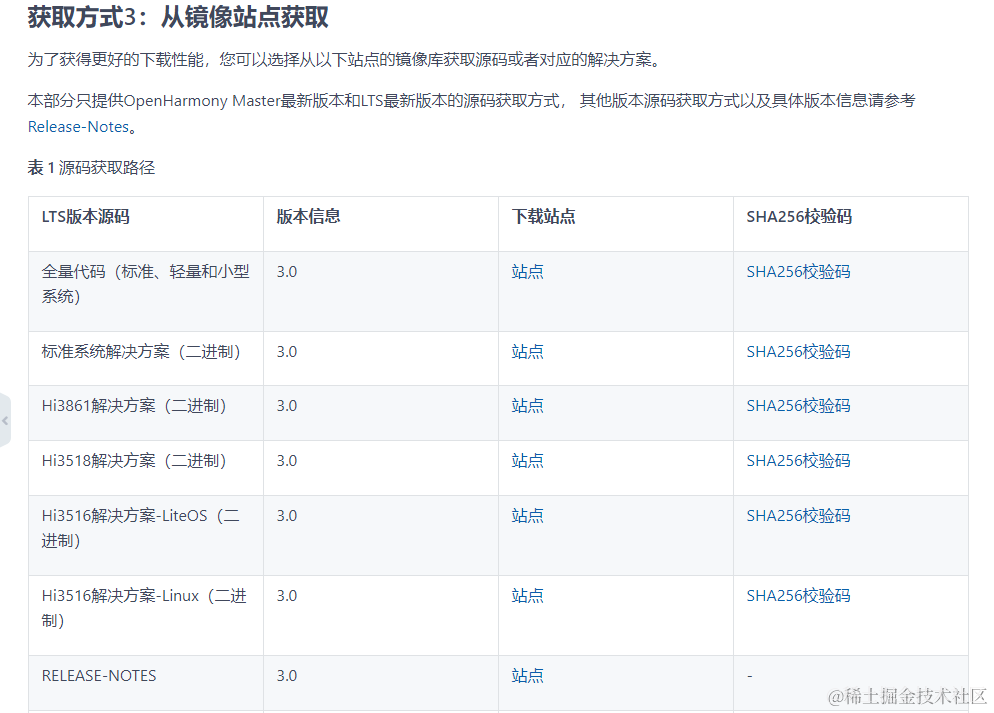
- 搭建燒錄環境。
- 搭建開發環境。
- 開始前請參考[工具準備],完成DevEco Studio的安裝和開發環境配置。
- 開發環境配置完成后,請參考[使用工程向導]創建工程(模板選擇“Empty Ability”),選擇JS或者eTS語言開發。
- 工程創建完成后,選擇使用[真機進行調測]。
2.鴻蒙HarmonyOS與OpenHarmony技術知識籽料+mau123789是v直接拿
分布式組網
本章節以系統自帶的音樂播放器為例,介紹如何完成兩臺設備的分布式組網。
保證開發板A、B上電開機狀態,網線兩端分別連接開發板A、B的網口,將TYPE-C轉USB線先連接A,使用hdc_std.exe,在命令行輸入hdc_std shell ifconfig eth0 192.168.3.125,設置成功后,將TYPE-C轉USB線連接B,在命令行輸入hdc_std shell ifconfig eth0 192.168.3.126即可。
將設備A,B設置為互相信任的設備。
- 找到系統應用“音樂”。

- 設備A打開音樂,點擊左下角流轉按鈕,彈出列表框,在列表中會展示遠端設備的id。
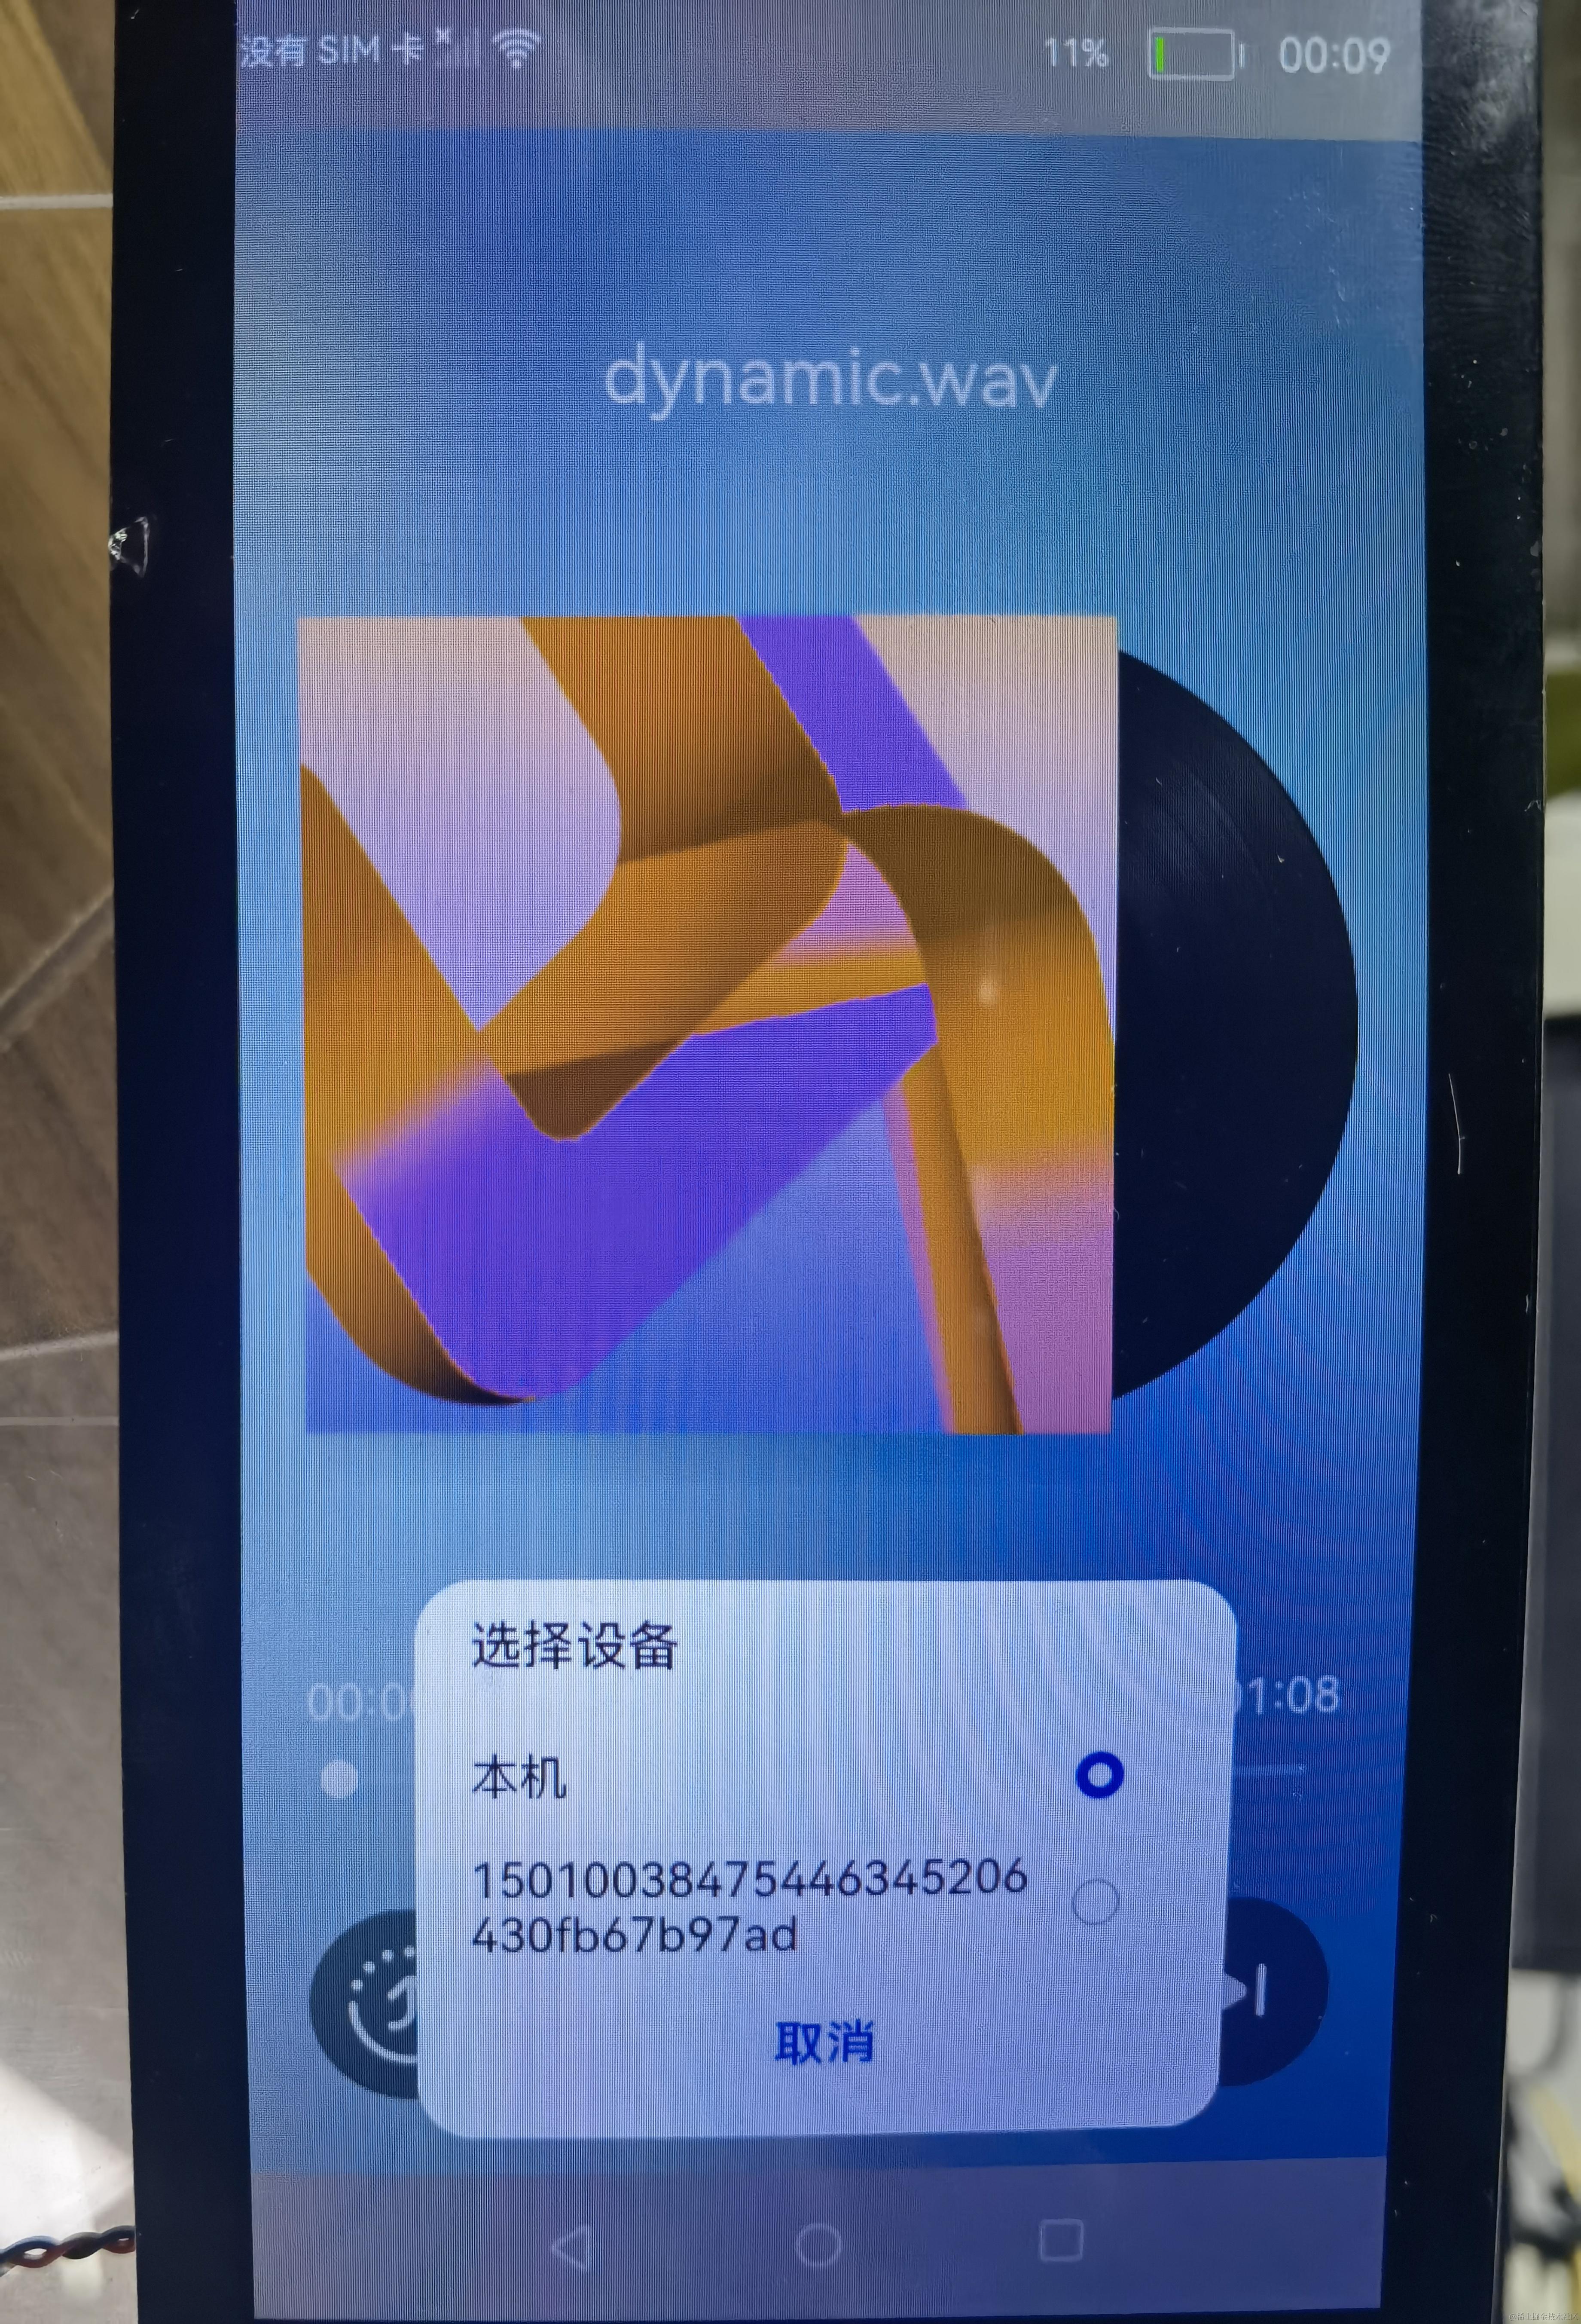
- 選擇遠端設備B的id,另一臺開發板(設備B)會彈出驗證的選項框。
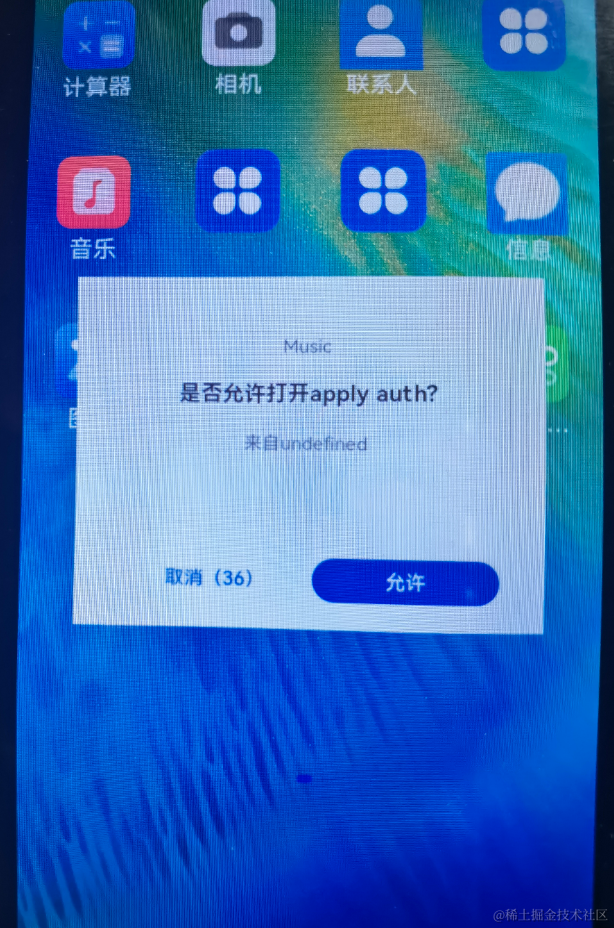
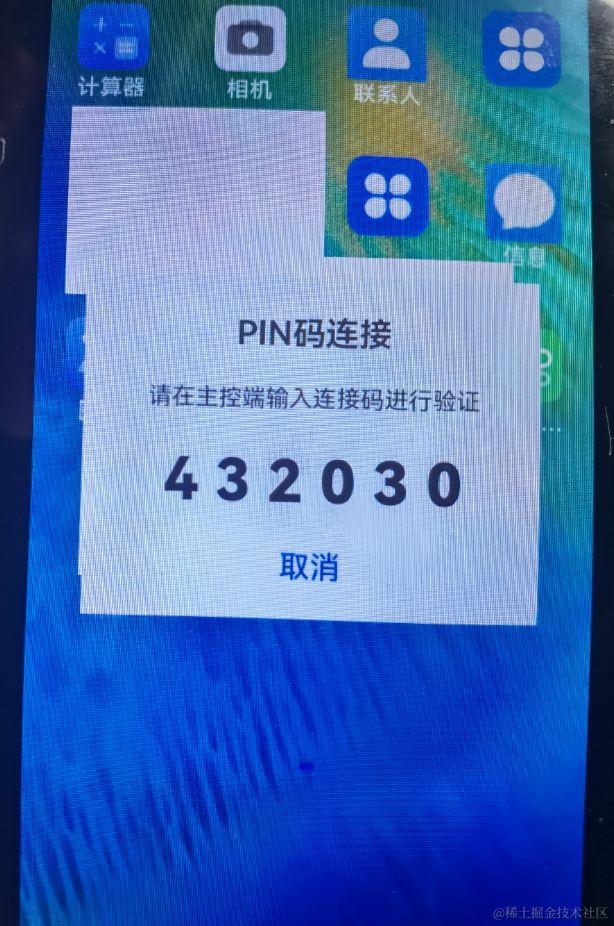
- 設備B點擊允許,設備B將會彈出隨機PIN碼,將設備B的PIN碼輸入到設備A的PIN碼填入框中。
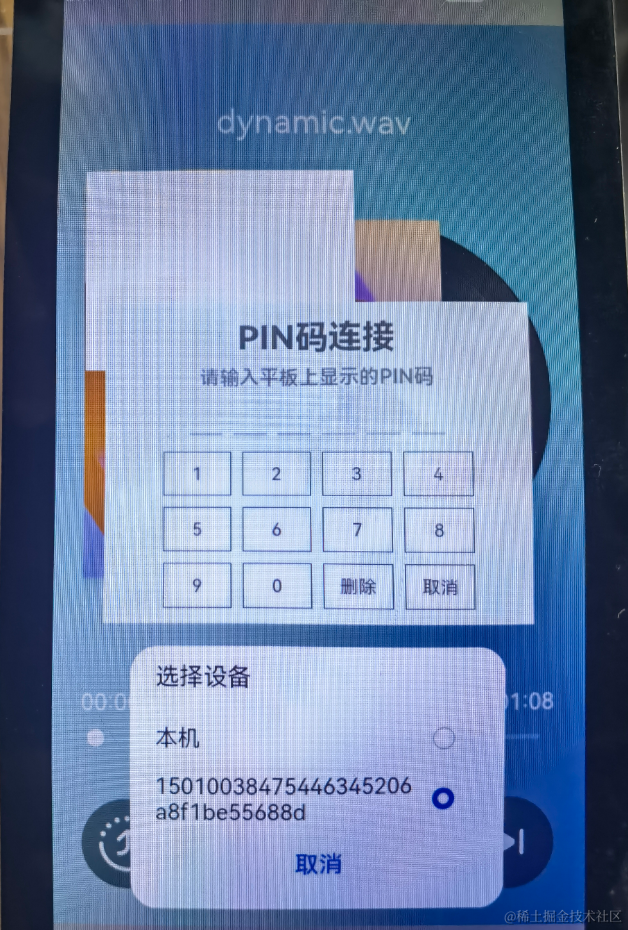
配網完畢。
代碼結構解讀
本篇Codelab只對核心代碼進行講解,首先來介紹下整個工程的代碼結構:

- MainAbility:存放應用主頁面。
- pages/index.ets:應用主頁面。
- model:存放獲取組網內的設備列表相關文件。
- RemoteDeviceModel.ets:獲取組網內的設備列表。
- ServiceAbility:存放ServiceAbility相關文件。
- service.ts:service服務,用于跨設備連接后通訊。
- resources :存放工程使用到的資源文件。
- resources/rawfile:存放工程中使用的圖片資源文件。
- config.json:配置文件。
實現頁面布局和樣式
在本章節中,您將學會如何制作一個簡單的郵件界面。
實現主頁面布局和樣式。
在MainAbility/pages/index.ets 主界面文件中布局整個郵件頁面,包括收件人、發件人、主題、內容等等,代碼如下:
@Entry @Component struct Index { private imageList: any[]= [] @Provide dataList: string[]= ['xiaohua@128.com','xiaoming@128.com','假期溫馨提示','2022年新春佳節即將來臨,請同學們細讀節前相關溫馨提示,保持辦公場所環境整潔,假期期間注意信息及個人安全,預祝全體同學新春快樂,虎虎生威!'] dialogController: CustomDialogController = new CustomDialogController({ builder: CustomDialogExample({ cancel: this.onCancel, confirm: this.onAccept }), cancel: this.existApp, autoCancel: true }) build() { Flex({ direction: FlexDirection.Column, justifyContent: FlexAlign.SpaceBetween }) { Column() { Row() { Flex({ direction: FlexDirection.Row, justifyContent: FlexAlign.SpaceBetween, alignItems: ItemAlign.Center }) { Text('?').fontSize(20).fontColor('#000000') Button('發送').width(70).fontSize(14).fontColor('#ffffff').backgroundColor('#fc4646') .onClick(() = > { RegisterDeviceListCallback(); this.dialogController.open(); }) } .height(50) .padding({ top: 10, right: 15, bottom: 10, left: 15 }) } Column() { Flex({ direction: FlexDirection.Row, alignItems: ItemAlign.Center }) { Text('收件人').width(70).height(30).fontSize(15).fontColor('#969393') Text(this.dataList[0]).width('100%').height(30).fontSize(15).fontColor('#000000') } .padding({ top: 5, right: 15, bottom: 5, left: 15 }) Text().width('100%').height(1).backgroundColor('#f8f6f6') Flex({ direction: FlexDirection.Row, alignItems: ItemAlign.Center }) { Text('發件人').width(70).height(30).fontSize(15).fontColor('#969393') Text(this.dataList[1]).width('100%').height(30).fontSize(15).fontColor('#000000') } .padding({ top: 5, right: 15, bottom: 5, left: 15 }) Text().width('100%').height(1).backgroundColor('#f8f6f6') Flex({ direction: FlexDirection.Row, alignItems: ItemAlign.Center }) { Text('主題').width(50).height(30).fontSize(15).fontColor('#969393') Text(this.dataList[2]).width('100%').height(30).fontSize(15).fontColor('#000000') } .padding({ top: 5, right: 15, bottom: 5, left: 15 }) Text().width('100%').height(1).backgroundColor('#f8f6f6') TextArea({ placeholder: 'input your word', text: this.dataList[3]}).height('100%').width('100%') .onChange((value: string) = > { this.dataList[3] = value if(mRemote){ sendMessageToRemoteService(JSON.stringify(this.dataList)); } onDisconnectService(); }) } } Column() { Flex({ direction: FlexDirection.Row }) { List() { ForEach(this.imageList, (item) = > { ListItem() { Image(item).width(50).height(50).objectFit(ImageFit.Contain) }.editable(true) }, item = > item) } .listDirection(Axis.Horizontal) // 排列方向 .divider({ strokeWidth: 2, color: 0xFFFFFF, startMargin: 20, endMargin: 20 }) // 每行之間的分界線 }.width('100%').height(50).backgroundColor('#ccc') Text().width('100%').height(1).backgroundColor('#f8f6f6') Flex({ direction: FlexDirection.Row, justifyContent: FlexAlign.SpaceBetween }) { Flex({ direction: FlexDirection.Row, alignItems: ItemAlign.Center }) { Button({ stateEffect: false }) { Image($rawfile('icon_photo.png')).width(20).height(20) }.backgroundColor('#ffffff').margin({ right: 20 }) .onClick(() = > { RegisterDeviceListCallback(); this.dialogController.open(); }) Button({ stateEffect: false }) { Image($rawfile('icon_at.png')).width(20).height(20) }.backgroundColor('#ffffff') } Flex({ direction: FlexDirection.Row, justifyContent: FlexAlign.End }) { Button({ stateEffect: false }) { Image($rawfile('icon_distributed.png')).width(20).height(20) }.backgroundColor('#ffffff') .onClick(() = > { this.getDeviceList() }) Button({ stateEffect: false }) { Image($rawfile('icon_timer.png')).width(20).height(20) }.backgroundColor('#ffffff').margin({ left: 10, right: 10 }) Button({ stateEffect: false }) { Image($rawfile('icon_enclosure.png')).width(20).height(20) }.backgroundColor('#ffffff') } }.height(50).padding(15) } }.width('100%').padding({ top: 5, bottom: 15 }) } }在入口組件的生命周期函數aboutToAppear()中調用訂閱事件。如果Ability是被其他設備拉起的,在aboutToAppear()中調用featureAbility.getWant(),可通過want中的參數重新初始化dataList數組,入口組件的生命周期函數aboutToAppear()代碼如下:
async aboutToAppear() {
    this.subscribeEvent();
    let self = this;
    // 當被拉起時,通過want傳遞的參數同步對端界面UI
    await featureAbility.getWant((error, want) = > {
      var status = want.parameters;
      if (want.parameters.dataList) {
        self.dataList = JSON.parse(status.dataList)
        // 遠端被拉起后,連接對端的service
        if (want.parameters.remoteDeviceId) {
          let remoteDeviceId = want.parameters.remoteDeviceId
          onConnectRemoteService(remoteDeviceId)
        }
      }
    });
  }
給"發送"按鈕添加點擊事件。
點擊"發送"按鈕,調用拉起彈窗函數,彈窗中顯示可拉起的同局域網下的設備,代碼如下:Button('發送').width(70).fontSize(14).fontColor('#ffffff').backgroundColor('#fc4646') .onClick(() = > { RegisterDeviceListCallback(); this.dialogController.open(); })給內容區域Textarea添加onChange事件。
內容區域文字變化會調用onChange()方法,每一次的變化都會調用sendMessageToRemoteService()方法去同步另一個設備的數據。其中onChange()和sendMessageToRemoteService()方法代碼如下:TextArea({ placeholder: 'input your word', text: this.dataList[3]}).height('100%').width('100%') .onChange((value: string) = > { this.dataList[3] = value if(mRemote){ sendMessageToRemoteService(JSON.stringify(this.dataList)); } onDisconnectService(); })async function sendMessageToRemoteService(dataList) { if (mRemote == null) { prompt.showToast({ message: "mRemote is null" }); return; } let option = new rpc.MessageOption(); let data = new rpc.MessageParcel(); let reply = new rpc.MessageParcel(); data.writeStringArray(JSON.parse(dataList)); prompt.showToast({ message: "sendMessageToRemoteService" + dataList, duration: 3000 }); await mRemote.sendRequest(1, data, reply, option); let msg = reply.readInt(); }
拉起遠端FA及連接遠端Service服務
在本章節中,您將學會如何拉起在同一組網內的設備上的FA,并且連接遠端Service服務。
調用featureAbility.startAbility()方法,拉起遠端FA,并同步界面UI。
點擊"分布式拉起"按鈕,調用RegisterDeviceListCallback()發現設備列表,并彈出設備列表選擇框CustomDialogExample,選擇設備后拉起遠端FA。CustomDialogExample()代碼如下:// 設備列表彈出框 @CustomDialog struct CustomDialogExample { @State editFlag: boolean = false @Consume imageIndexForPosition : number[] @Consume pictureList: string[] controller: CustomDialogController cancel: () = > void confirm: () = > void build() { Column() { List({ space: 10, initialIndex: 0 }) { ForEach(DeviceIdList, (item) = > { ListItem() { Row() { Text(item) .width('87%').height(50).fontSize(10) .textAlign(TextAlign.Center).borderRadius(10).backgroundColor(0xFFFFFF) .onClick(() = > { onStartRemoteAbility(item,this.imageIndexForPosition,this.pictureList); this.controller.close(); }) Radio({value:item}) .onChange((isChecked) = > { onStartRemoteAbility(item,this.imageIndexForPosition,this.pictureList); this.controller.close(); }).checked(false) } }.editable(this.editFlag) }, item = > item) } }.width('100%').height(200).backgroundColor(0xDCDCDC).padding({ top: 5 }) } }點擊Text組件或者Radio組件都會調用onStartRemoteAbility()方法拉起遠端FA,onStartRemoteAbility()代碼如下:
function onStartRemoteAbility(deviceId,imageIndexForPosition,pictureList: string[]) {
  AuthDevice(deviceId);
  let numDevices = remoteDeviceModel.deviceList.length;
  if (numDevices === 0) {
    prompt.showToast({
      message: "onStartRemoteAbility no device found"
    });
    return;
  }

  var params = {
    imageIndexForPosition: JSON.stringify(imageIndexForPosition),
    pictureList : JSON.stringify(pictureList),
    remoteDeviceId : localDeviceId
  }
  var wantValue = {
    bundleName: 'com.huawei.cookbook',
    abilityName: 'com.example.openharmonypicturegame.MainAbility',
    deviceId: deviceId,
    parameters: params
  };
  featureAbility.startAbility({
    want: wantValue
  }).then((data) = > {
    // 拉起遠端后,連接遠端service
    onConnectRemoteService(deviceId)
  });
}
調用featureAbility.connectAbility方法,連接遠端Service服務,連接成功后返回remote對象。
在featureAbility.startAbility()成功的回調中調用onConnectRemoteService()方法,onConnectRemoteService()方法代碼如下:// 連接遠端Service async function onConnectRemoteService(deviceId) { // 連接成功的回調 async function onConnectCallback(element, remote) { mRemote = remote; } // Service異常死亡的回調 function onDisconnectCallback(element) { } // 連接失敗的回調 function onFailedCallback(code) { prompt.showToast({ message: "onConnectRemoteService onFailed: " + code }); } let numDevices = remoteDeviceModel.deviceList.length; if (numDevices === 0) { prompt.showToast({ message: "onConnectRemoteService no device found" }); return; } connectedAbility = await featureAbility.connectAbility( { deviceId: deviceId, bundleName: "com.huawei.cookbook", abilityName: "com.example.openharmonypicturegame.ServiceAbility", }, { onConnect: onConnectCallback, onDisconnect: onDisconnectCallback, onFailed: onFailedCallback, }, ); }在配置文件config.json需要設置ServiceAbility的屬性visible為true,代碼如下:
"abilities": [ ... { "visible": true, "srcPath": "ServiceAbility", "name": ".ServiceAbility", "icon": "$media:icon", "srcLanguage": "ets", "description": "$string:description_serviceability", "type": "service" } ],同時,Service側也需要在onConnect()時返回IRemoteObject,從而定義與Service進行通信的接口。onConnect()需要返回一個IRemoteObject對象,OpenHarmony提供了IRemoteObject的默認實現,通過繼承rpc.RemoteObject來創建自定義的實現類。
Service側把自身的實例返回給調用側的代碼如下:
import rpc from "@ohos.rpc";
import commonEvent from '@ohos.commonEvent';
class FirstServiceAbilityStub extends rpc.RemoteObject{
    constructor(des) {
        if (typeof des === 'string') {
            super(des);
        } else {
            return null;
        }
    }
    onRemoteRequest(code, data, reply, option) {
        if (code === 1) {
            let arr = data.readIntArray();
            reply.writeInt(100);
            // 發布公共事件相關流程
	    ...


        } else {
        }
        return true;
    }
}

export default {
    // 創建Service的時候調用,用于Service的初始化
    onStart() {
    },
    // 在Service銷毀時調用。Service應通過實現此方法來清理任何資源,如關閉線程、注冊的偵聽器等。
    onStop() {
    },
    // 在Ability和Service連接時調用,該方法返回IRemoteObject對象,開發者可以在該回調函數中生成對應Service的IPC通信通道
    onConnect(want) {
        try {
            let value = JSON.stringify(want);
        } catch(error) {
        }
        return new FirstServiceAbilityStub("[pictureGame] first ts service stub");
    },
    // 在Ability與綁定的Service斷開連接時調用
    onDisconnect(want) {
        let value = JSON.stringify(want);
    },
    // 在Service創建完成之后調用,該方法在客戶端每次啟動該Service時都會調用
    onCommand(want, startId) {
        let value = JSON.stringify(want);
    }
};
RPC跨設備通訊
在本章節中,您將學會在成功連接遠端Service服務的前提下,如何利用RPC進行跨設備通訊。
- 成功連接遠端Service服務的前提下,在正文部分增刪文字,都會完成一次跨設備通訊,假如在設備A端輸入文字,消息的傳遞是由設備A端的FA傳遞到設備B的Service服務,發送消息的方法sendMessageToRemoteService()代碼如下:
// 連接成功后發送消息 async function sendMessageToRemoteService(imageIndexForPosition) { if (mRemote == null) { prompt.showToast({ message: "mRemote is null" }); return; } let option = new rpc.MessageOption(); let data = new rpc.MessageParcel(); let reply = new rpc.MessageParcel(); data.writeIntArray(JSON.parse(imageIndexForPosition)); await mRemote.sendRequest(1, data, reply, option); let msg = reply.readInt(); } - 在B端的Service接收消息,當A端成功連接B端Service服務后,在A端會返回一個remote對象,當A端remote對象調用sendRequest()方法后,在B端的Service中的onRemoteRequest()方法中會接收到發送的消息,其中繼承rpc.RemoteObject的類和onRemoteRequest()方法代碼如下:
class FirstServiceAbilityStub extends rpc.RemoteObject{
    constructor(des) {
        if (typeof des === 'string') {
            super(des);
        } else {
            return null;
        }
    }

    onRemoteRequest(code, data, reply, option) {
        if (code === 1) {
            // 從data中接收數據
            let arr = data.readIntArray();
            // 回復接收成功標識
            reply.writeInt(100);
            // 發布公共事件相關流程
           ...

        } else {
        }
        return true;
    }
}
FA訂閱公共事件
在九宮格組件PictureGrid的生命周期函數aboutToAppear()中,調用訂閱公共事件方法subscribeEvent(),用來訂閱"publish_moveImage"公共事件,subscribeEvent()代碼如下:
subscribeEvent(){
    let self = this;
    // 用于保存創建成功的訂閱者對象,后續使用其完成訂閱及退訂的動作
    var subscriber;
    // 訂閱者信息
    var subscribeInfo = {
      events: ["publish_moveImage"],
      priority: 100

    };

    // 設置有序公共事件的結果代碼回調
    function SetCodeCallBack(err) {
    }
    // 設置有序公共事件的結果數據回調
    function SetDataCallBack(err) {
    }
    // 完成本次有序公共事件處理回調
    function FinishCommonEventCallBack(err) {
    }
    // 訂閱公共事件回調
    function SubscribeCallBack(err, data) {
      let msgData = data.data;
      let code = data.code;
      // 設置有序公共事件的結果代碼
      subscriber.setCode(code, SetCodeCallBack);
      // 設置有序公共事件的結果數據
      subscriber.setData(msgData, SetDataCallBack);
      // 完成本次有序公共事件處理
      subscriber.finishCommonEvent(FinishCommonEventCallBack)
      // 處理接收到的數據data
      self.imageIndexForPosition = data.parameters.imageIndexForPosition;
      self.pictureList = [];
      self.imageIndexForPosition.forEach(value = > {
        if (value == 9) {
          self.pictureList.push("--")
        } else {
          self.pictureList.push(`picture_0` + value + `.png`)
        }
      });

      self.onFinish();
    }

    // 創建訂閱者回調
    function CreateSubscriberCallBack(err, data) {
      subscriber = data;
      // 訂閱公共事件
      commonEvent.subscribe(subscriber, SubscribeCallBack);
    }

    // 創建訂閱者
    commonEvent.createSubscriber(subscribeInfo, CreateSubscriberCallBack);
 }
在FA中訂閱到Service服務發布的"publish_moveImage"事件后,在SubscribeCallBack()回調中重新賦值imageIndexForPosition數組與pictureList數組,從而同步更新界面UI。
service發布公共事件
當Service服務接收到消息后,在onRemoteRequest()發布公共事件,代碼如下:
onRemoteRequest(code, data, reply, option) {
    if (code === 1) {
	// 從data中接收數據
	let arr = data.readIntArray();
	// 回復接收成功標識
	reply.writeInt(100);
	// 公共事件相關信息
	var params ={
	    imageIndexForPosition: arr
	}
	var options = {
            // 公共事件的初始代碼
	    code: 1,
            // 公共事件的初始數據
	    data: 'init data',、
            // 有序公共事件
	    isOrdered: true,
	    bundleName: 'com.huawei.cookbook',
	    parameters: params

        }
	// 發布公共事件回調
	function PublishCallBack() {
	}
	// 發布公共事件
	commonEvent.publish("publish_moveImage", options, PublishCallBack);

	} else {
	}
	return true;
 }
在接收到消息后,把接收到的圖片位置數組放入params中,然后發布名稱為"publish_moveImage"的有序公共事件。
審核編輯 黃宇
-
分布式
+關注
關注
1文章
950瀏覽量
74756 -
鴻蒙
+關注
關注
57文章
2410瀏覽量
43291 -
HarmonyOS
+關注
關注
79文章
1987瀏覽量
31075 -
OpenHarmony
+關注
關注
25文章
3768瀏覽量
17015
發布評論請先 登錄
相關推薦
HarmonyOS應用開發-分布式任務調度
HarmonyOS應用開發-分布式設計
HarmonyOS分布式數據庫,為啥這么牛?
HarmonyOS教程—基于跨設備遷移和分布式文件能力,實現郵件的跨設備編輯和附件的調用
HarmonyOS分布式應用框架深入解讀
HDC2021技術分論壇:如何高效完成HarmonyOS分布式應用測試?
如何高效完成HarmonyOS分布式應用測試?
通過HarmonyOS分布式能力實現任務的跨設備遷移設計資料分享
HarmonyOS應用開發-EducationSystem分布式親子早教系統體驗
HarmonyOS應用開發-分布式語音攝像頭體驗
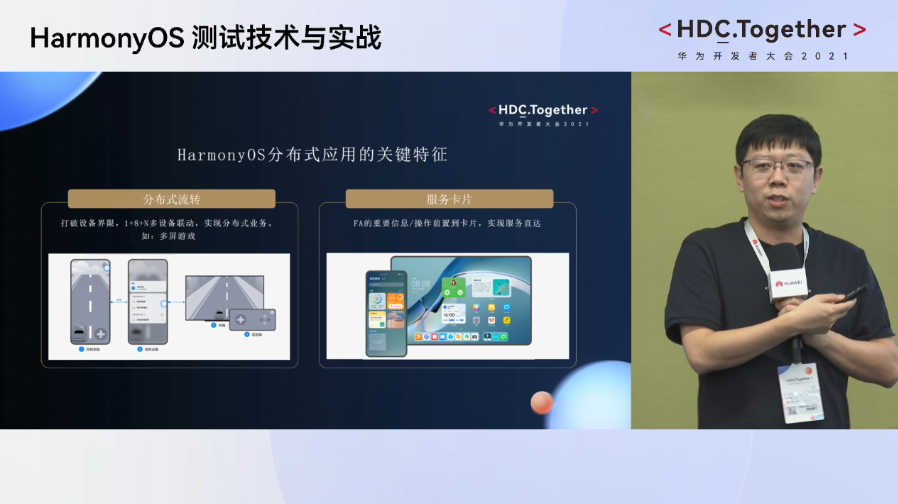
HarmonyOS測試技術與實戰-HarmonyOS分布式應用特征與挑戰
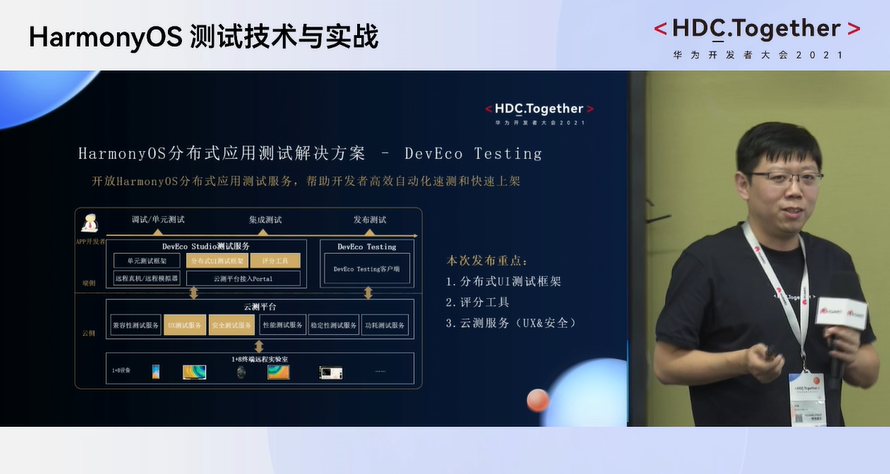
HarmonyOS測試技術與實戰-分布式應用測試解決方案
HarmonyOS分布式應用上架問題分析


 工商網監
工商網監
評論